119
Scope and Multimeter Operations Operations
Cursor 1, the top slider and arrows, is the left-hand cursor on the screen. Cursor 2, the lower set
of controls, is the right-hand cursor on the screen. Drag the slider or select the arrows to position
the cursors. Each tap of the stylus moves the cursor incrementally in the direction of the arrow.
Select Show to display the cursors (the icon changes to Hide).
Select Hide to conceal the cursors (the icon changes to Show).
Select Back to close the dialog box.
Refresh Controls
Selecting the Refresh icon from the Scope Multimeter Toolbar clears the minimum and maximum
digital values and updates the viewing screen.
File Controls
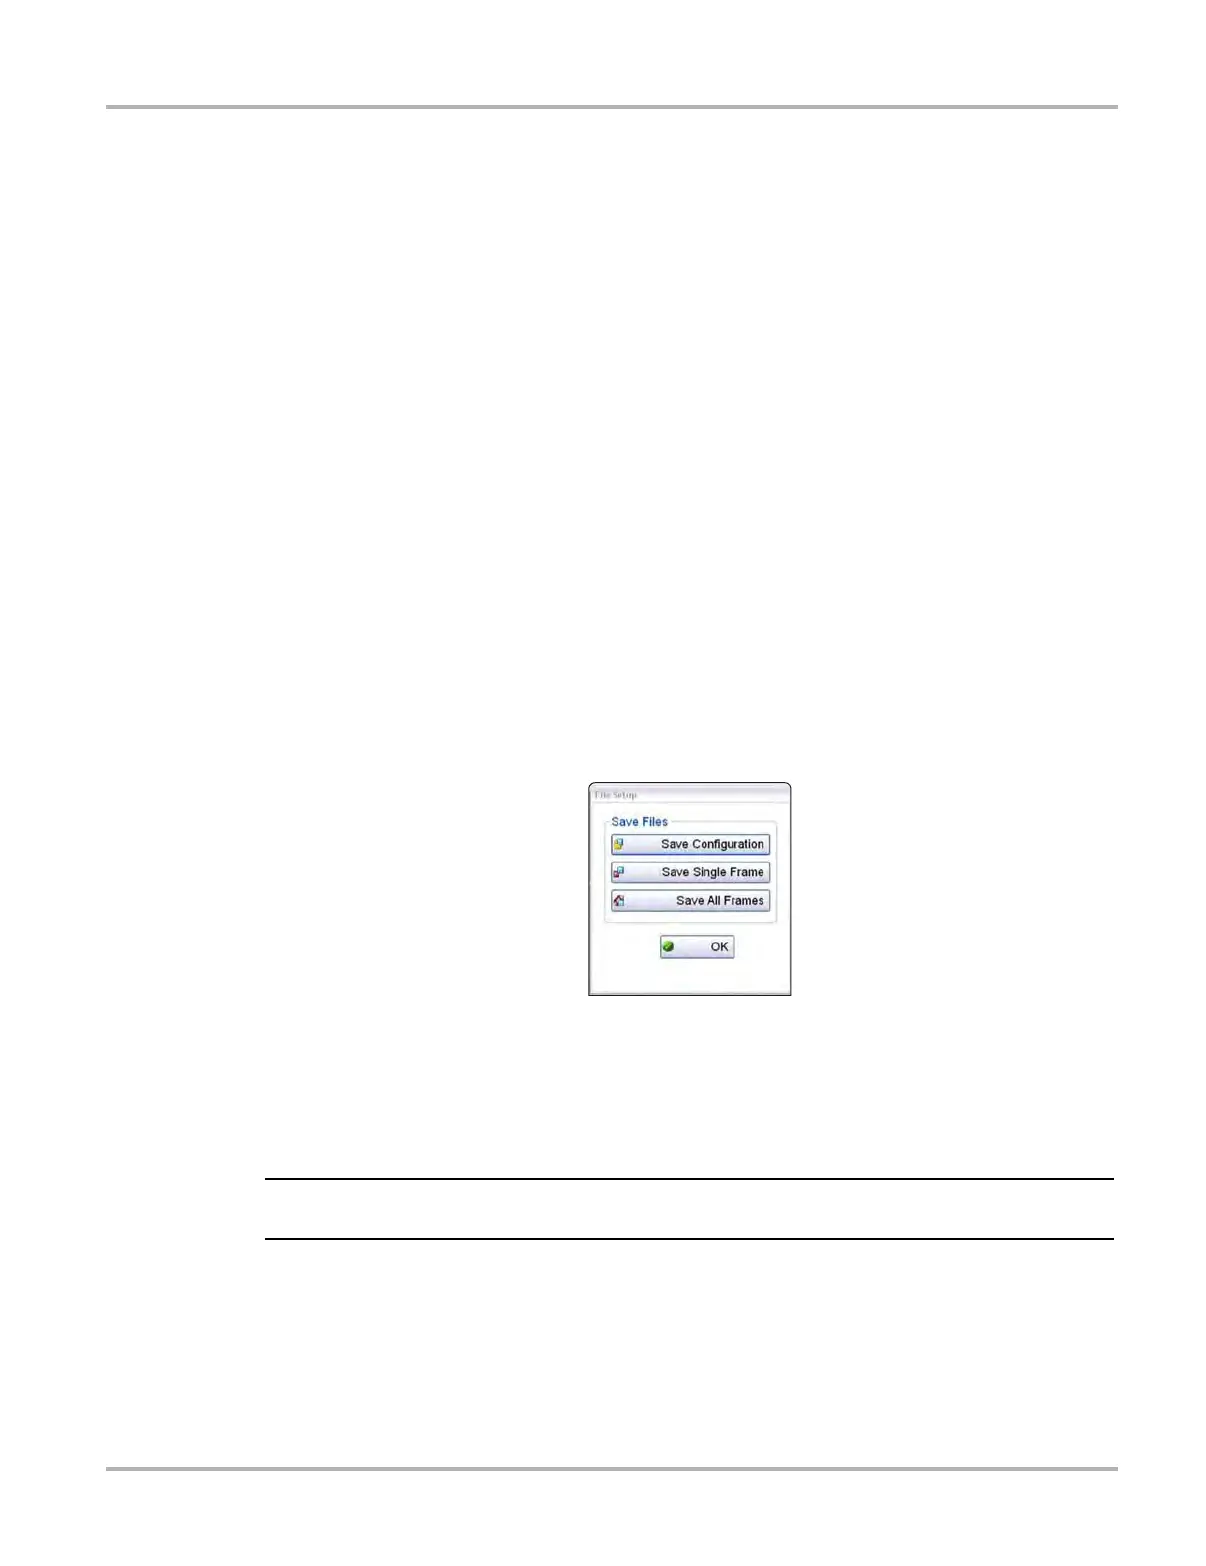
Selecting File from the toolbar opens a dialog box with a menu of save options:
• Save Configuration—saves the current setup values as a preset.
• Save Single Frame—saves the data currently on the screen only.
• Save All Frames—saves the current screen plus all the data stored in the buffer.
z To save a file or configuration:
1. Select File from the toolbar.
2. Select a save option from the dialog box.
Figure 8-32 Sample file setup dialog box
The Save As dialog box and the virtual keyboard open.
3. Use the keyboard to name the file to be saved, then either select the Save icon or select
return on the keyboard.
A configuration description dialog box opens.
i The description entered here is what displays in the information panel of the Data Manager.
4. Use the keyboard to enter a description of the file to be saved.
5. Select the OK icon or select return on the keyboard.
6. Select OK to close the file setup dialog box.
Once a configuration is saved, it becomes available as a preset. Files are saved to the Scope
Multimeter Data Folder and can be retrieved through the Data Manager.