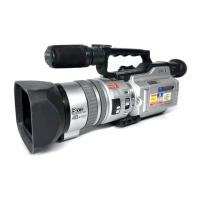
5-17
3. HALL Adjustment
For detecting the position of the lens iris, adjust AMP gain and
offset.
Subject Not required
Measurement Point Display data of page 1 (Note1)
Measuring Instrument Adjustment remote commander
Adjustment Page F
Adjustment Address 1E, 1F, 70
Specified Value 1 88 to 8C
Specified Value 2 15 to 19
Note1: Displayed data of page 1 of the adjustment remote commander.
1 : XX : XX
IRIS display data
Note2: Check that the data of page: 6, address: 02 is “00”. If not, to page:
6, address: 01, set data: 00, and press the PAUSE button.
Adjusting method:
Order Page
Address
Data Procedure
1 0 01 01 Set the data.
2 6 94 8A Set the data.
3 6 95 17 Set the data.
4 6 01 6D Set the data, and press PAUSE
button.
5 6 02 Check that the data changes to
“01”. (Note3)
6 6 01 00 Set the data, and press PAUSE
button.
Note3: The adjustment data will be automatically input to page: F, address:
1E, 1F, 70.
Checking method:
Order Page
Address
Data Procedure
1 6 04 03 Set the data.
2 6 01 01 Set the data, and press PAUSE
button.
3 1 Check that the IRIS display data
(Note1) satisfies the specified
value 1.
4 6 01 03 Set the data, and press PAUSE
button.
5 1 Check that the IRIS display data
(Note1) satisfies the specified
value.2.
Processing after Completing Adjustments:
Order Page
Address
Data Procedure
1 6 01 00 Set the data, and press PAUSE
button.
2 6 04 00 Set the data.
3 6 94 00 Set the data.
4 6 95 00 Set the data.
5 0 01 00 Set the data.
4. Offset Adjustment
Adjust so that the AGC OUT potential lies within the specified value
of the digital clamp.
Subject Not required
Measurement Point DDS display data of LCD or TV
monitor (Note1)
Measuring Instrument
Adjustment Page E
Adjustment Address 2D, 2E, 2F
Specified Value 70 to 90
Note 1: DDS display data of LCD or TV monitor.
CA 00 0000
CA 00 00XX
Object data
Adjusting method:
Order Page
Address
Data Procedure
1 0 01 01 Set the data.
2 D 11 02 Set the data, and press PAUSE
button.
3 6 01 05 Set the data, and press PAUSE
button.
4 E 0C 02 Set the data, and press PAUSE
button.
5 6 04 1F Set the data.
6 E 2D Change the data and adjust the
DDS display data (Note 1) to
“80”. (Rch offset adjustment)
7 E 2D Press PAUSE button.
8 6 04 20 Set the data.
9 E 2E Change the data and adjust the
DDS display data (Note 1) to
“80”. (Gch offset adjustment)
10 E 2E Press PAUSE button.
11 6 04 21 Set the data.
12 E 2F Change the data and adjust the
DDS display data (Note 1) to
“80”. (Bch offset adjustment)
13 E 2F Press PAUSE button.
Processing after Completing Adjustments
Order Page
Address
Data Procedure
1 D 11 00 Set the data, and press PAUSE
button.
2 E 0C 00 Set the data, and press PAUSE
button.
3 0 01 00 Set the data.
4 6 01 00 Set the data, and press PAUSE
button.
5 6 04 00 Set the data.
6 Turn off the power and turn on
again.