1-1. DSR-2000
Location and Function of Parts
Chapter 1 Overview
34
Chapter 1 Overview
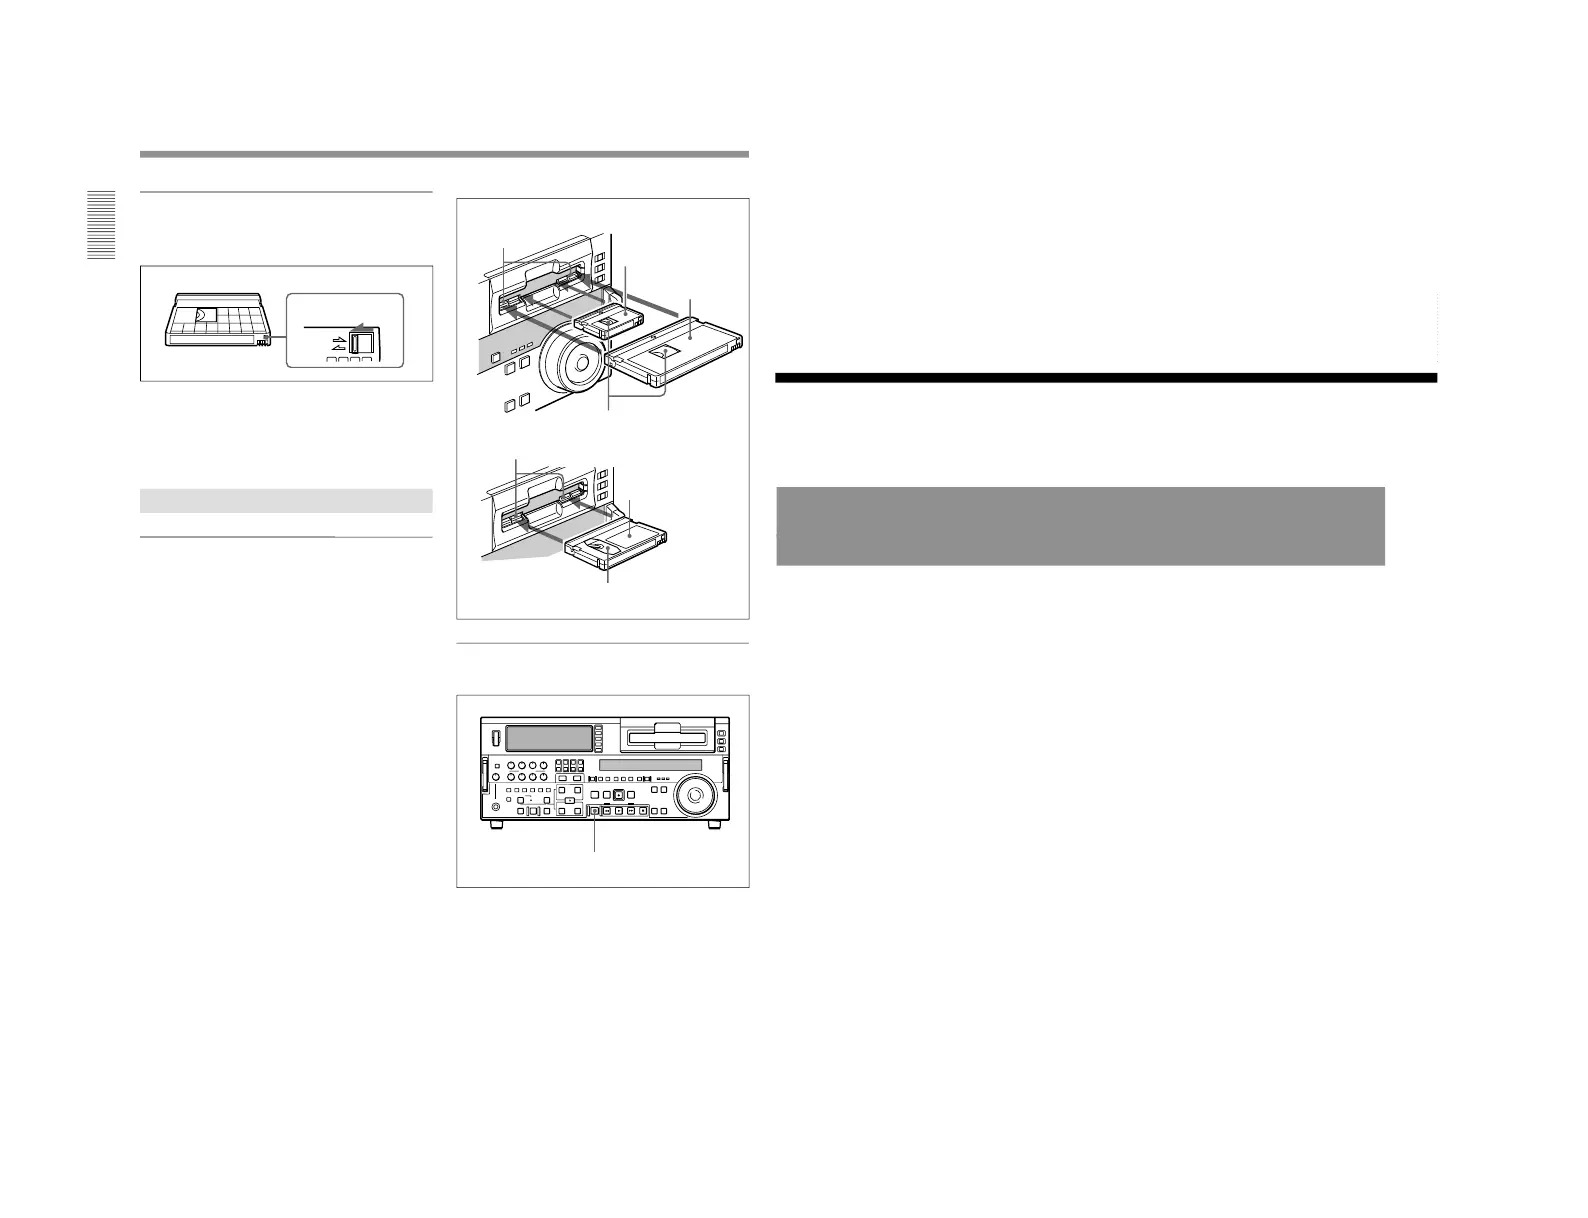
Preventing accidental erasure
Set the REC/SAVE switch on the cassette to SAVE to
prevent accidental erasure of recorded contents.
To enable re-recording
Set the cassette’s REC/SAVE switch to REC.
When this switch is set to SAVE, the unit cannot
record on the tape.
Inserting and Ejecting Cassettes
Inserting a cassette
This unit accepts three sizes of cassette: L (standard
size), M (medium size: DVCPRO) and S (mini size).
When inserting a cassette in the unit, make sure its
tape window faces upward as shown in the following
figure.
Set to SAVE
REC/SAVE switch
Ejecting a cassette
Press the EJECT button.
Outer guides
Mini size (Insert the cassette
into the middle of the cassette
compartment.)
Standard size
Tape window facing upward
Inner guides
Medium size (Align the
cassette with the outer
guides, then slide it in over
the inner guides.)
EJECT button
Tape window facing upward
Chapter 2 Setting/Displaying Time Data and Text Information
Chapter 2 Setting/Displaying Time Data and Text Information
35
Chapter
2
Setting/Displaying
Time Data and Text
Information
Displaying Time Data and Unit's Operating Status−
Superimposing Text Information
To display superimposed time data and text information about the
operating status of the unit on the monitor, set the CHARACTER switch
on the subsidiary control panel to ON.
When the CHARACTER switch is set to ON, the text information is
superimposed on the output of the VIDEO OUT 3 (SUPER) connector and
also of the SDI OUTPUT 3 (SUPER) connector.
To adjust the displayed text
You can adjust the position, size, and type of superimposed information
using setup menu items 002, 003, 009, and 011.
For details, see pages 108 and 109.