1-1. DSR-2000
Chapter 4 Editing
68
Chapter 4 Editing
Insert edit mode
In insert editing, you insert video, audio, and time code at desired positions
on an already recorded tape. You can insert all three types of data at the
same time or insert one of the types separately.
Note
Before you use an unrecorded tape in insert editing, a video signal, e.g. a
black signal, and time code must be recorded on all over the tape.
You can carry out DMC editing in both edit modes. In insert editing, split
editing is also possible.
To record a video signal and time code on an unrecorded tape
When recording a video signal and time code on an unrecorded tape to use
it as a recording tape in insert editing, you can use a test signal generated
by the internal signal generator of the unit. An example procedure follows.
1
Insert an unrecorded cassette in the unit and rewind it.
2
Using the VIDEO IN button in the input selection section (see page
14), select the video test signal (SG) as the input video signal.
3
Set switches on the subsidiary control panel (see page 25) as follow.
INT/EXT-PRESET/REGEN switch: INT−PRESET (right position)
FREE RUN/REC RUN switch: REC RUN
DF/NDF switch: Set as required.
4
Set an initial time code value (see page 39)
5
Carry out recording (see page 48).
Recording time code
For automatic editing, regardless of the settings of the INT/EXT−
PRESET/REGEN switch, time code is recorded continuously from the
previous time code recorded on the tape.
Using extended menu item 610, it is also possible to record time code according to
the settings on the control panels.
Automatic Editing
Chapter 4 Editing
Chapter 4 Editing
69
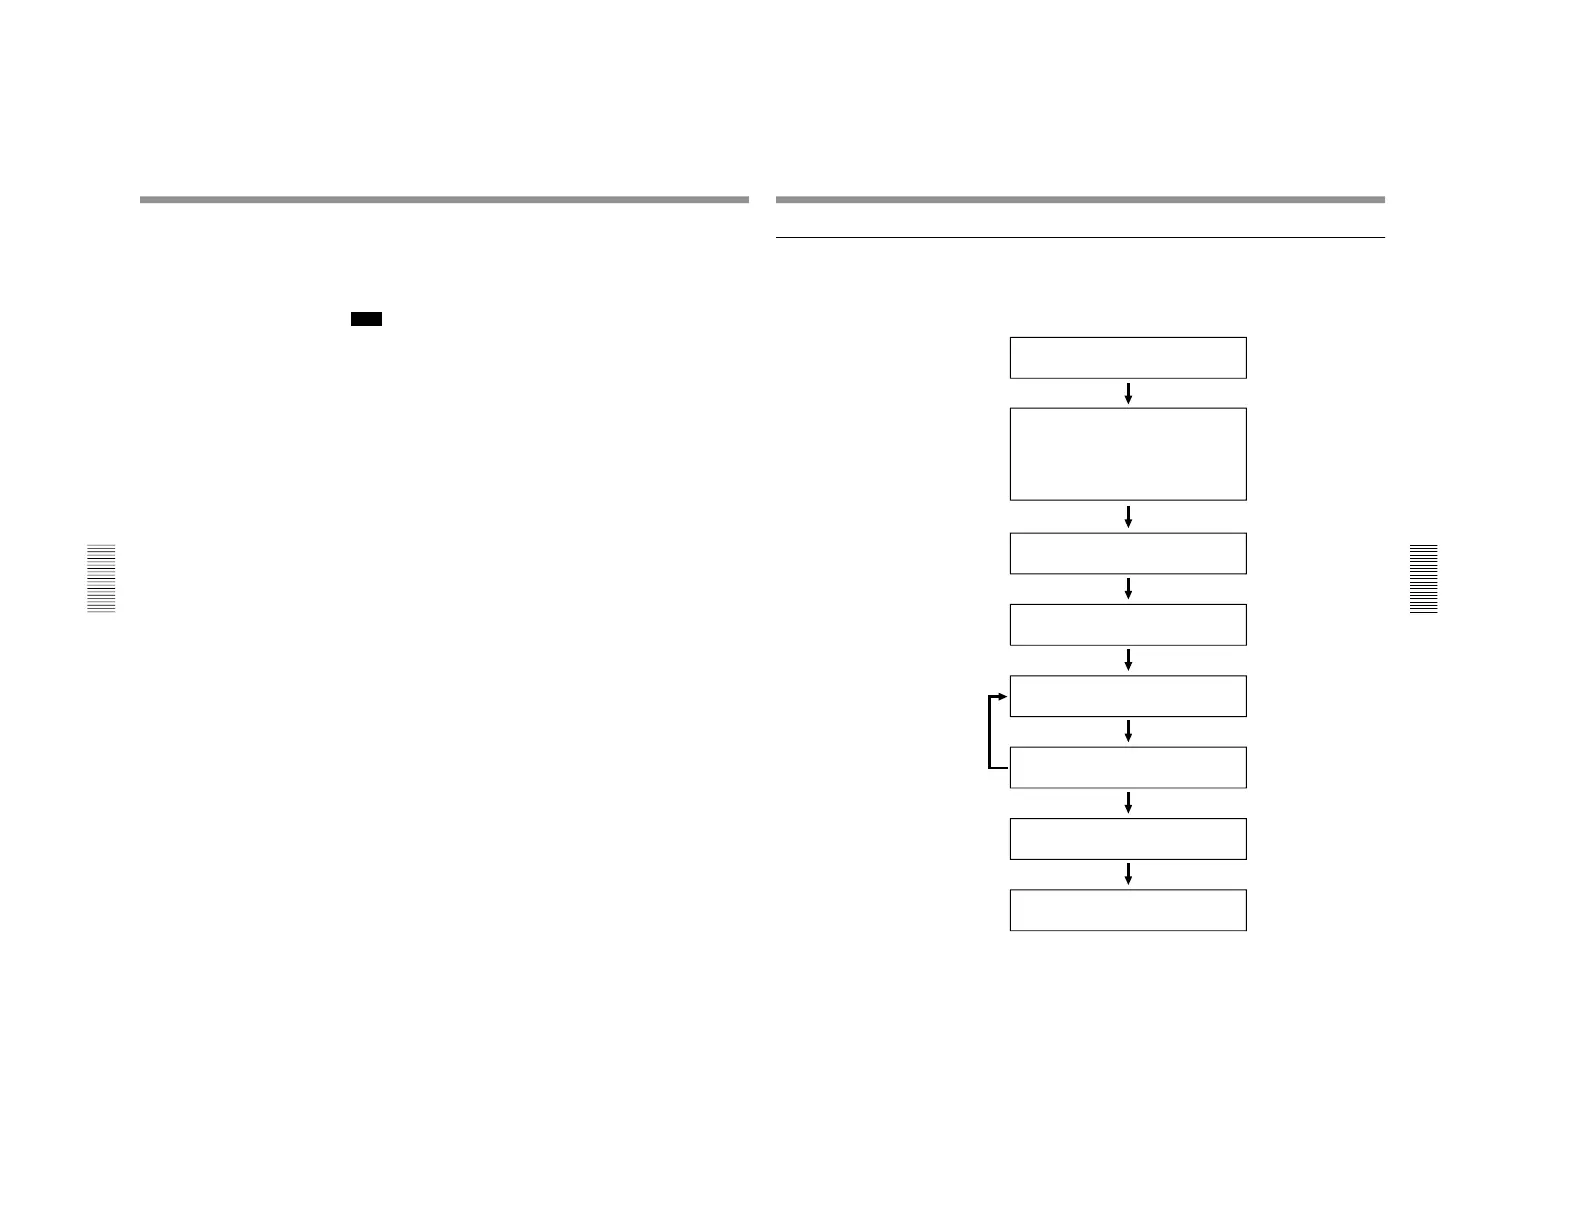
Sequence of editing operations
The following flowchart outlines the sequence of operations in automatic
editing with two DSR-2000/2000P units.
Sequence of Operation
See
Making necessary settings
Insert cassettes.
• Insert a cassette for recording the results of
editing in the recorder.
• Insert the cassette on which material to be edited
has been recorded in the player.
Select an edit mode.
Determine edit points.
Preview the editing results.
Modify edit points as necessary.
Execute automatic editing.
Review the editing results as necessary.
“Button/Switch Settings for
Editing” (page 70)
“Usable Cassettes
” (page
33)
“Selecting an Edit Mode
”
(page 71)
“Setting Edit Points
” (page
72)
“Checking Editing Results
—
Preview” (page 80)
“Modifying Edit Points
”
(page 76
)
“Executing Automatic
Editing” (page 81)
“Reviewing the editing
results” (page 83)