1-1. DSR-2000
Chapter 4 Editing
70
Chapter 4 Editing
Notes on video output to the monitor
In E-E mode, the video output of the unit is delayed by the time for video
circuit processing with respect to the input video signal (8H).
Unlike the playback operations described in Chapter 3, for playback to be
carried out in edit mode with both the player and recorder specified, you
can use extended menu item 701 to delay the V-SYNC phase by 8H.
Button/Switch Settings for Editing
Before beginning editing, set buttons and switches on the recorder and
player as follows.
For details of the settings of each of the buttons/switches, see the pages indicated
in parenthesis.
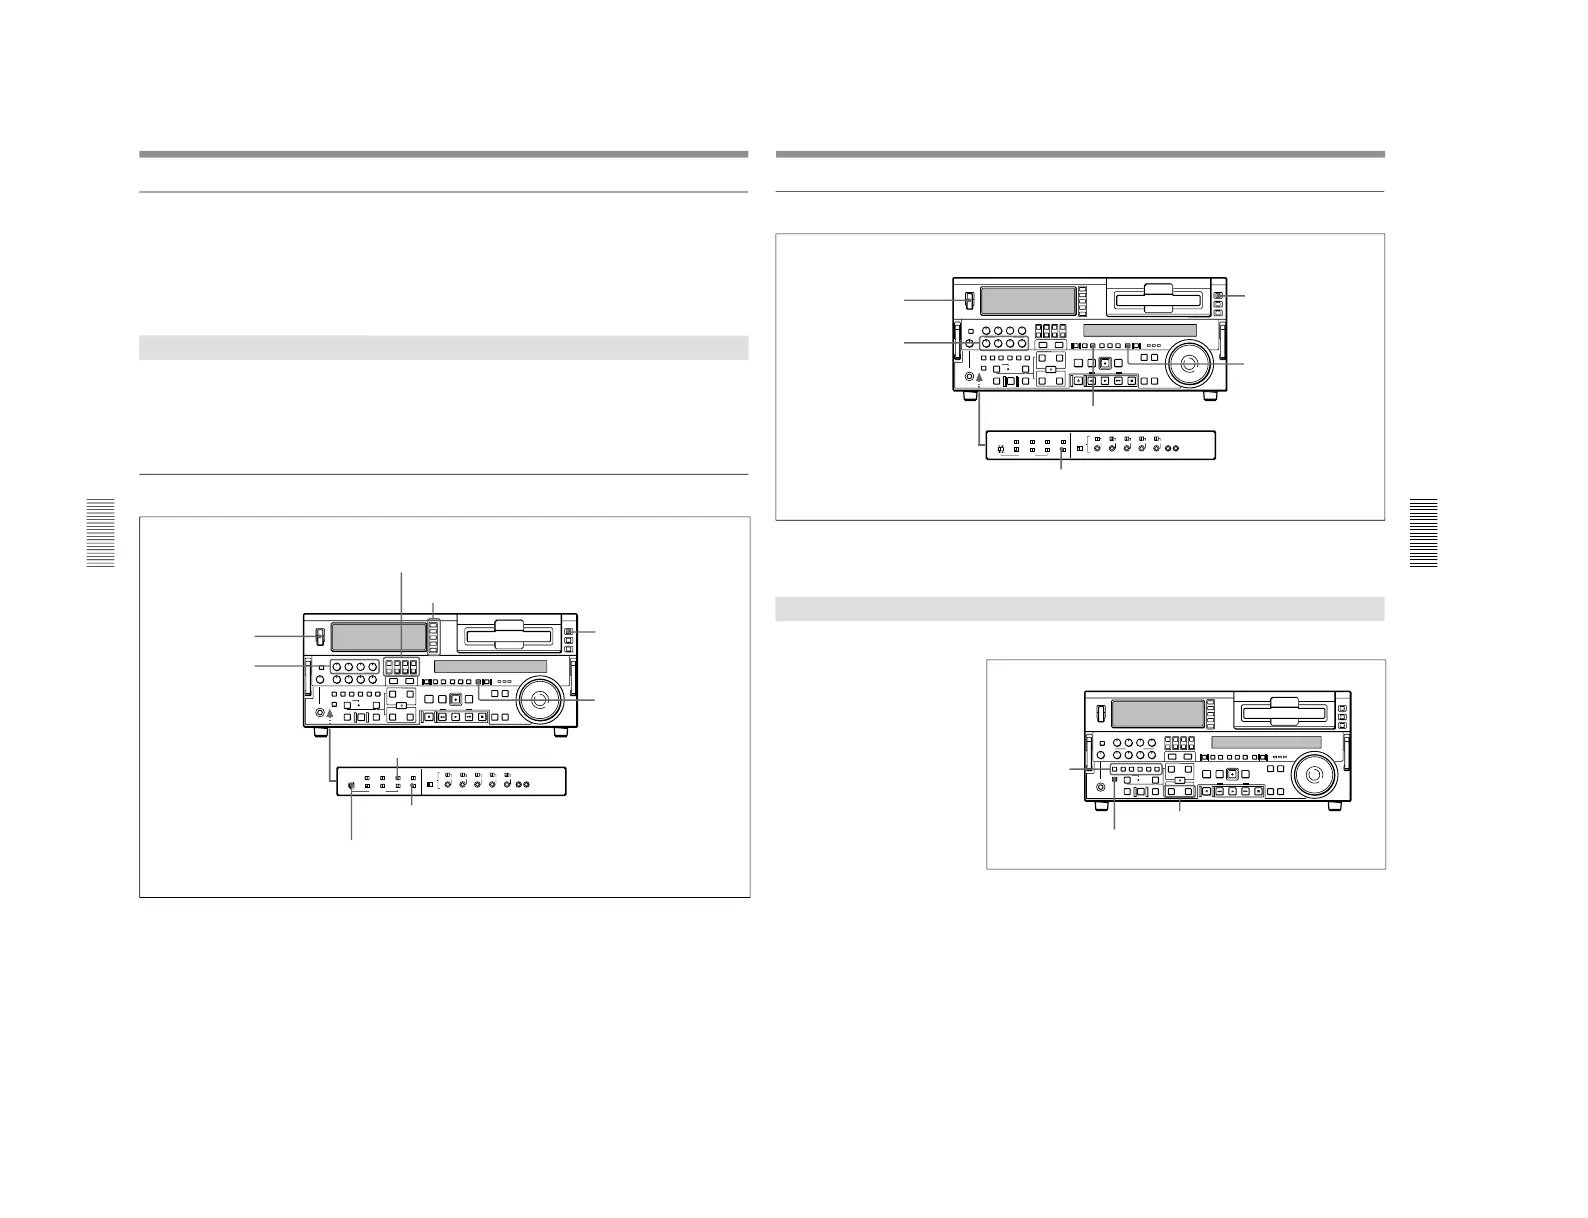
Recorder settings
MONITOR SELECT buttons
(page 17)
: select the audio channels to be monitored.
POWER switch: I side
REC controls
(page 16)
:
adjust the audio recording
levels.
Input selection section
(page 14)
: select the input video and
audio signals.
REMOTE button
(page 15)
:
unlit 9PIN (when using
REMOTE-IN/-OUT) or i.LINK
(when using i.LINK) button: lit
COUNTER SEL button
(page
18)
: select the data to be
displayed (counter value or
time code value)
REC INHIBIT switch
(page 26)
: OFF
TC SELECT switch
(page 26)
: TC or VITC, when displaying time code
INT/EXT–PRESET/REGEN switch
(page 26)
: select the time code to be recorded.
Automatic Editing
Chapter 4 Editing
Chapter 4 Editing
71
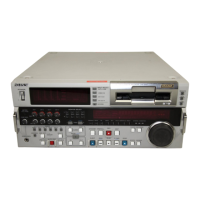
Player settings
(In the subsequent description, except where the player is explicitly
mentioned, operations are all on the recorder.)
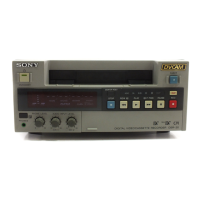
Selecting an Edit mode
Select either assemble mode or insert mode.
Depending on the desired edit mode, press the following button or buttons.
•For assemble editing: ASSEMBLE button
•For insert editing: the desired INSERT buttons (VIDEO, CH-1 to CH-4,
TC)
When you select an edit mode, the IN and OUT buttons begin to flash,
indicating that the edit points require setting.
POWER switch: I side
PB controls
(page 17)
:
adjust the audio playback
levels.
REMOTE button
(page 15)
: lit
9PIN (when using REMOTE-
IN/-OUT) or i.LINK (when
using i.LINK) button: lit
COUNTER SEL button
(page
18):
select the data to be
displayed (counter value or
time code value)
PB button
(page 18)
: lit
TC SELECT switch
(page 26)
: TC or VITC, when displaying time code
INSERT buttons
ASSEMBLE button
IN button and OUT button