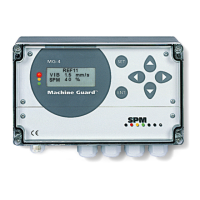
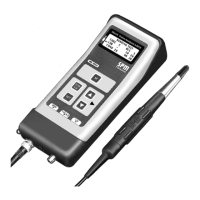
Measuring point data for ISO 2372
The only measuring point data that should
beeditedare‘Direction’and‘Class’(1).Press
SHIFT+F3toopen‘Measuringpointdata’.For
both, the alternatives are selected from lists
aftermarkingthelineandpressingF1‘Edit’.
The selected measuring direction appears as
measuring point name in the measurement
window (2). The selected machine class
effects the evaluation of the measuring result
(3). Readings in the yellow and red zone are
indicated with an alarm flag and a flashing red
dot (4) before the value.
‘Portable’ on the transducer line (5) means that
the default transducer for vibration measure-
ments is active. Set up of default transducers
isdescribedinChapterApage13.
To temporarily use another transducer, press
SHIFT+F3toopen‘Measuringpointdata’and
mark‘Transducer’onthelist.PressF1‘Edit’
and select ‘Remote’.
The transducer data become editable after
you switch ‘Transducer’ from ‘Portable’ to
‘Remote’. Provided you know the transducer’s
frequency range, sensitivity and its upper and
lower bias range, you can input the data here.
This temporarily transducer data will be lost
when closing the measuring technique but will
be saved in the measuring result file.
To measure, connect the transducer and press
theM/Skey.Savethemeasurementwith
M/S.Ifyoudonotacceptthereading,press
SHIFT+M/Stocollectanewreadingwithout
saving the previous.
To see or delete measurement(s) before sav-
ing,pressF1togototheresultwindow.
PressSHIFT+F1toseethealarmlist.Press
SHIFT+F2tosetadefaultcommentorvoice
recordingtotheresult(seeChapterB,Com-
ments).PressF2togotographics(seeChap-
ter B, Graphics).
To save the result as a file, press MENU and
select ‘Save as’. Select ‘Save a file’ and input a
name via the keyboard window. Press ENTER
to save.
1
5
2
3
2
4