Maintenance Waukesha Cherry-Burrell
®
Brand Universal 3 Pump
Page 66 95-03103 11/2018
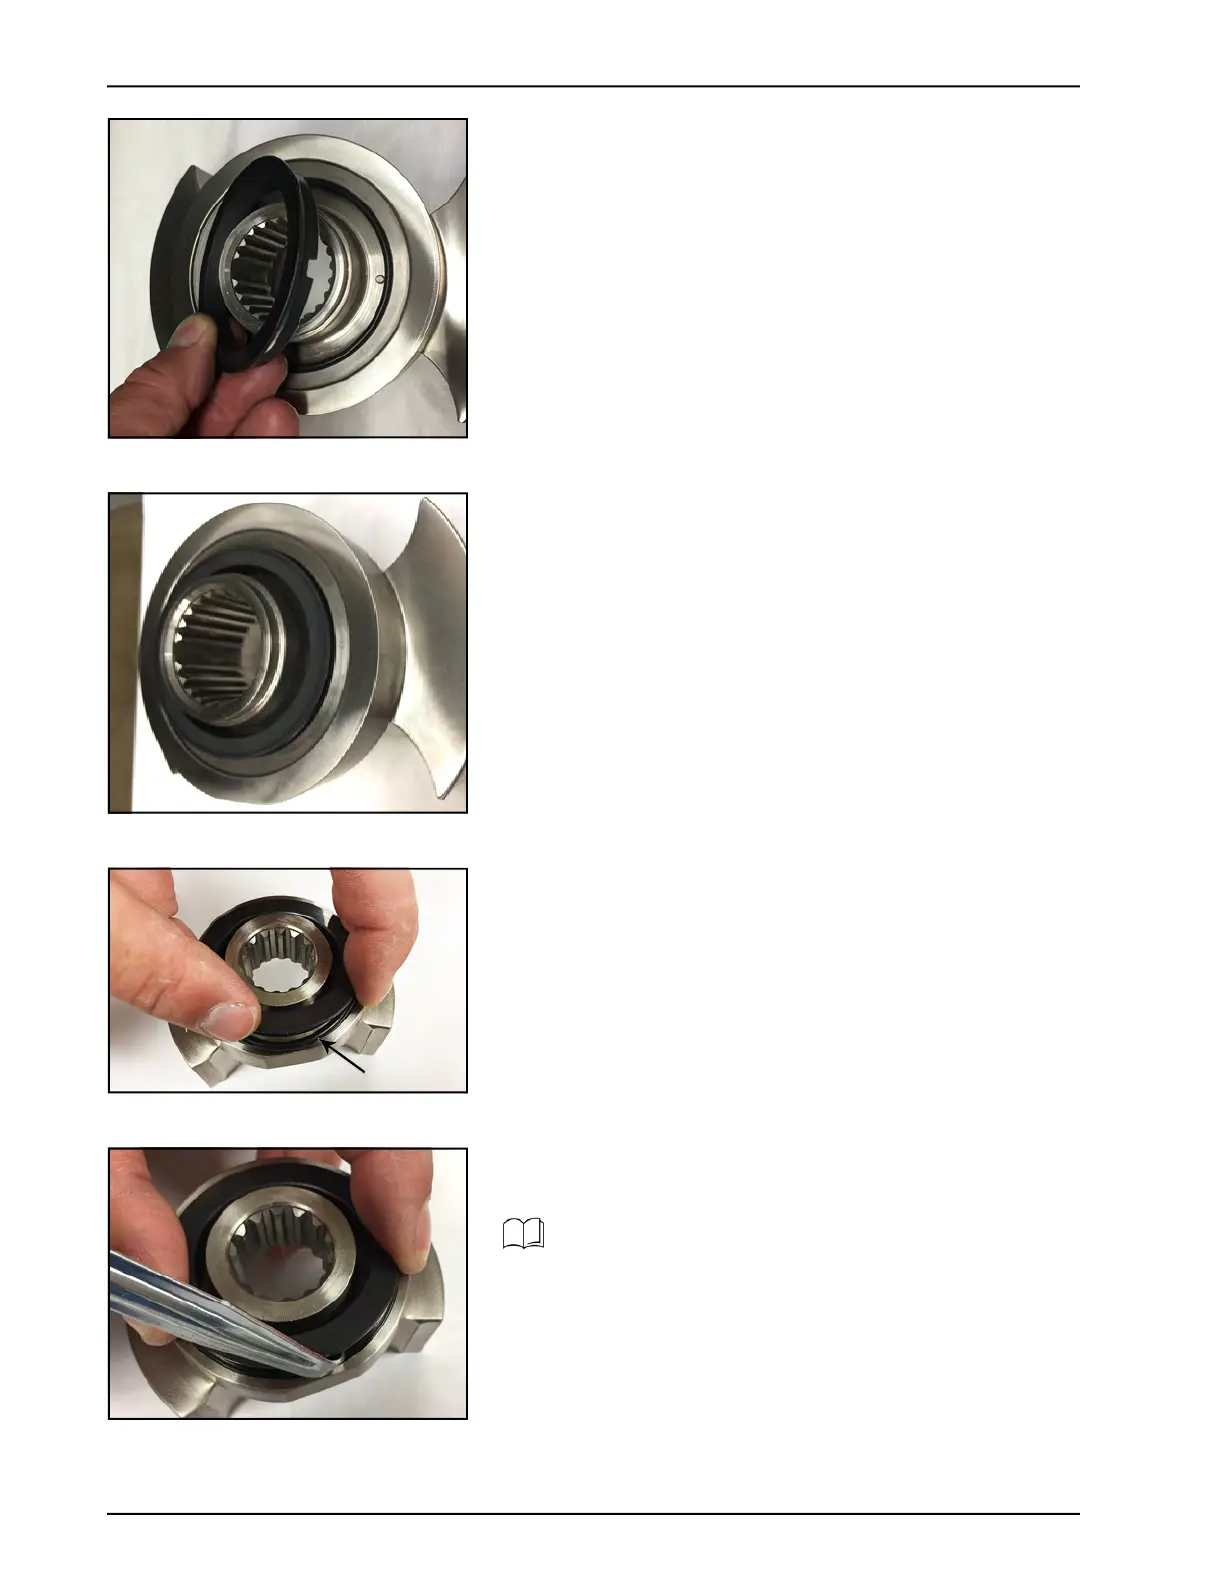
8. Install the rotary seal into the rotor. Align the notches in the
seal to the drive pins on the rotor.
9. After installing the rotary seal, it should fit solidly in the rotor
as shown in Figure 141.
10. Make sure the seal O-ring is not pinched.
11. If the O-ring is pinched as shown in Figure 142, push in the
O-ring with the O-ring removal tool while inserting the seal.
(For part number, see “O-ring Removal Tools” on page 131.)
Figure 140 - Install rotary seal
Figure 141 - Rotary seal installed
Figure 142 - Seal O-ring pinched
Figure 143 - Push in O-ring
Skip to “Install Rotors” on page 76.