vii
764333-766
LIST OF FIGURES
Figure Description Page
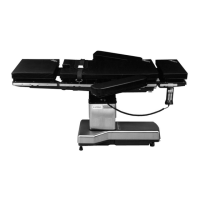
Figure 4-1. INTELLIPOWER Panel LED Display (Typical) ................................................................................... 4-5
Figure 4-2. Install/Remove Battery Fuse (Typical)................................................................................................ 4-7
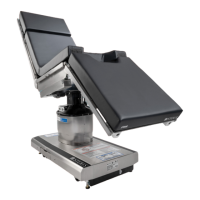
Figure 6-1. Table Sensor Calibration .................................................................................................................... 6-2
Figure 6-2. Table Sensor Calibration .................................................................................................................... 6-4
Figure 6-3. Lower Lift Column............................................................................................................................... 6-5
Figure 6-4. Center Inner Column .......................................................................................................................... 6-5
Figure 6-5. Note Direction of Lash ........................................................................................................................ 6-6
Figure 6-6. Articulation Adjustment Screws .......................................................................................................... 6-7
Figure 7-1. Table Column Top Cover Screws....................................................................................................... 7-2
Figure 7-2. Table Column Bottom Cover Screws.................................................................................................. 7-3
Figure 7-3. Base Cover Insert Screws .................................................................................................................. 7-3
Figure 7-4. Apply Tape to Mounting Bracket ........................................................................................................ 7-3
Figure 7-5. Ensure Base Cover Sits Flush on Base at Insert Opening ................................................................. 7-4
Figure 7-6. Seal Mating Areas Between Front and Rear Base Covers.................................................................7-4
Figure 7-7. Apply RTV to V-Shaped Cut-Outs ...................................................................................................... 7-4
Figure 7-8. Seal Cover Around Power Inlet .......................................................................................................... 7-4
Figure 7-9. Seal Around Upper Plastic Covers and Column................................................................................. 7-4
Figure 7-10. Seal Along Both Seams of Upper Plastic Column Covers................................................................7-4
Figure 7-11. Install Base Cover Insert and Attach to Base Cover......................................................................... 7-5
Figure 7-12. Seal Seam Between Base Cover Insert and Base Cover................................................................. 7-5
Figure 7-13. Replace Batteries ............................................................................................................................. 7-5
Figure 7-14. Replace Power Supply ..................................................................................................................... 7-6
Figure 7-15. Replace Floor Lock Cylinder ............................................................................................................ 7-6
Figure 7-16. Adjust Floor Lock.............................................................................................................................. 7-6
Figure 7-17. Replace Caster Assembly ................................................................................................................ 7-7
Figure 7-18. Replace Floor Lock Manifold ............................................................................................................ 7-7
Figure 7-19. Replace Hydraulic Pump .................................................................................................................. 7-8
Figure 7-20. Unplug Auxiliary Hand Control ......................................................................................................... 7-8
Figure 7-21. Table Column Plastic Cap ................................................................................................................ 7-9
Figure 7-22. Reconnect Tilt Cylinder Shaft ........................................................................................................... 7-9
Figure 7-23. Height Sensor Replacement............................................................................................................. 7-9
Figure 7-24. Replacing CPU Board .................................................................................................................... 7-10
Figure 7-25. Tilt Cylinder Replacement .............................................................................................................. 7-10
Figure 7-26. Trendelenburg Cylinder Replacement ............................................................................................ 7-11
Figure 7-27. Properly Secure Tabletop............................................................................................................... 7-11
Figure 7-28. Disconnect Hydraulic Lines From Main Valve Block ...................................................................... 7-12
Figure 7-29. Remove Tabletop Seat Section...................................................................................................... 7-12
Figure 7-30. Remove Tabletop Kidney Section .................................................................................................. 7-12