Stonex R20 – User Manual 17
4.3. Setting / Leveling up and Centring
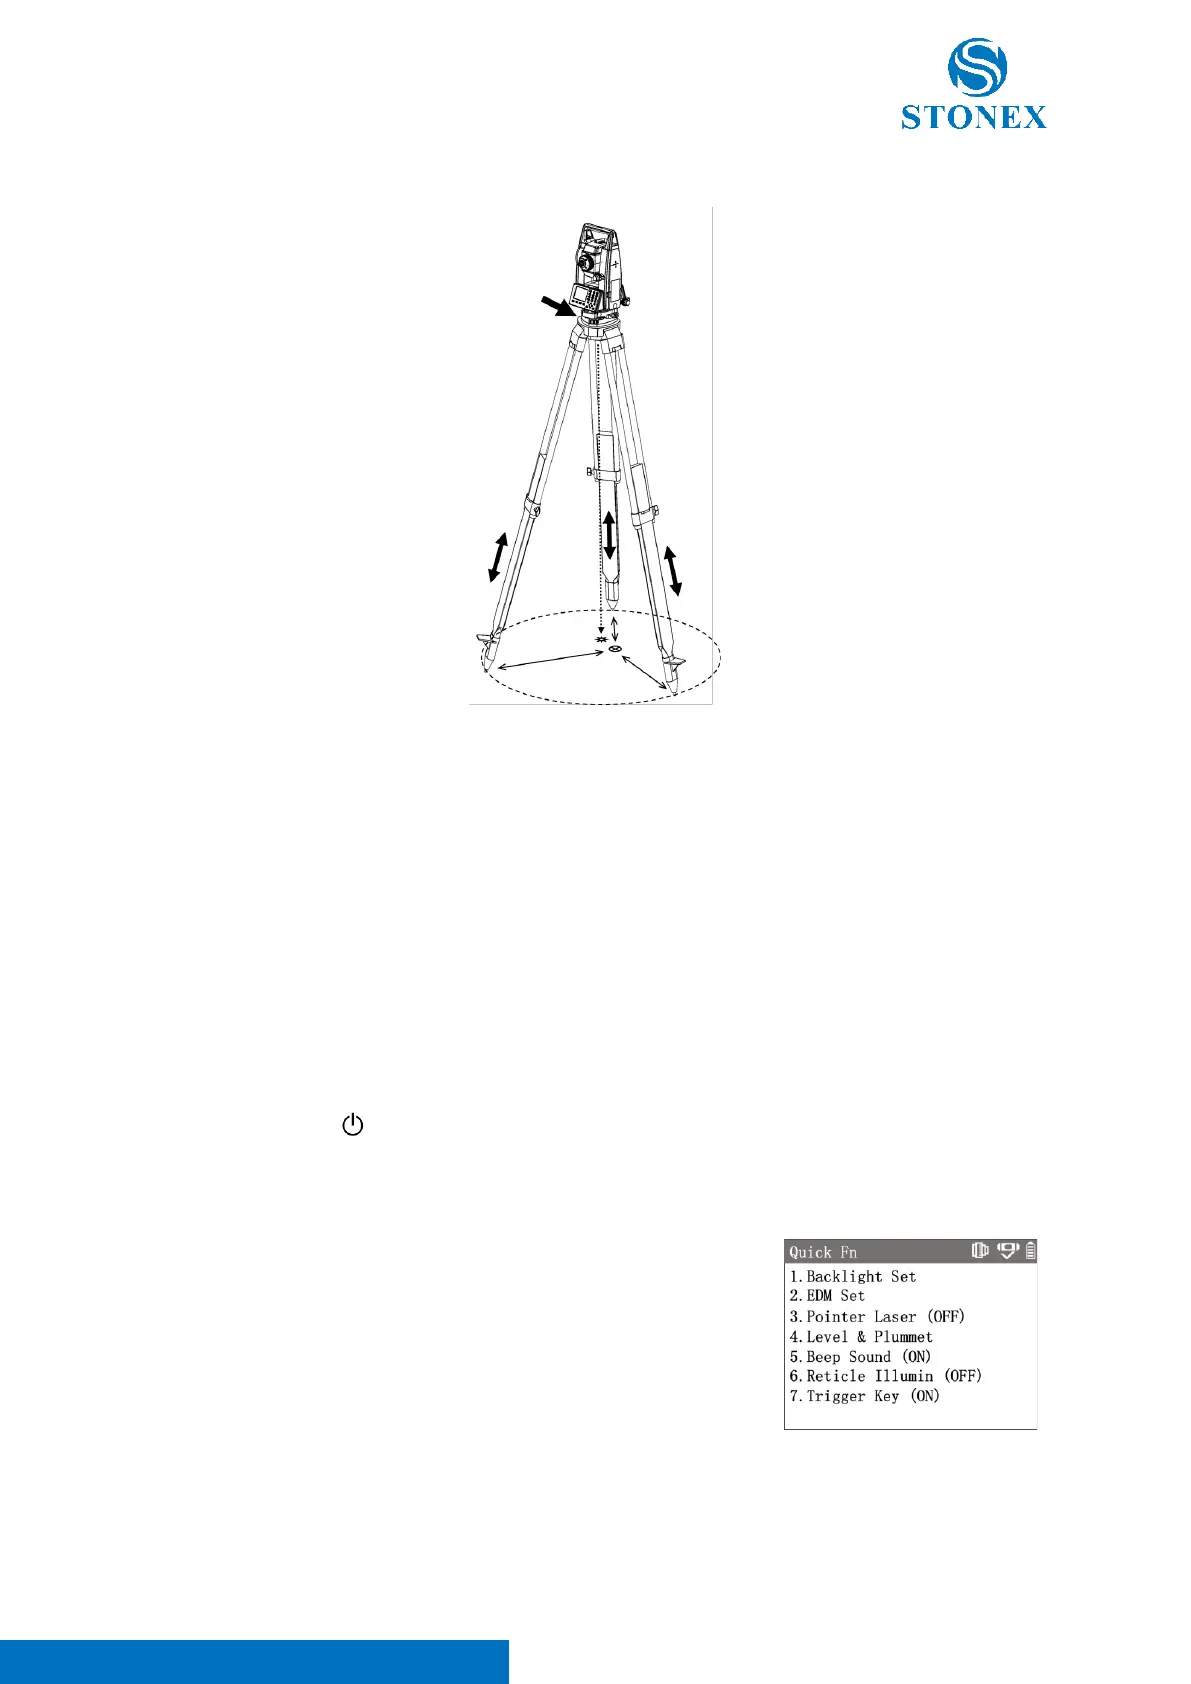
Setting up the Tripod and Instrument
1. Adjust the tripod's three legs to nearly equal lengths that meet the height requirements for comfortable
measurement.
2. Position the tripod over the station point. The three toes are firmly supported on the ground as
equidistantly as possible, the center of the circle formed by the toes is close to the station point, and the
tripod plate is nearly horizontal.
3. Take out the instrument and make sure that the instrument and its tribrach are firmly connected. Place
the instrument onto the top plate of the tripod, fix the instrument with one hand, align the central knob
of the tripod with the center hole of the tribrach with the other hand and tighten it.
4. Gently push the tribrach to make sure it is securely attached to the tripod plate.
Leveling up and Centring
1. Press and hold [ ] to power on the instrument. If tilt compensator is on, the laser plummet will
automatically light up and project a red spot on the ground and {Level & Plummet} will automatically
appear.
If the interface of {Level & Plummet} does not appear automatically, press
[★] in the general measurement interface to enter {Quick Fn} menu, then
press [4]〈Level & Plummet〉enter {Level & Plummet}.
Press [-] in the measurement interface also provides quick access to {Level
& Plummet}.
The electronic circular level diagram on the left indicates the current leveling
state, while the dot at the bullseye indicates leveling.