Stonex R20 – User Manual 15
4. Preparation & Setting up
4.1. Battery and Charger
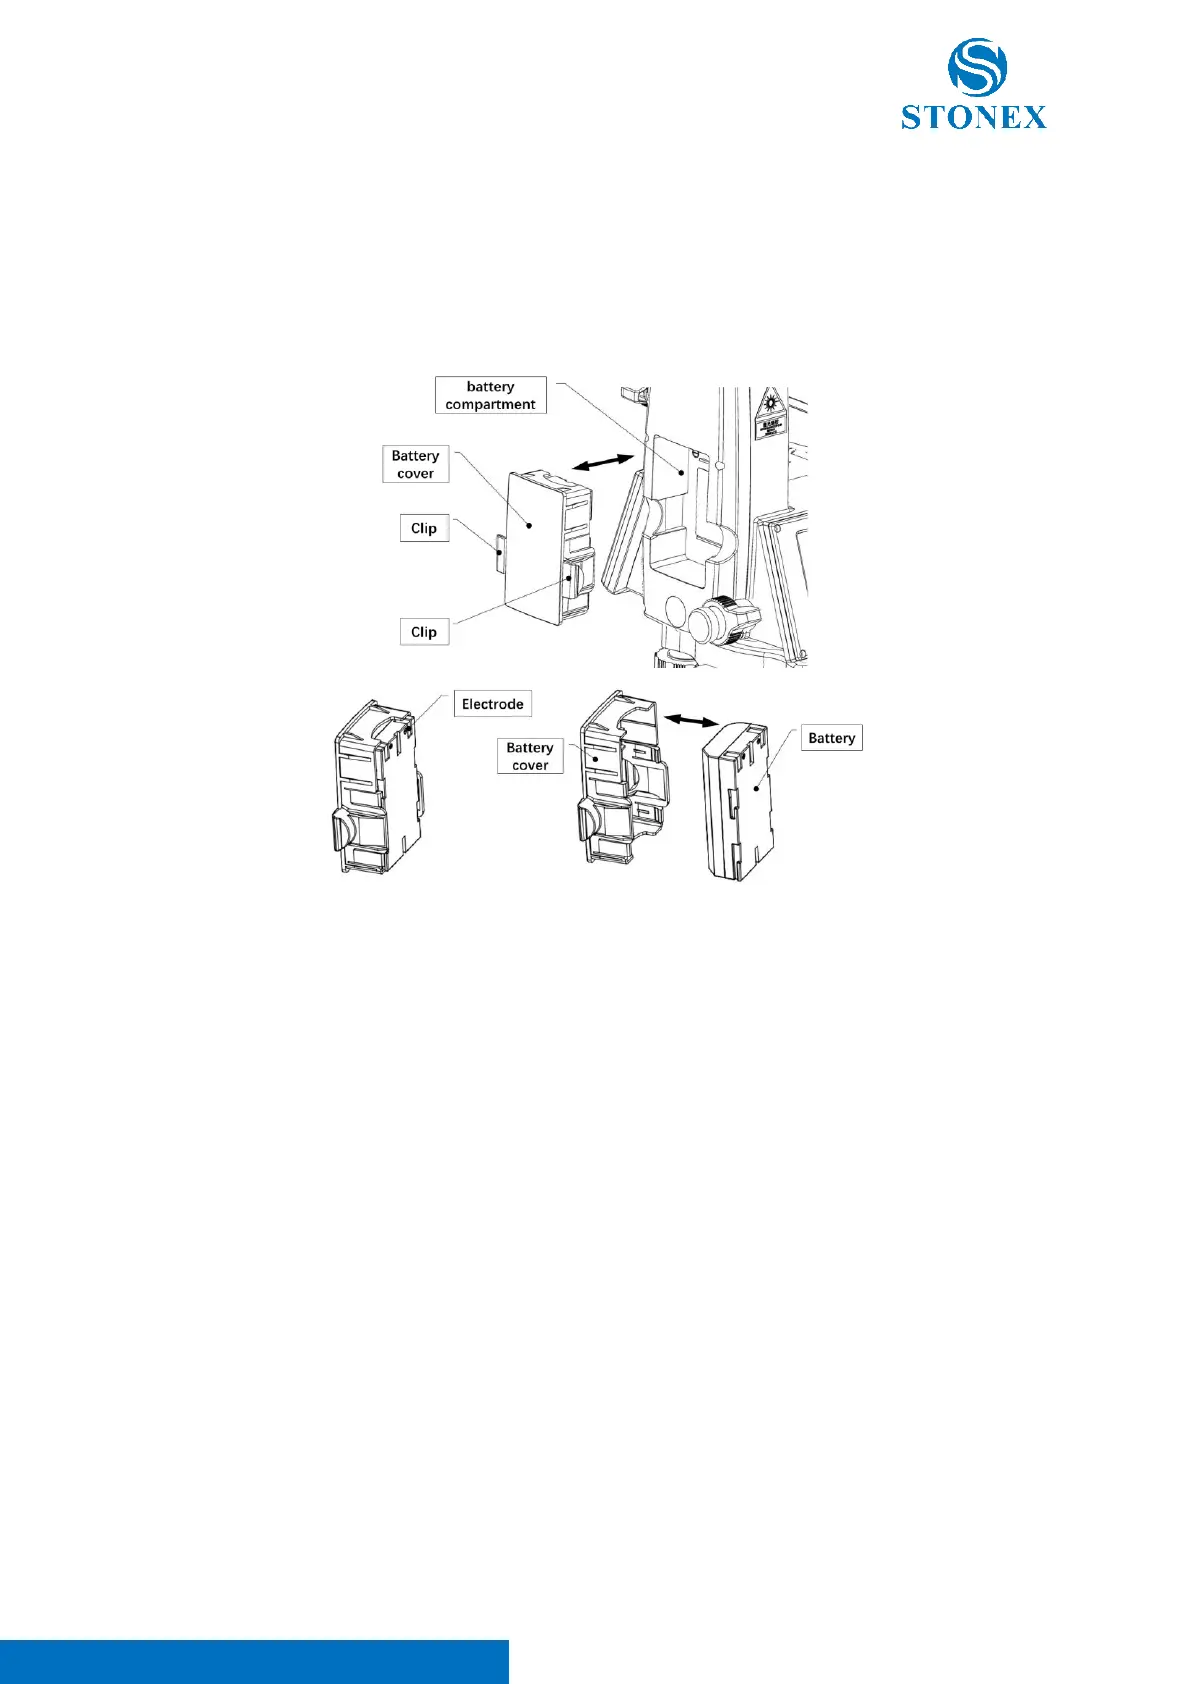
Installing / Replacing Battery
1. With the power off, pinch the clips on either side of the battery cover inward with your thumb and
forefinger to unlock it, then gently pull the battery cover outward.
2. Remove the battery from the battery cover.
3. Make sure the battery electrodes are facing outwards and the electrodes are on top and place the new
battery into the battery cover. You will hear a clicking sound when the battery is fully inserted.,。
4. Make sure that the battery is facing inward, and the electrodes are on top, gently push the battery cover
inside the battery compartment of the side cover, and hear a click sound to indicate that the placement is
in place, at this time the battery cover should be flush with the side cover.
NOTE: There is a product labels in the battery compartment. The label contains important information such as the
model number and the serial number of the instrument. When contacting a service center or authorized service
center when repair or calibration services are required, customer service may require you to provide the instrument's
serial number information.
Please use the charger and battery from STONEX. Store, use and charge at the specified temperature conditions,
taking care to avoid contact with liquids.