Stonex R20 – User Manual 43
P
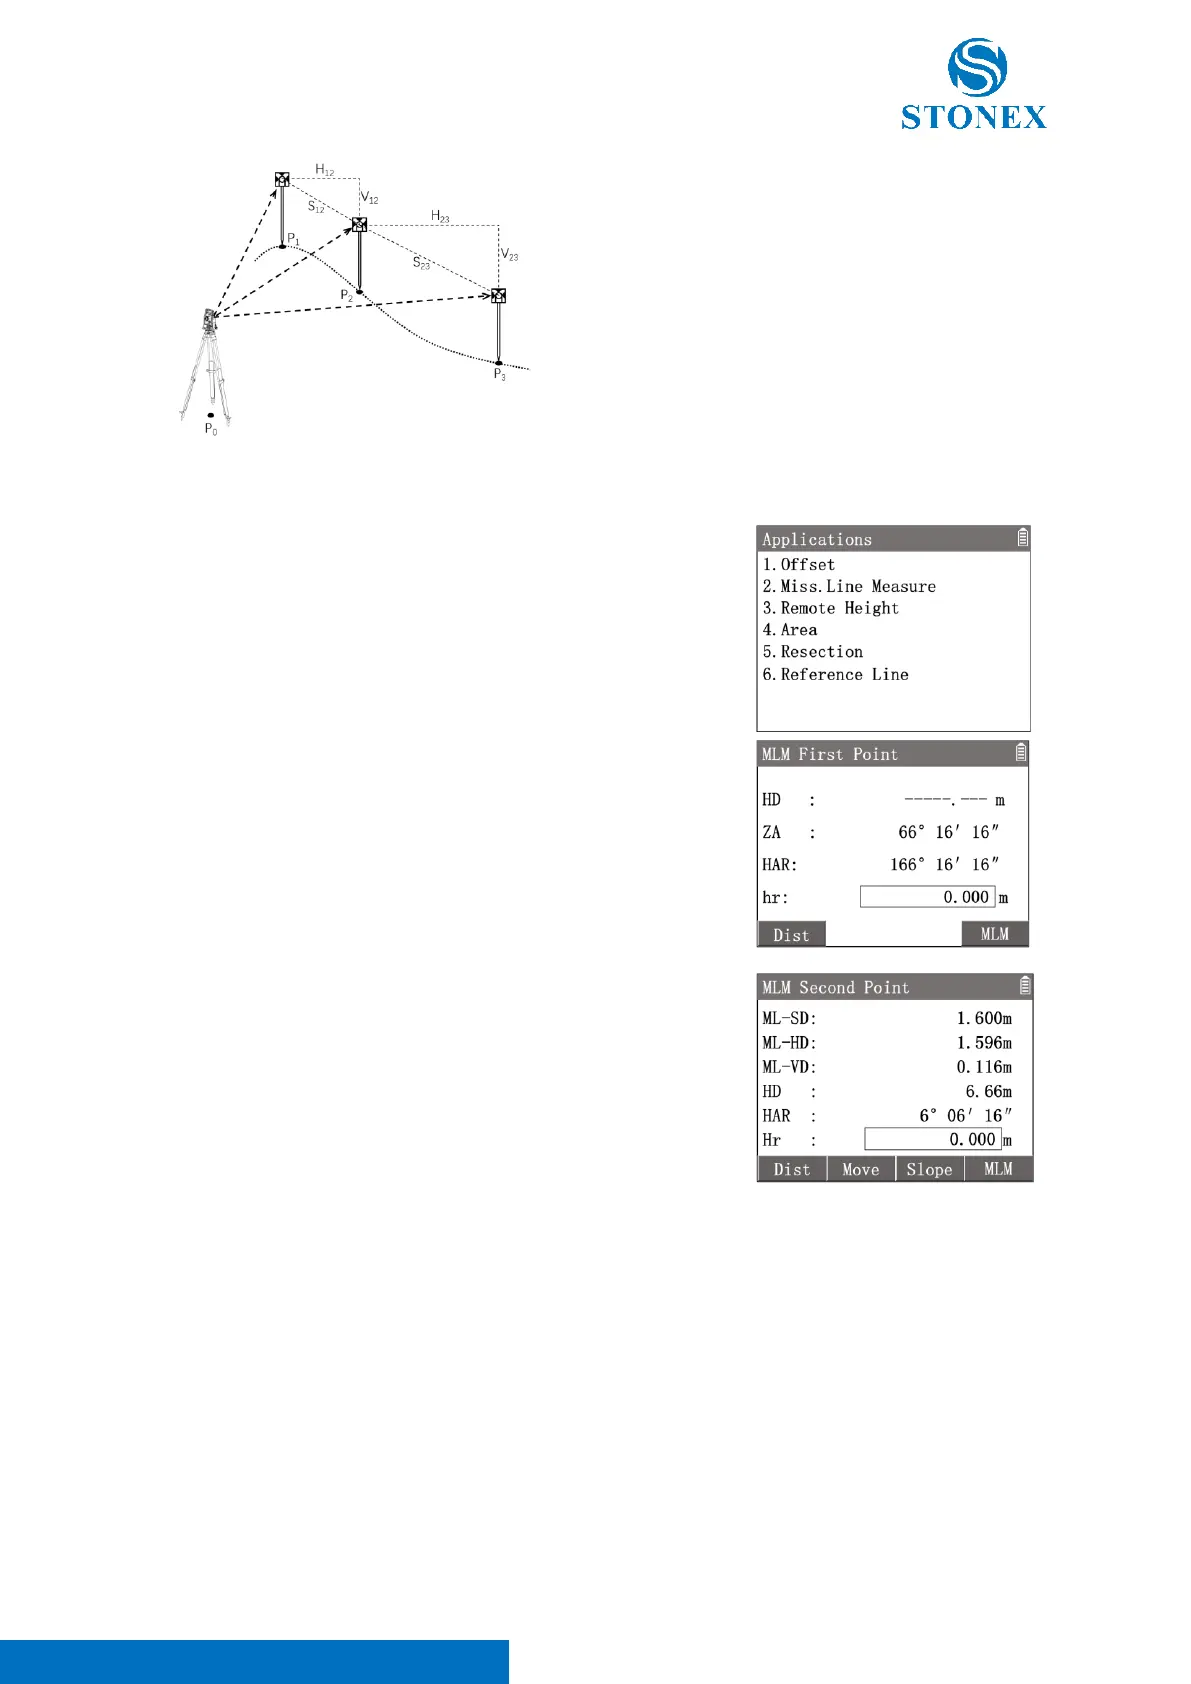
0
: Station
P
1
: First point 1# (Start point)
P
2
: Second point 2# (New start point)
P
3
: Third point 3# (New second point)
S
12
: SD between 1# and 2#
H
12
: HD between 1# and 2#
V
12
: VD between 1# and 2#
S
23
: SD between 2# and 3#
H
23
: HD between 2# and 3#
V
23
: VD between 2# and 3#
1. In the measurement interface, press [M] to enter {Main Menu}.
2. Use the navigation keys to select 〈3.Apps〉and press [ENT], or
simply press the numeric key [3] to enter {Applications}.
3. Press [2] 〈2.Miss. Line Measure〉to enter {MLM First Point}.
4. Aim at the first point (start point) and press [F1]【Dist】to trigger
the distance measurement.
5. Aim at the second point and press [F4]【MLM】to trigger the
distance measurement and enter {MLM Second Point}.
6. Workspace display the calculated distance between the two points
and the data of the second point.
〈ML-SD〉: SD between the two points.
〈ML-HD〉: HD between the two points.
〈ML-VD〉: VD between the two points.
〈HD〉: HD between the second point and station.
〈HAR〉: HAR of the second point.
〈hr〉: Input the prism height.
[F1]【Dist】: Measure a new start point.
[F2]【Move】: Set the second point as new start point.
[F3]【SD/Slope】: Switch the display modes between SD and slope.
[F4]【MLM】: Re-measure the second point or aim then measure the new
second point (remain the same first point).