page 3–7
Jack Replacement (Without Compression Spring)
Required Tools:
3/8” Wrench 1/2” Socket 1/2” Wrench
Needle–Nosed Pliers
Replacement Procedure:
1. Apply stretcher brakes. Raise litter to full up. Raise Fowler to full up and raise siderails.
2. Use a 3/8” wrench to remove the bolt in the litter support tube above black bellows on both ends.
3. With the assistance of another person, lift off the stretcher litter and set it aside, taking care not to damage
the siderails, etc.
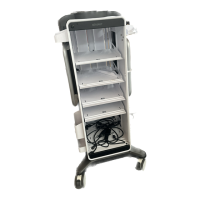
4. Push down on the jack actuator to put the jack in the full down position.
5. Lift off the plastic base hood, separating the Velcro holding it to the base frame.
6. Using a 1/2” socket and 1/2” wrench, remove the four bolts, washers and nuts holding the jack support
straps to the base frame.
7. Using needle–nosed pliers, remove the two cotter keys on the pump link and remove the pump link.
8. Using a 1/2” socket and a 1/2” wrench, remove the four bolts holding the jack base to the base frame (using
a 3” extension may be required). Remove the jack from the base frame.
9. Reverse steps 6–8 to install the replacement jack. Reinstall the base hood and the stretcher litter.
Jack Replacement (With Compression Spring)
Required Tools:
3/8” Wrench Needle–Nosed Pliers Straight Screwdriver
Spring Compression Tool (Part Number 1210–1–3)
Replacement Procedure:
1. Apply stretcher brakes. Raise litter to full up. Raise Fowler to full up and raise siderails.
2. Use a 3/8” wrench to remove the bolt in the litter support tube above black bellows on both ends.
3. With the assistance of another person, lift off the stretcher litter and set it aside, taking care not to damage
the siderails, etc.
4. Push down on the jack actuator to put the jack in the full down position.
5. Lift off the plastic base hood, separating the Velcro holding it to the base frame.
6. Using needle–nosed pliers, pull cotter pin from pump cylinder.
7. Using a straight screwdriver and pump spring compression tool (available upon request), compress the
pump spring and pry the pump link out of the pump cylinder.
CAUTION
Be sure not to let the pump piston come out of the jack or damage to the unit may occur.
8. Remove and replace jack as described in the procedure above.
9. Replace pump spring and pump link using the straight screwdriver and the pump compression tool.
10. Reinstall the base hood and the stretcher litter.