POWER TRIM AND TILT 8-5
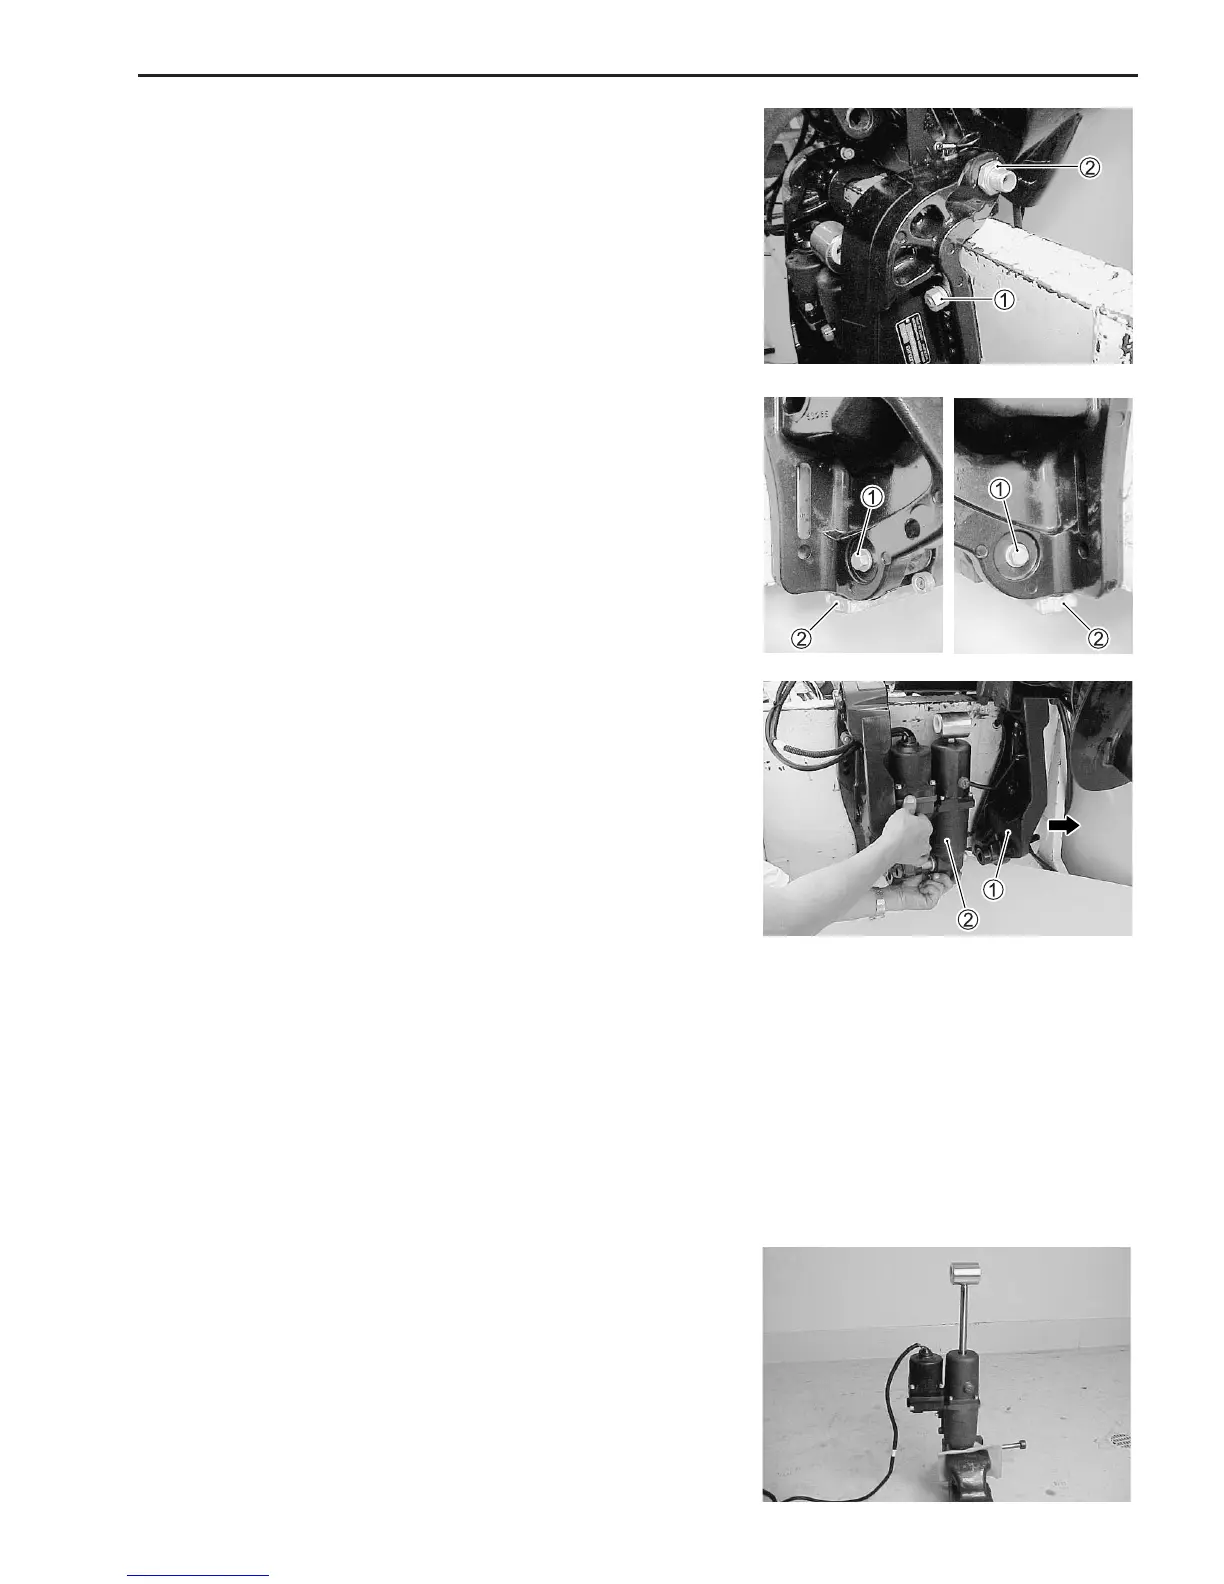
7. Remove the starboard motor mounting bolts 1 and the clamp
bracket shaft nut 2.
8. Remove the PTT cylinder lower shaft bolts 1.
9. Remove the two bolts and the anode 2.
10. Slide the starboard clamp bracket 1 off the clamp bracket
shaft, then remove the PTT unit 2.
DISASSEMBLY
NOTE:
Before disassembly, wash the PTT body with a stiff bristle brush
and hot, soapy water to remove sand or dirt and dry the PTT
body with compressed air.
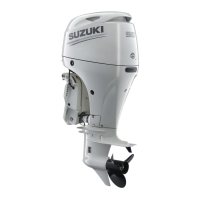
1. Place the lower mounting eye of the PTT cylinder in a vise.
Tighten the vise only enough to secure the PTT unit, do not
over tighten.
NOTE:
To prevent damage to the PTT cylinder use wood blocks, vise jaw
protectors, etc., between the vise jaws and the PTT components
before tightening the vise.
2. Connect the PTT motor cable leads (Green, Blue) to the bat-
tery and operate the PTT motor until the tilt piston rod is at a
maximum stroke. (full-tilt up position)