141
NOTE:
Special care must be used when installing
belt tensioner and timing belt. Be sure to
refer to SECTION 3 of this manual.
Torque each bolt and nut to specification.
5) Install crankshaft pulley and pump drive belt.
6)Adjust intake and exhaust valve lashes. (For adjust-
ment and related data, refer to SECTION 3 of this
manual.
7) Adjust alternator belt tension. (Refer to SECTION 10
of this manual).
8) connect negative Θ cable at battery.
9) Fill cooling system
Thermostat
1) When positioning thermostat on intake manifold, be
sure to bring its air bleed valve to front side of engine.
2) Install new gasket and thermostat cap to intake man-
ifold
3) Fill cooling system.
Radiator
Install or connect radiator by reversing removal proce-
dure, noting the following.
1) Tighten bolts securely for proper installation.
2) Install radiator shroud and cooling fan.
3) Tighten shroud bolts and fan nut.
4) Connect radiator inlet and outlet hoses and fix joints
of 2 hoses with clamps.
5) Adjust alternator belt tension.
6) Fill with specified amount of coolant.
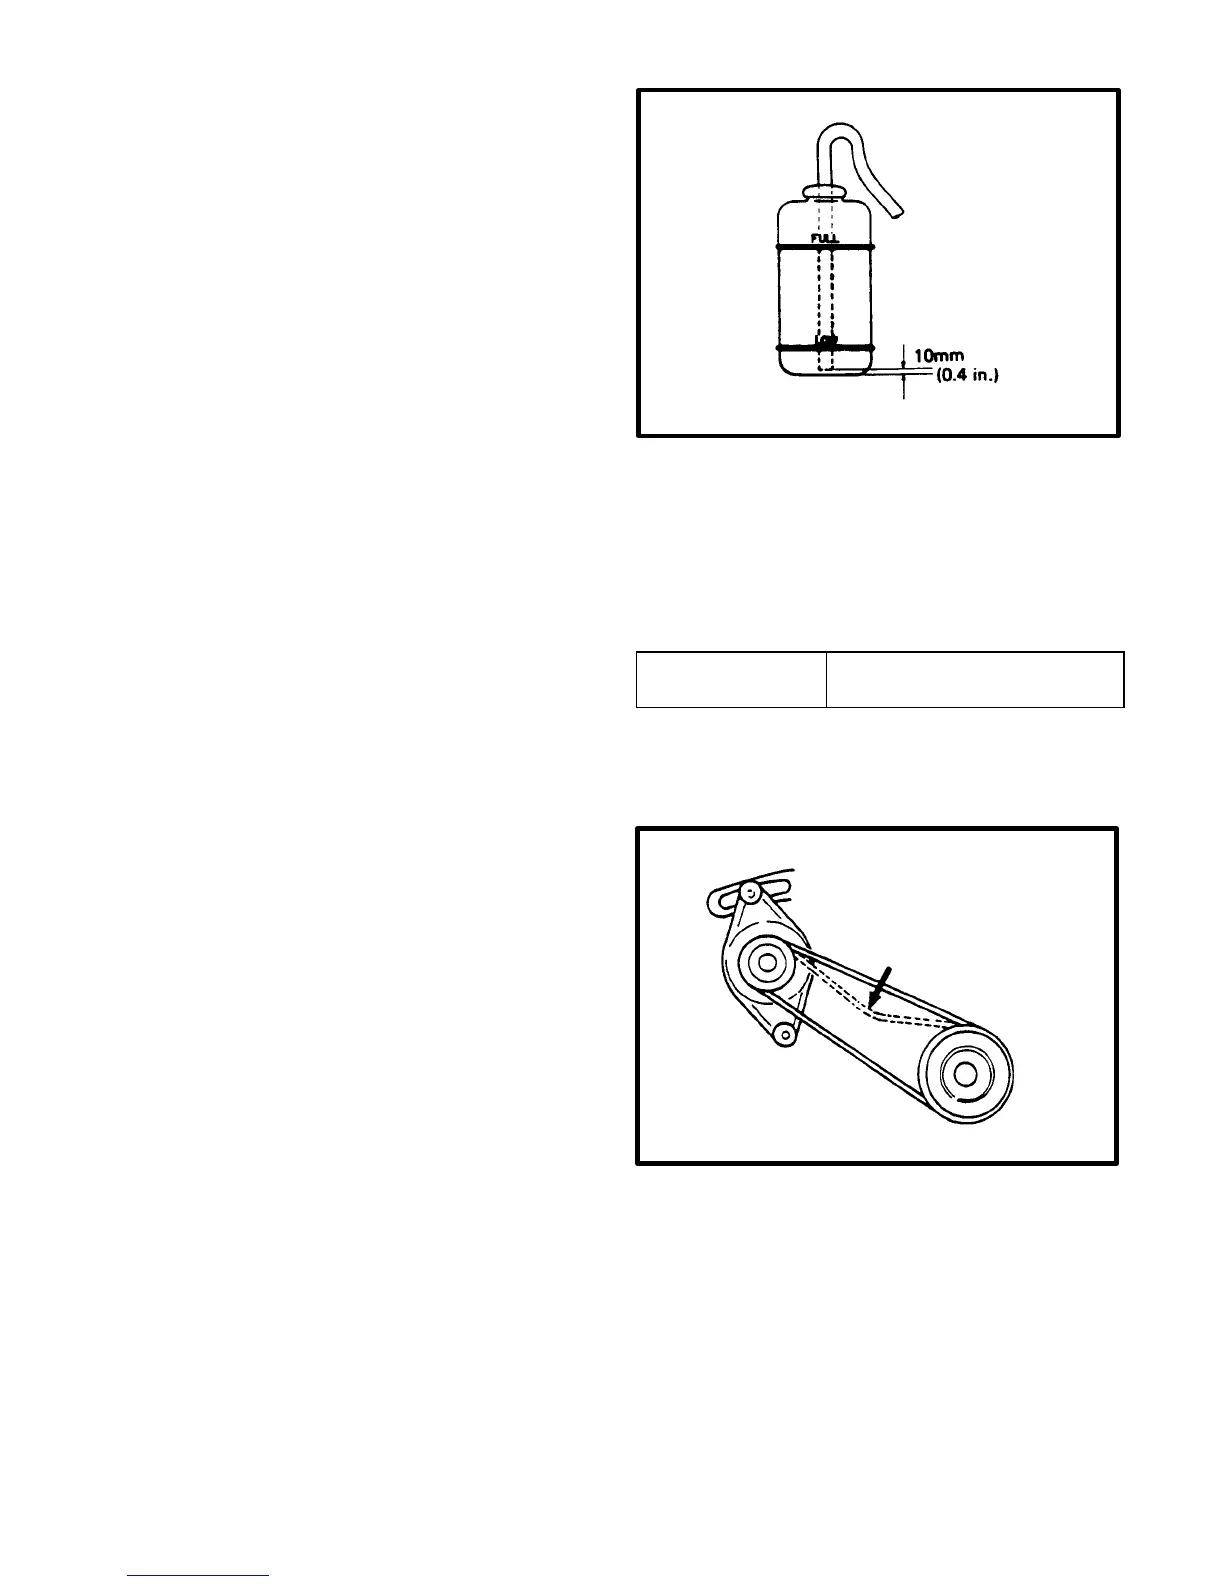
NOTE:
Check to ensure that there is a clearance of 10 mm
(0.40 in.) between the end of the rubber hose in the
reservoir and the bottom of the reservoir.
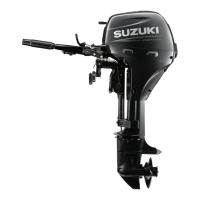
Alternator Belt
1) Inspect belts for cracks, cuts, deformation, wear
and cleanliness. If necessary, replace the belt.
2) Check belt for tension. The belt is in proper tension
if it deflects 11 to 14 mm (0.43–0.55 in.) under thumb
pressure (about 10 kg or 22 lbs.).
Belt tension
specification
11–14 mm (0.43–0.55 in.) as
deflection
NOTE:
When replacing the belt with a new one, adjust belt
tension to 10–12 mm (0.28–0.47 in.).
2) If belt is too tight or too loose, adjust it to proper tension
by adjusting alternator.