177
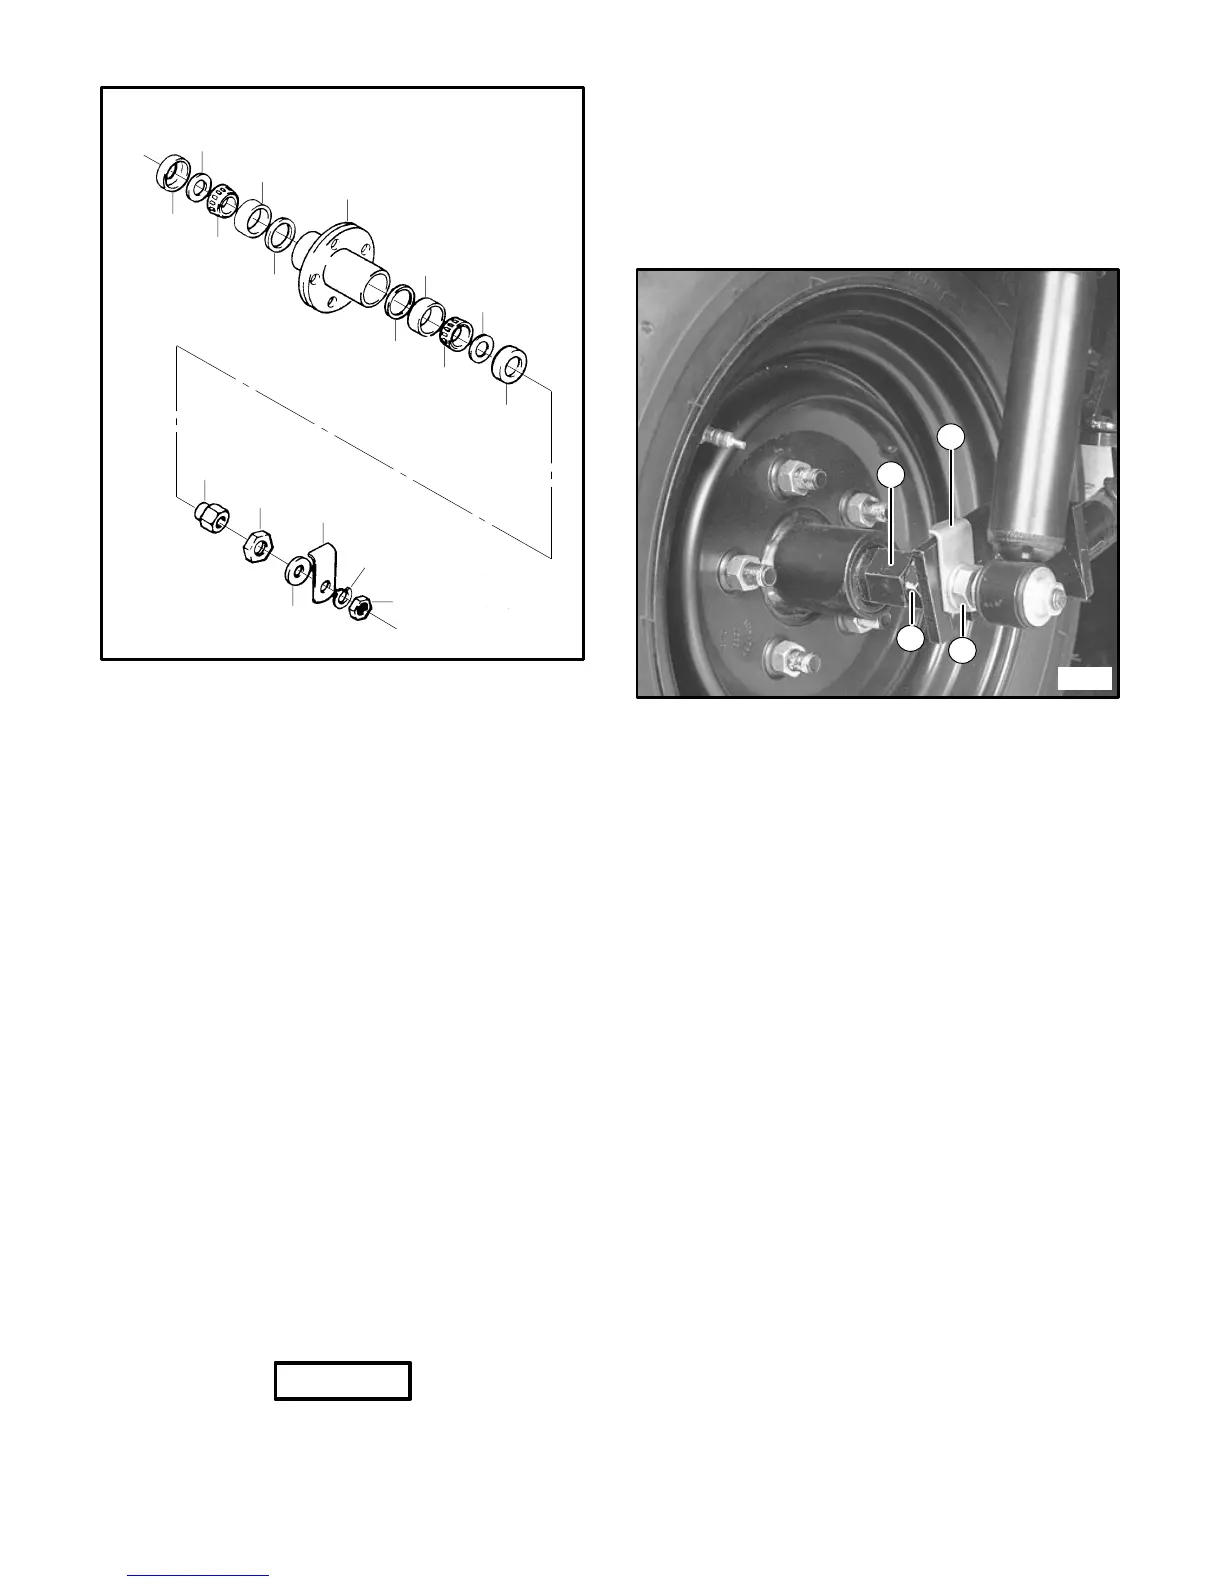
FIGURE 22
1. Axle Nut
2. Axle Lock
3. Jam Nut
4. Lubrication Seals
5. Bearing Cone
6. Hub
7. Lockwasher
8. Special Washer
9. Bearing Adjusting
Nut
10. Oil Slinger
11. Bearing Cup
12. Bearing Backing
Ring
1
7
2
8
3
9
4
10
5
11
12
6
12
11
5
10
4
3. Remove special washer, jam nut and bearing adjust-
ing nut.
4. Remove lubrication seals, oil slinger and bearings.
5. Clean and inspect all parts for wear and damage. If
there is any sign of wear, replace with new parts.
6. If the roller bearing cup was removed, replace with
new parts. BE SURE backing ring is installed first.
7. Pack bearings with wheel bearing lubricant.
8. Install bearings and new lubrication seals into wheel
hub.
NOTICE
• DO NOT reuse grease seals after they have been
removed. Replace with new parts to prevent dam-
age to bearings and other components.
9. Install hub onto axle. Tighten the bearing adjustment
nut 7 to 13 ft.–lbs. (10 to 17 N⋅m) torque while rotat-
ing the hub by hand. Back off nut 1/6 turn. This will
allow the hub to rotate freely without drag. A slight
amount of end play is allowed. Refer to Figure 23 for
part locations.
1
2
3
4
4391
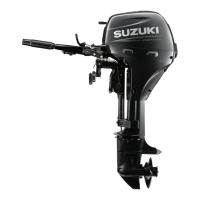
FIGURE 23
1. Axle Lock Nut
2. Bearing Adjustment Nut
3. Bearing Jam Nut
4. Axle Lock
10. Tighten bearing jam nut. See Figure 23.
REAR TIRE AND WHEEL REMOVAL
Remove and reinstall as follows:
• Remove the wheel retaining nuts and remove wheel
assembly from hub.
• When reinstalling the tire and wheel make sure the
valve stem faces the outside and tighten the wheel
retaining nuts to 70 to 100 ft.-lbs. (95 to 140 N
·
m)
torque.
FRONT TIRE REMOVAL
IMPORTANT!
READ THIS SECTION COMPLETELY BEFORE
ATTEMPTING TIRE/WHEEL REMOVAL OR FRONT
WHEEL INSTALLATION.