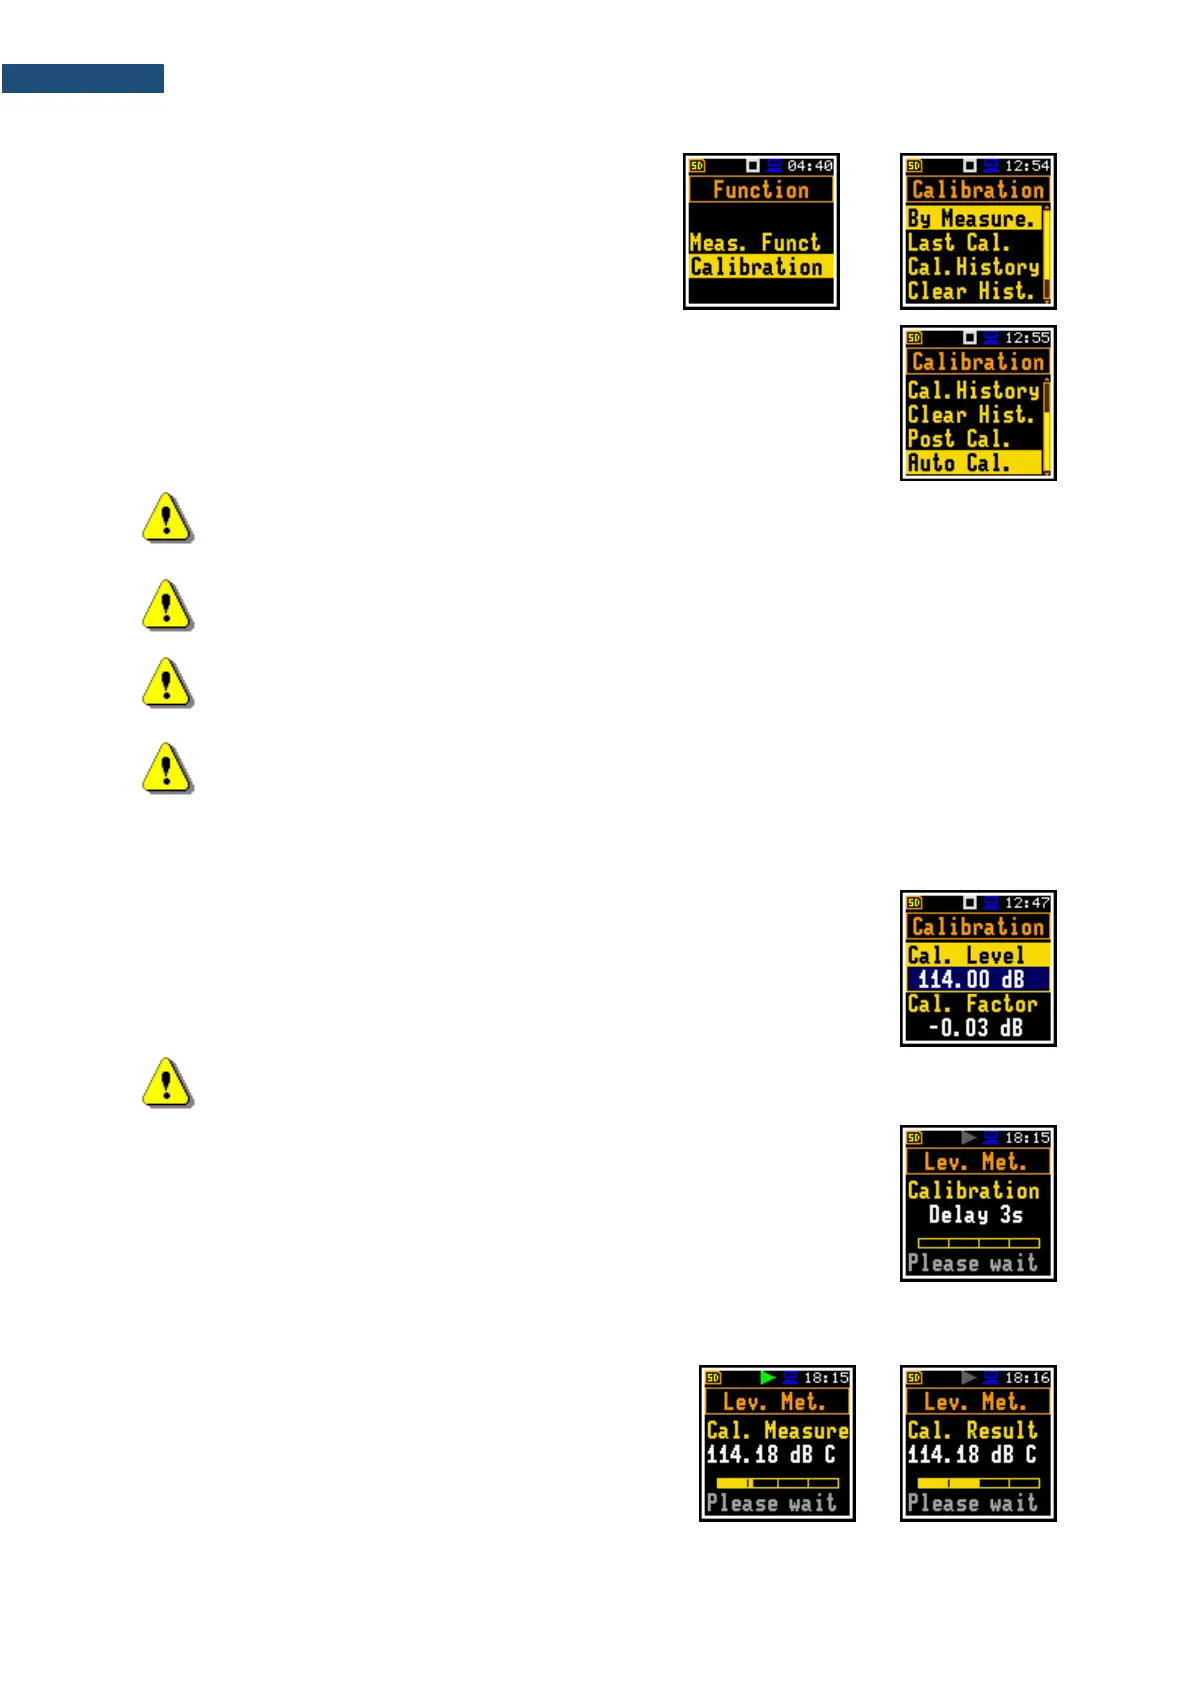
In the Simple user interface, the Calibration list
comprises positions enabling calibration with the use of
the sound calibrator (By Measure.), checking and
erasing previous calibration records (Last Calibration,
Calibration History, Clear History), adding current
calibration results to the logger file (Post Cal.).
In the Advanced user interface, there is additional position in the Calibration list
- Auto Calibration, which allows you to switch on/off the auto calibration function.
Note: It is advised to perform calibration of the instrument each time before the measurements
begin. A single calibration at the start of each day is usually sufficient for most regulations.
Note: The calibration factor is always added to measurement results and measurement range
limits of the Lev. Met., 1/1 Oct., 1/3 Oct., RT60 and Dosimeter functions.
Note: The recommended factory calibration interval is 12 months for instruments to be
confident in their continuing accuracy and compliance with the international codes. Please
contact your local Svantek distributor for further details.
Note: It is possible to perform so called “By Sensitivity” calibration by setting the calibration
factor with the use of special command – see Appendix A.
3.2.1 Calibration – By Measurement
To calibrate the instrument:
1. Set the calibration level (Cal. Level) – see Appendix C, Chapter C.1, par.
Calibration.
2. Carefully attach the sound calibrator (SV 34B or equivalent 114 dB / 1000 Hz)
to the instrument's microphone.
Note: It is also possible to use an electro-mechanical pistonphone, which generates the signal
(ca 124 dB) or different type of sound calibrator dedicated for ½” microphones.
3. Switch on the calibrator (if the used calibrator doesn’t have auto run function)
and wait ca 30 seconds for the tone to stabilise before starting the calibration
measurement.
4. Start the calibration measurement by pressing the <Start> key.
The calibration delay time is set to 3 seconds. While waiting for the start of the
measurement the Delay is counting down on the display.
The calibration process is divided into calibration of the Level meter and calibration of the Dosimeter.
The progress bar displays the entire progress of the calibration.
During the first calibration, the level of the calibration signal
measured by the Level Meter is displayed until the measured
result stabilizes (the maximum difference between three
consecutive 1-second LCeq results should be within 0.05
dB). The result of the calibration will then be displayed and
the next measurement for the Dosimeter will be waiting for
the start.