If the automatic calibration is switched on, the instrument, when it doesn’t perform the measurement,
periodically compares the measured signal level (Running SPL for 1 second) with the reference
calibration level and starts the calibration measurement if the stable SPL result is within ±5dB of the
calibration level.
To perform the automatic microphone calibration, follow next steps:
1. Switch on the instrument.
2. Attach the SV 34B (or equivalent 114 dB/1000 Hz) calibrator to the microphone and switch it on (if
the used calibrator doesn’t have automatic switch-on feature).
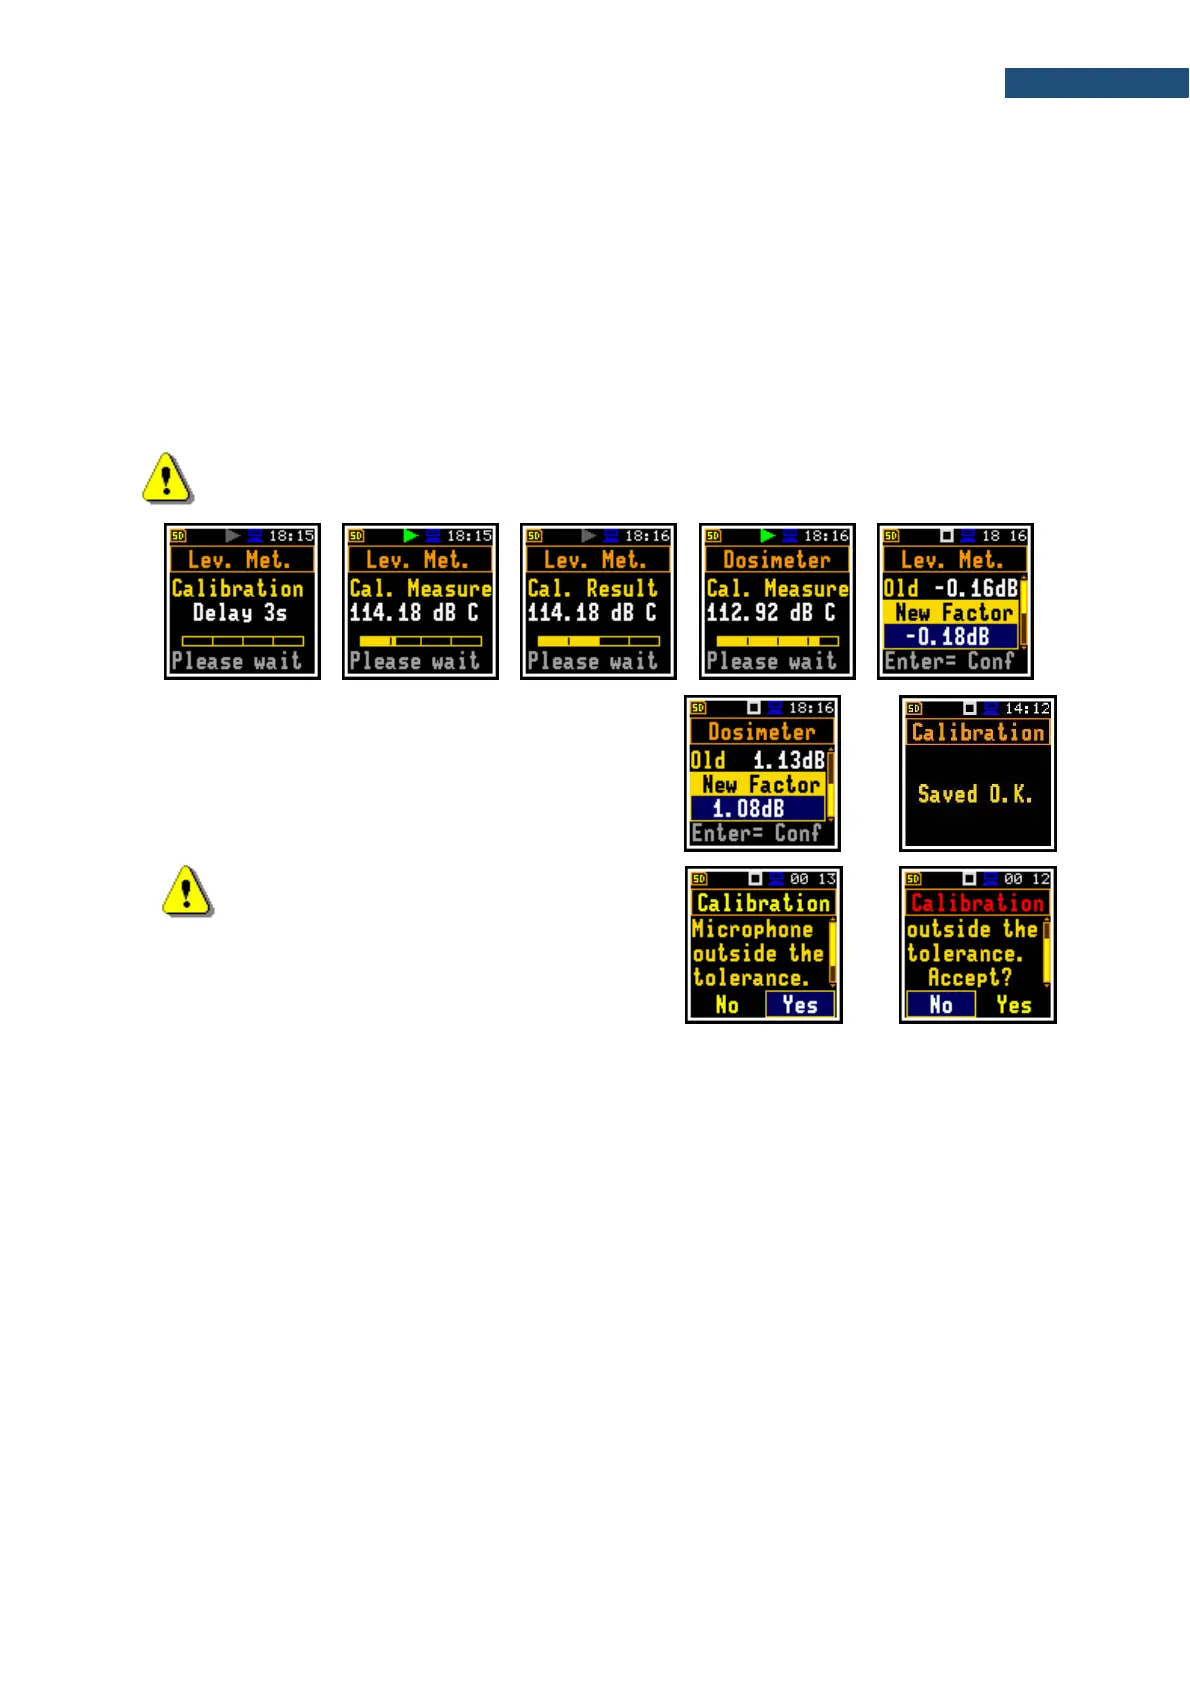
The calibration starts automatically, and the calibration process is similar as in case of calibration By
Measurement.
Note: The automatic calibration will be performed regarding the calibration level set in the
By Measurement screen.
3. Press <Enter> to accept and save the new
calibration factors.
4. Detach the calibrator from the microphone.
Note: If calculated calibration factor is out of
the ±3 dB range, the warning “Microphone
outside the tolerance. Accept?” appears on the
screen. If the calibration drift is out of the ±20
dB range, the header of the screen turns red:
Calibration.
 Loading...


