54
83507013 Rev G
4.5.1 Making J1 connections
J1 Connector type: AMP, P/N: 5747461-3
J1 plug description: AMP, 749809-9 or equivalent.
Wire dimension range: AWG26-22
Extraction tool: AMP, 91232-1 or equivalent.
Manual Pistol grip tool:
Handle: AMP, P/N: 58074-1
Head: AMP, P/N: 58063-2
Before making any connection, turn the AC on/Off switch to the Off position and wait
until the front panel display has turned Off.
CAUTION
Terminals 12, 22 and 23 of J1 are connected internally to the negative sense
(-S) potential of the power supply. Do not attempt to bias any of these terminals
relative to the negative sense. Use the Isolated Programming interface option
to allow control from a programming source at a different potential relative to
the power supply negative.
CAUTION
To prevent ground loops and to maintain power supply isolation when
programming from J1, use an ungrounded programming source.
WARNING
There is a potential shock hazard at the output when using a power
supply with rated output greater than 40V. Use wires with minimum
insulation rating equivalent to the maximum output voltage of the
power supply.
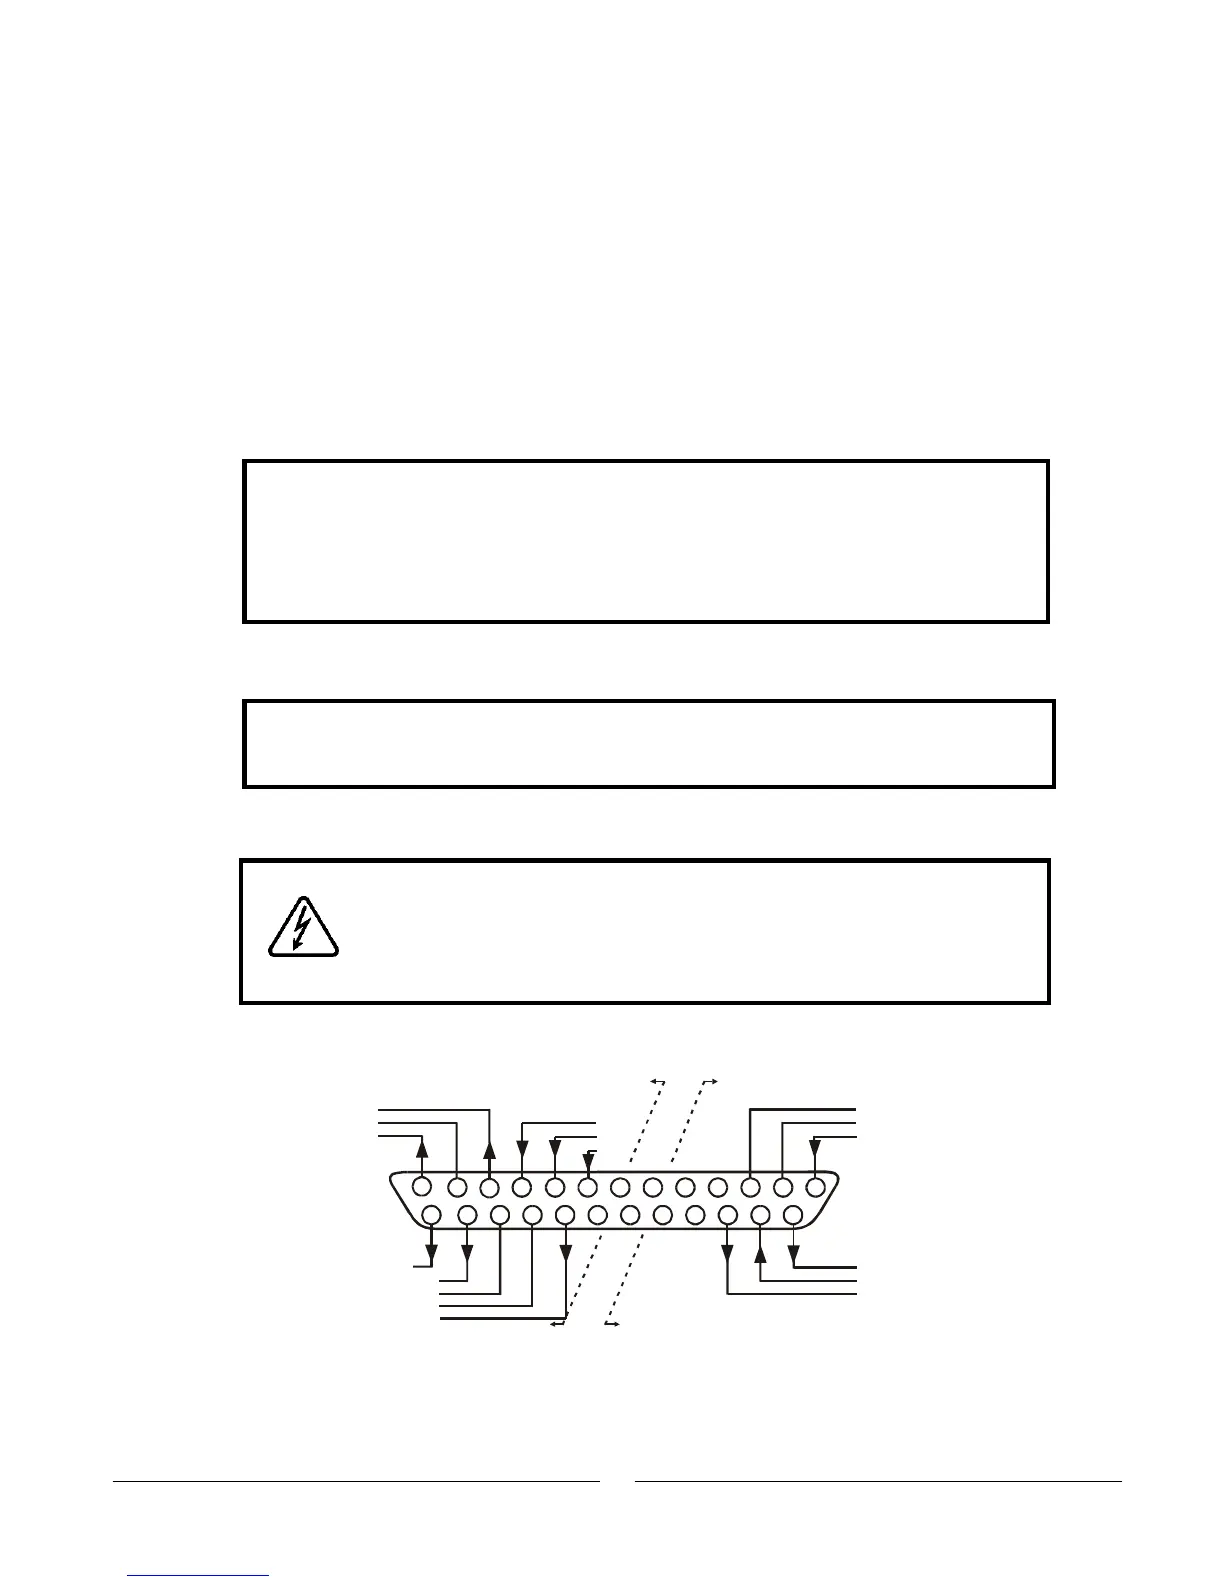
Fig. 4-4: J1 connector terminals and functions
Fig.4-4: J1 connector terminals and functions
141516
1718
19
2021
22232425
1
2
3
4
567
8
1011
12
13
9
Same ground
as P/S negative
sense (-S)
Isolated from
PS outputs,
same ground
as RS232/RS485
IMON
IPGM_RTN
VPGM_RTN
LOC/REM SIGNAL
IF_COM
IF_COM
ENA_IN
VMON
COM
CV/CC
IPGM
VPGM
LOC/
REM
P ENA_OUT
SO
PS_OK