4-15
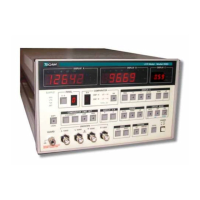
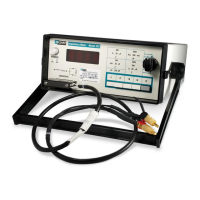
Model 3550 LCR Meter Instruction Manual Operating Instructions
Front Panel Description cont’d:
[SHIFT] ĺ [9]: RS-232C Settings Mode
For the RS-232C, the baud rate, data length, parity and stop bit can be defined by the
user. Press the [SHIFT] ĺ [9] key to enter into the RS-232C setup mode.
After entering the RS-232C setup mode, you will notice that the BIN LED will begin to blink.
Press a key from [1] ~[4] to select the RS-232C parameter that you wish to set.
[1]: Set the Baud Rate Default=5, 9600BPS
[2]: Set the Data Length Default=1, 8 Bits
[3]: Set the Parity Default=0, No Parity
[4]: Set the Stop Bit Default=0, 1 Stop Bit
Notice that after selecting a parameter from 1-4, DISPLAY B will show a number that
corresponds to the parameter setting as summarized in the tables below: Use the tables to
determine the appropriate setting for the RS-232C communications. Use the [CURSOR Ź]
or [CURSOR Ż] keys to navigate between the RS-232C parameter and the setting on
DISPLAY B.
Press the [ENTER] key to finalize the settings and return to measurement mode.
BIN Display "1" Baud Rate Settings
DISPLAY B
Settings
RS-232C Settings
0 300bps
1 600bps
2 1200bps
3 2400bps
4 4800bps
5 9600bps
6 19.2kbps
7 38.4kbps
BIN Display "3" Parity Settings
DISPLAY B
Settings
RS-232C
Settings
0 No parity
1 Odd parity
2 Even parity
BIN Display "2" Data Length
Settings
DISPLAY B
Settings
RS-232C
Settings
0 7bits
1 8bits
BIN Display "4" Stop Bit Settings
DISPLAY B
Settings
RS-232C
Settings
0 1bit
1 2bit