4-34
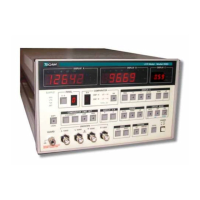
Model 3550 LCR Meter Instruction Manual Operating Instructions
Operating the 3550 cont’d:
Measuring: Loss Coefficient (D), Quality (Q), Equivalent Series Resistance (R
S
),
Equivalent Parallel Resistance (R
P
), Conductance (G), Reactance (X), Susceptance (B),
and Phase Angle (ș)
1) Always perform a zero correction procedure if the condition of the test leads/fixture has
changed. This procedure must be performed before making a measurement. Refer to “How to
Perform a Zero Correction” for more details.
2) Press the [B] key in the “DISPLAY A-B panel to select D, Q, R
S
, R
P
, G, X, B, or LJ.
3) Press the [FREQ] key and adjust the frequency using the [UP] or [DOWN] keys or by manually
entering a new value for test frequency. See [SHIFT] ĺ [0]: “Frequency Set Mode” for more
details on manually setting the test frequency. Frequency will be displayed on DISPLAY C.
4) Press the [V] key, and adjust the voltage using the [UP] or [DOWN] keys. See [SHIFT] ĺ [1]:
“Test Voltage Set Mode” for more details on manually setting the test frequency. The
measurement voltage will be displayed on DISPLAY C.
5) Press the [AUTO] key in the RANGE panel and verify that the “AUTO” LED is on. This puts the
3550 in AUTO range.
NOTE: Selecting the manual mode allows the measurement time to be reduced by eliminating the
time needed for switching the ranges. See "RANGE" Selection Panel” for more details.
6) Press the [INT] key in the TRIGGER panel and verify that the “INT” LED is on. This will
continuously trigger the 3550 and update the reading shown on DISPLAY A at a rate determined
by measurement frequency, delay time, number of averages, and the time taken to auto range. If
MAN/EXT trigger mode is selected the reading will not be updated until a new trigger is received
from the front panel or remote interface.
8) Connect the DUT to the measurement terminals. The CIRCUIT MODE and RANGE will be
automatically selected by the 3550. The D, Q, R
S
, R
P
, G, X, B, or LJ reading will be shown on
DISPLAY B.
Notes for Measuring Reactance & LJ
On occasion a “-“ sign will be observed occupying the same display as the most significant
digit “1”. The minus sign indicates a negative phase angle from a capacitive reactance, X
C
.
This is normal functionality in order to maximize the number of significant digits for an
upper-range measurement.
Display B indicating 16.775ƻ X
C
Value Display B indicating 16.775ƻ X
L
Value