•
•
•
Line Fuse
><
~
~
Front-Panel
Knobs
and
Shafts
Removal and Installation Procedures
S.
Perform this procedure
in
reverse order to install the power cord on the
oscilloscope.
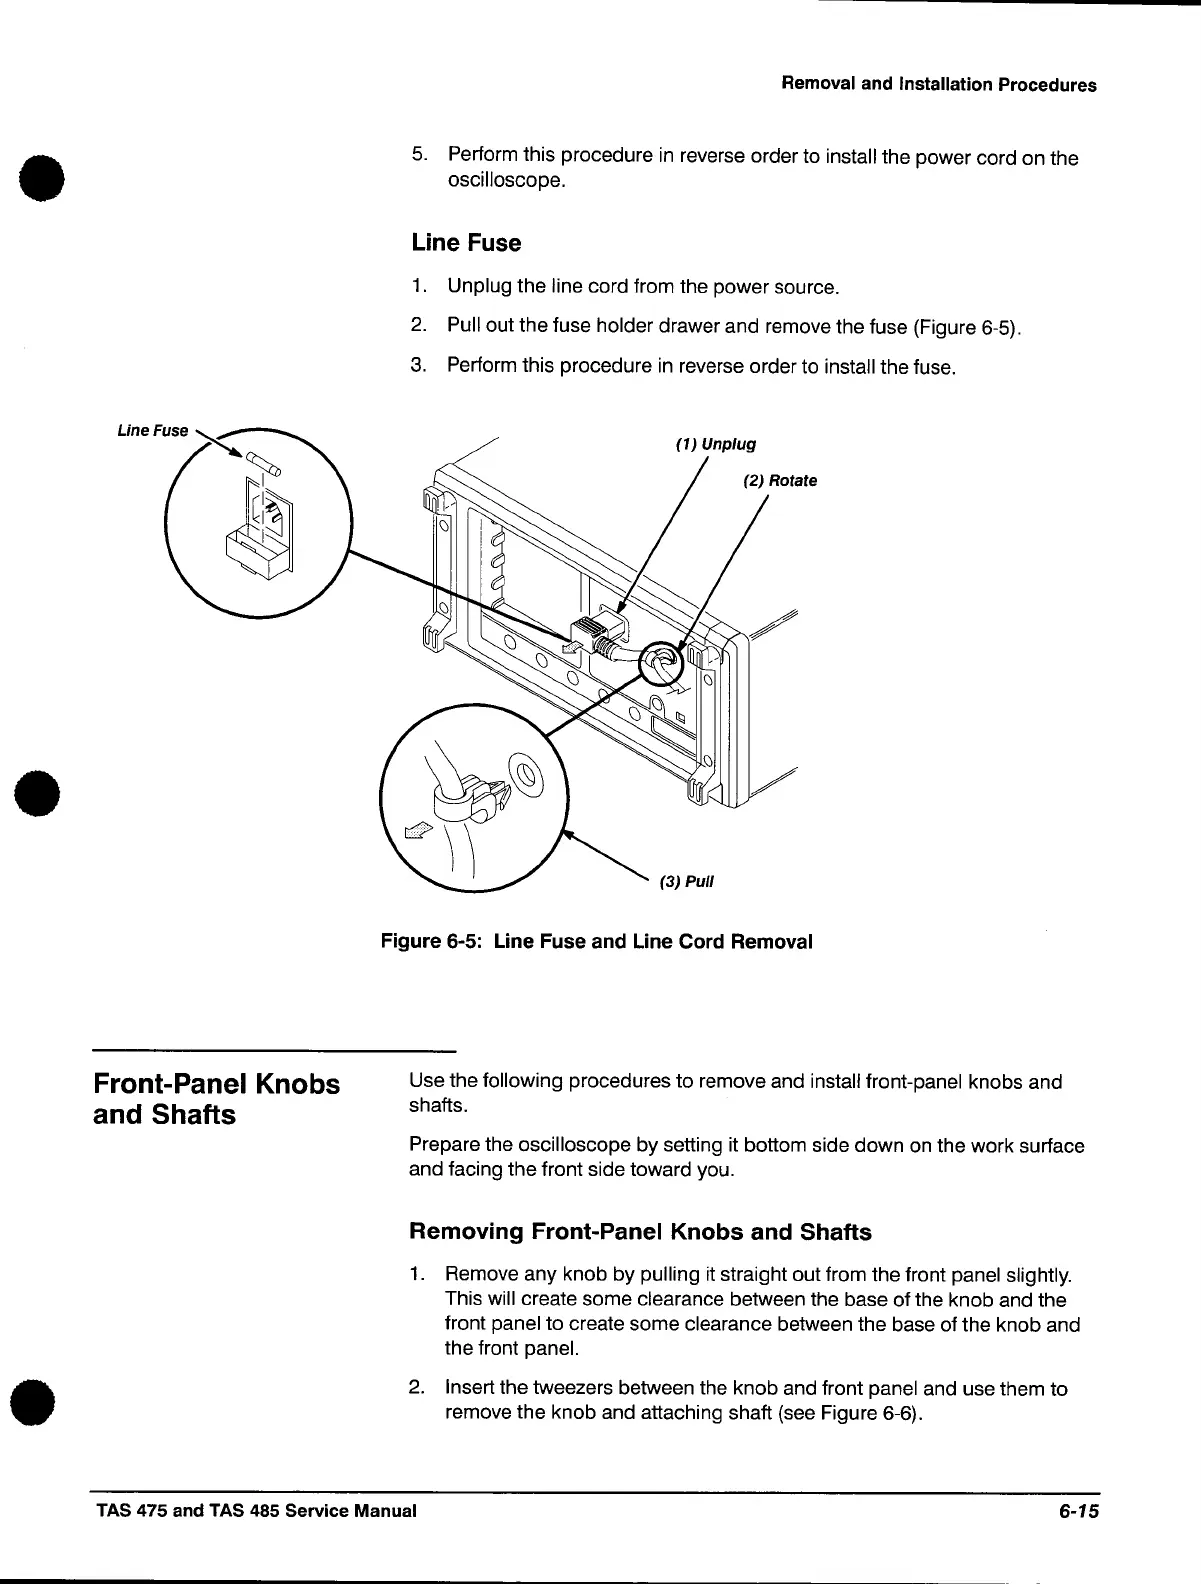
Line Fuse
1 . Unplug the line cord from the power source.
2.
Pull out the fuse holder drawer and remove the fuse (Figure
6-S).
3.
Perform this procedure
in
reverse order to install the fuse.
(3)
Pull
Figure 6-5: Line Fuse and Line Cord Removal
Use the following procedures to remove and install front-panel knobs and
shafts.
Prepare the oscilloscope by setting it bottom side down
on
the work surface
and facing the front side toward you.
Removing
Front-Panel
Knobs
and
Shafts
1.
Remove any knob by pulling
it
straight out from the front panel slightly.
This will create some clearance between the base of the knob and the
front
panel to create some clearance between the base of the knob and
the front
panel.
2.
Insert the tweezers between the knob and front panel and use them to
remove the knob and attaching shaft (see Figure 6-6).
TAS 475 and TAS 485 Service Manual
6-15
 Loading...

