•
•
•
Adjustment Procedures
15. Select Done with the menu button when you have the appropriate
display.
NOTE
At
this time, the calibration routine can be terminated
by
selecting
Abort
instead
of
Done.
The
abort option appears through the
remainder
of
this Factory Horizontal Cal routine.
16.
Select Done to continue
or
Abort
to terminate the calibration routine.
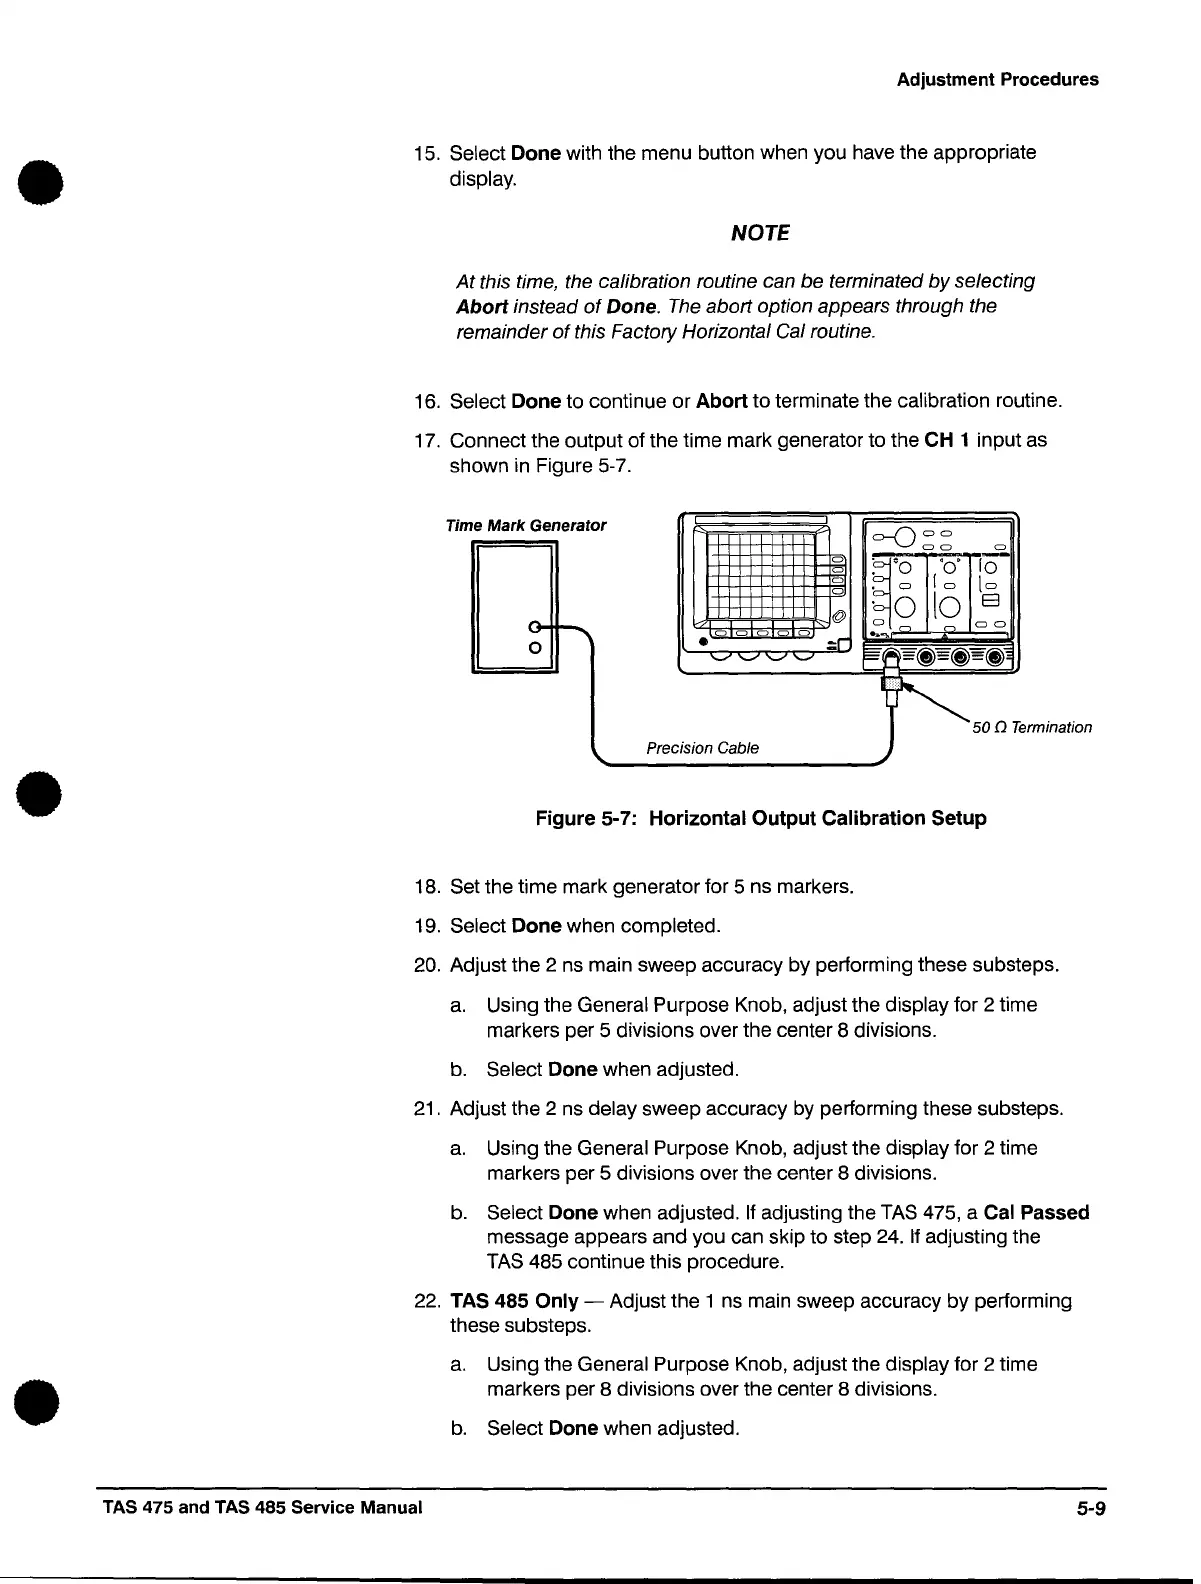
17.
Connect the output of the time mark generator to the
CH
1 input
as
shown in Figure 5-7.
Tim e
Mark
Generator
=-000
00
~
0
~'O
'0'
fO
0
0
• 0
fo
[0
0
lo
E3
·0
0-
~
@
0.0
o.
00
00 00
0
:r
..
..,.
0
•
'-"
'-" '-"
'-"
~I
~
=(j)=(j)=(~i~
~50nTe
rmination
"-
Precision Cable
Figure 5-7: Horizontal Output Calibration Setup
18.
Set the time mark generator for 5 ns markers.
19.
Select Done when completed.
20.
Adjust the 2
ns
main sweep accuracy by performing these substeps.
a.
Using the General Purpose Knob, adjust the display for 2 time
markers per 5 divisions over the center 8 divisions.
b.
Select Done when adjusted.
21.
Adjust the 2
ns
delay sweep accuracy
by
performing these substeps.
a.
Using the General Purpose Knob, adjust the display for 2 time
markers per 5 divisions over the center 8 divisions.
b.
Select Done when adjusted.
If
adjusting the
TAS
475, a Cal Passed
message appears and you can skip to step
24.
If
adjusting the
TAS
485 continue this procedure.
22.
TAS 485 Only - Adjust the 1
ns
main sweep accuracy by performing
these substeps.
TAS 475 and TAS 485 Service Manual
a.
Using the General Purpose Knob, adjust the display for 2 time
markers per 8 divisions over the center 8 divisions.
b.
Select Done when adjusted.
5-9
 Loading...

