7-16
7
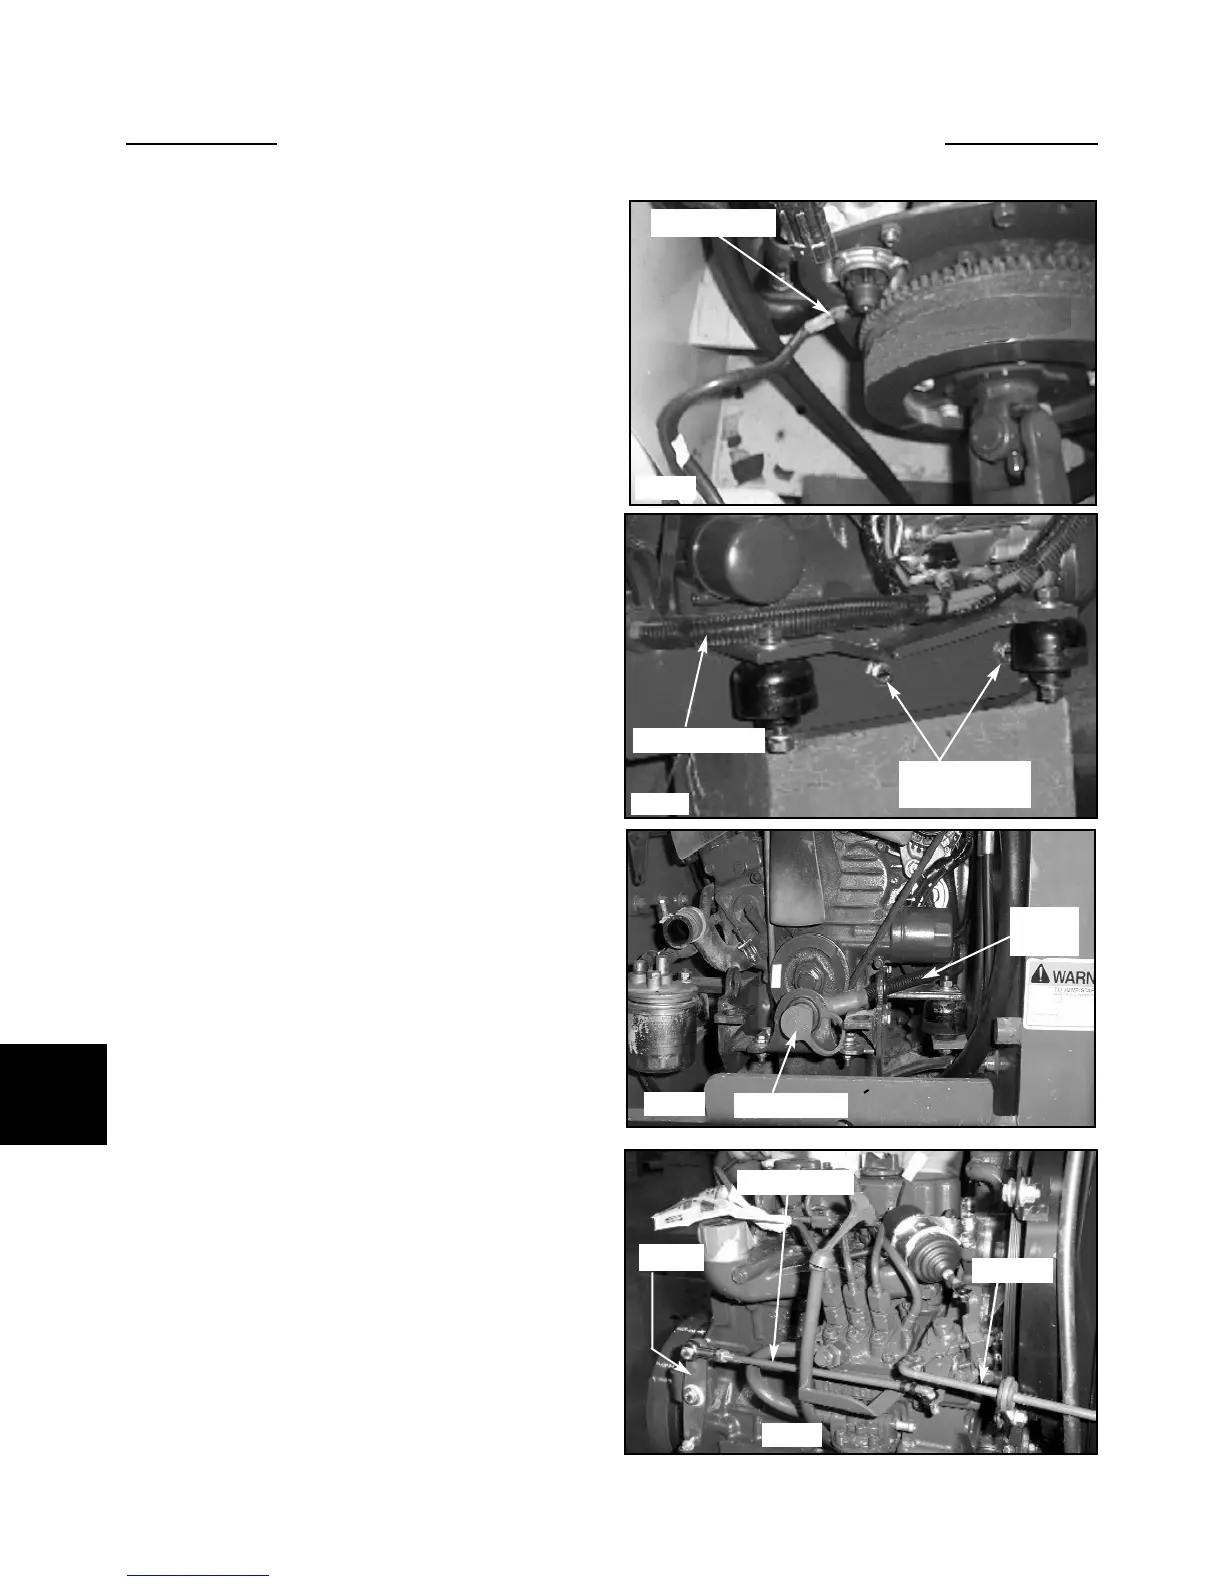
C5162
C5085
C5655
Installation
If the engine is being replaced with a new assembly, the
engine will require some preparation.
1 Remove the protective rust preventative coating from
the flywheel. Use a solvent to remove. The flywheel must
be clean with no nicks or burrs.
2 Install the engine U- Joint adapter. There are 5 bolts
hodling the adapter to the engine flywheel. Torque the
adapter bolts 20 ft lbs. (27.2 Nm)
3 Paint must be removed from the starter mount plate
where the engine ground strap is attach to the bottom
starter bolt. This will provide proper grounding of the
engine with the loader chassis. (fig. C5655)
4 Install the engine mounts. Apply Loctite 242 (blue)
to the threads of the mounting bolts. Torque the mounting
bolts to 35 ft lbs. (47.5 Nm). (fig. 5121)
5 Install the isolators into the engine mounts. (fig.
5121) Make sure the isolators are not separating or the
rubber is not deteriorated in any way. Replace isolators
as required.
6 Install the boosting lug mount and the boosting lug.
7 Install the engine temperature sender.
8 Install the engine wire harness and the positve battery
cable to the starter motor and the boosting lug.(fig.
C5162, fig. C5121)
9 Install the radiator to the engine mounts and install
the radiator hoses.
10 Install the fan guard to the radiator shroud.
11 Install the upper radiator mounting
bracket.(LB003382 Onward)
12 Add engine oil and coolant.
13 Install the engine throttle rod and the swivel to the
engine. Install the manual stop rod.(fig. C5085)
ENGINE REPLACEMENT 7.3
C5121
Ground cable
Engine mount
bolts
Swivel
Throttle rod
Stop rod
Positive cable
Positive
cable
Boosting lug