© 2011 Thorlabs
55Operating the Beam Profiler
BC106-VIS, respectively.
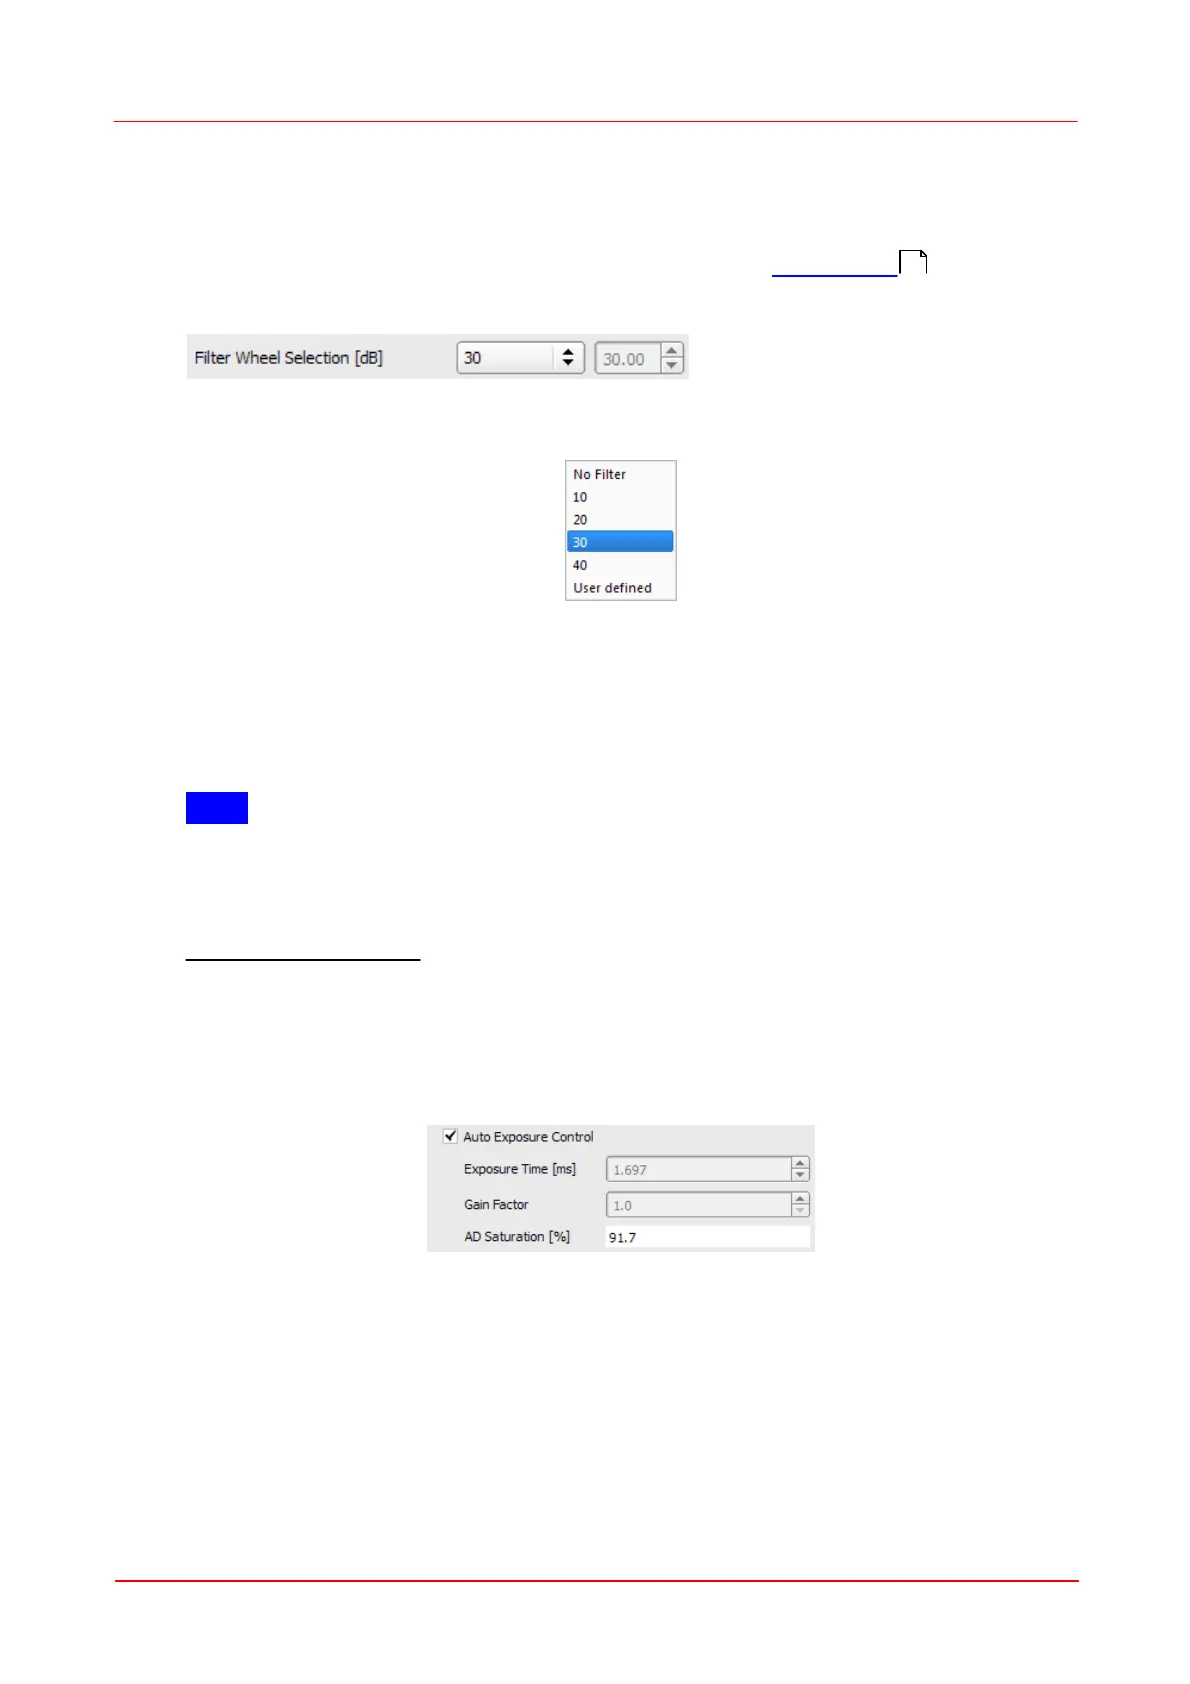
Filter wheel selection
There are in total 4 different neutral density (ND) filters available by rotating the filter
wheel in front of the Beam Profiler aperture. See chapter Filter Wheel for details.
You need to enter the nominal attenuation of the chosen ND filter in order to be
recognized for calculating the Total Power.
Select the filter in operation from the pull down list.
Select 'No Filter' in case you have removed the filter in front of the entrance aperture
so that no attenuation (0 dB) is present. In case you are using external attenuation
filters or beam splitters select 'User Filter' and enter its attenuation value into the
control on the right.
Only values between 0 and 100dB can be entered.
Note
The correct selection of this attenuation value is a precondition for a proper power
measurement and function of Ambient Light Correction.
Exposure Control
Auto Exposure Control
The exposure control of the Beam Profiler camera include adjustments for Exposure
Time and electrical Gain. Both settings determine the sensitivity of the camera and
need to be adapted to the actual beam power in order to ensure a nearly full scale
amplitude measured by the camera's AD converter.
By default, both settings are automatically controlled in order to achieve an Image
Saturation between 80 and 95% of the available AD range.
It is highly recommended to use this automatic exposure control by enabling the
'Auto Exposure Control' checkbox. If activated, the Beam Profiler software will
automatically adapt both, the exposure time and the additional gain in an optimal
manner. Both controls become gray and will only display the actually chosen
parameters. The Target is to keep the brightest pixel of the selected ROI at a high
saturation level but prevent saturation (100%) due to the limited range of the AD
converter digitizing the image.
However, in case of unstable or pulsed laser power it might be advantageous or
9