Receiver and File Maintenance
NET-G3A Operator’s Manual
4-16
Loading an OAF
Topcon Positioning System dealers provide customers with OAF
files. If you purchase an updated OAF for the receiver, you need to
load it before you can use the new feature. The following steps use
PC-CDU to load the option file.
For OAF related questions, e-mail TPS at options@topcon.com and
include the receiver’s ID number.
1. Connect your receiver and computer. See “Connecting the
Receiver and a Computer” on page 2-15 for this procedure.
2. Click ToolsReceiver Options.
3. Click Load at the bottom of the Option Manager dialog box (see
Figure 4-13 on page 4-15).
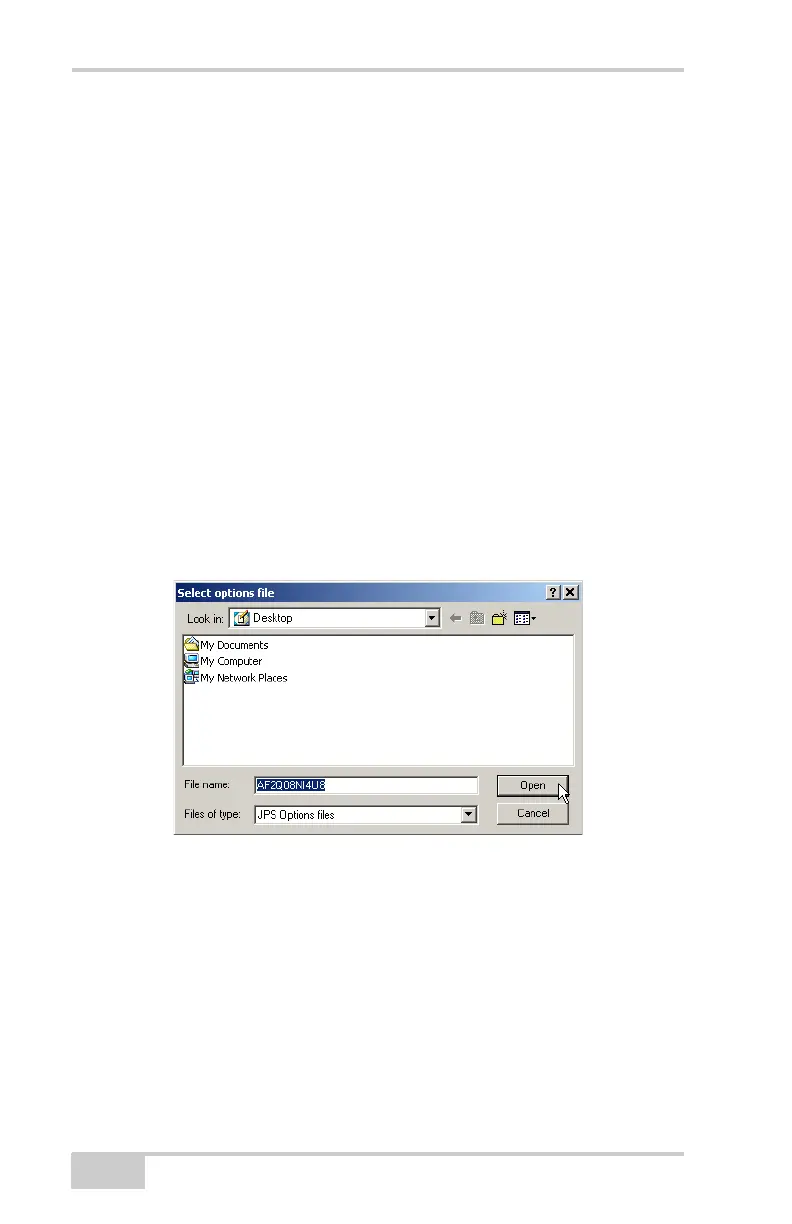
4. Navigate to the location of the new Option Authorization File.
OAFs have .jpo or .tpo extensions and are unique to each receiver
(Figure 4-14).
Figure 4-14. Load OAF
5. Select the appropriate file, and click Open (Figure 4-14). The
new receiver option loads onto the receiver, and the Option
Manager table updates.
6. When finished, click Exit on the Option Manager dialog box.
7. Click FileDisconnect to prevent conflicts with serial port
management.
Net-G3A_OM_Book.book Page 16 Thursday, May 14, 2009 8:49 AM