Greensmaster 3250--D Hydraulic SystemPage 4 -- 9 9
Removal (Fig. 68)
1. Park the machine on a level surface, engage the
parking brake, lower the cutting units and stop the en-
gine. Remove key from the ignition switch.
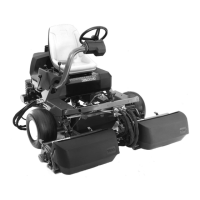
CAUTION
Before continuing further, read and become fa-
miliar with General Precautions for Removing
and Installing Hydraulic System Components.
2. Label all hose connections for assembly purposes
3. RemovehoseassembliesandO--ringsfromhydrau-
lic fittings on steering cylinder. Allow hoses to drain into
a suitable container.
4. Gain access to front steering cylinder ball joint.
A. Remove three (3) cap screws and flat washers
securing the fuel tank base plate to frame. Two (2)
screwsareonthetopoftheplateatthefrontcorners
of the tank. The third screw is in front of the castor
fork and below the plate.
B. Tilt fuel tank base up by lifting at the right of the
machinetogainaccesstothetopof the steering cyl-
inder ball joint and jam nuts. Prop up tank securely.
5. Remove both jam nuts from the front cylinder ball
joint. Rotate steering cylinder and detach ball joint from
frame bracket.
6. Pivot steering cylinder out from the frame. Remove
retaining ring f rom the rear of the cylinder. Remove cyl-
inder from rear ball joint and machine.
7. Ifnecessary,removef rontretainingringandballjoint
from the steering cylinder.
8. If hydraulic fittings are to be removed from steering
cylinder, mark fitting orientation to allow correct assem-
bly.RemovehydraulicfittingsandO--ringsfromcylinder.
Discard removed O--rings.
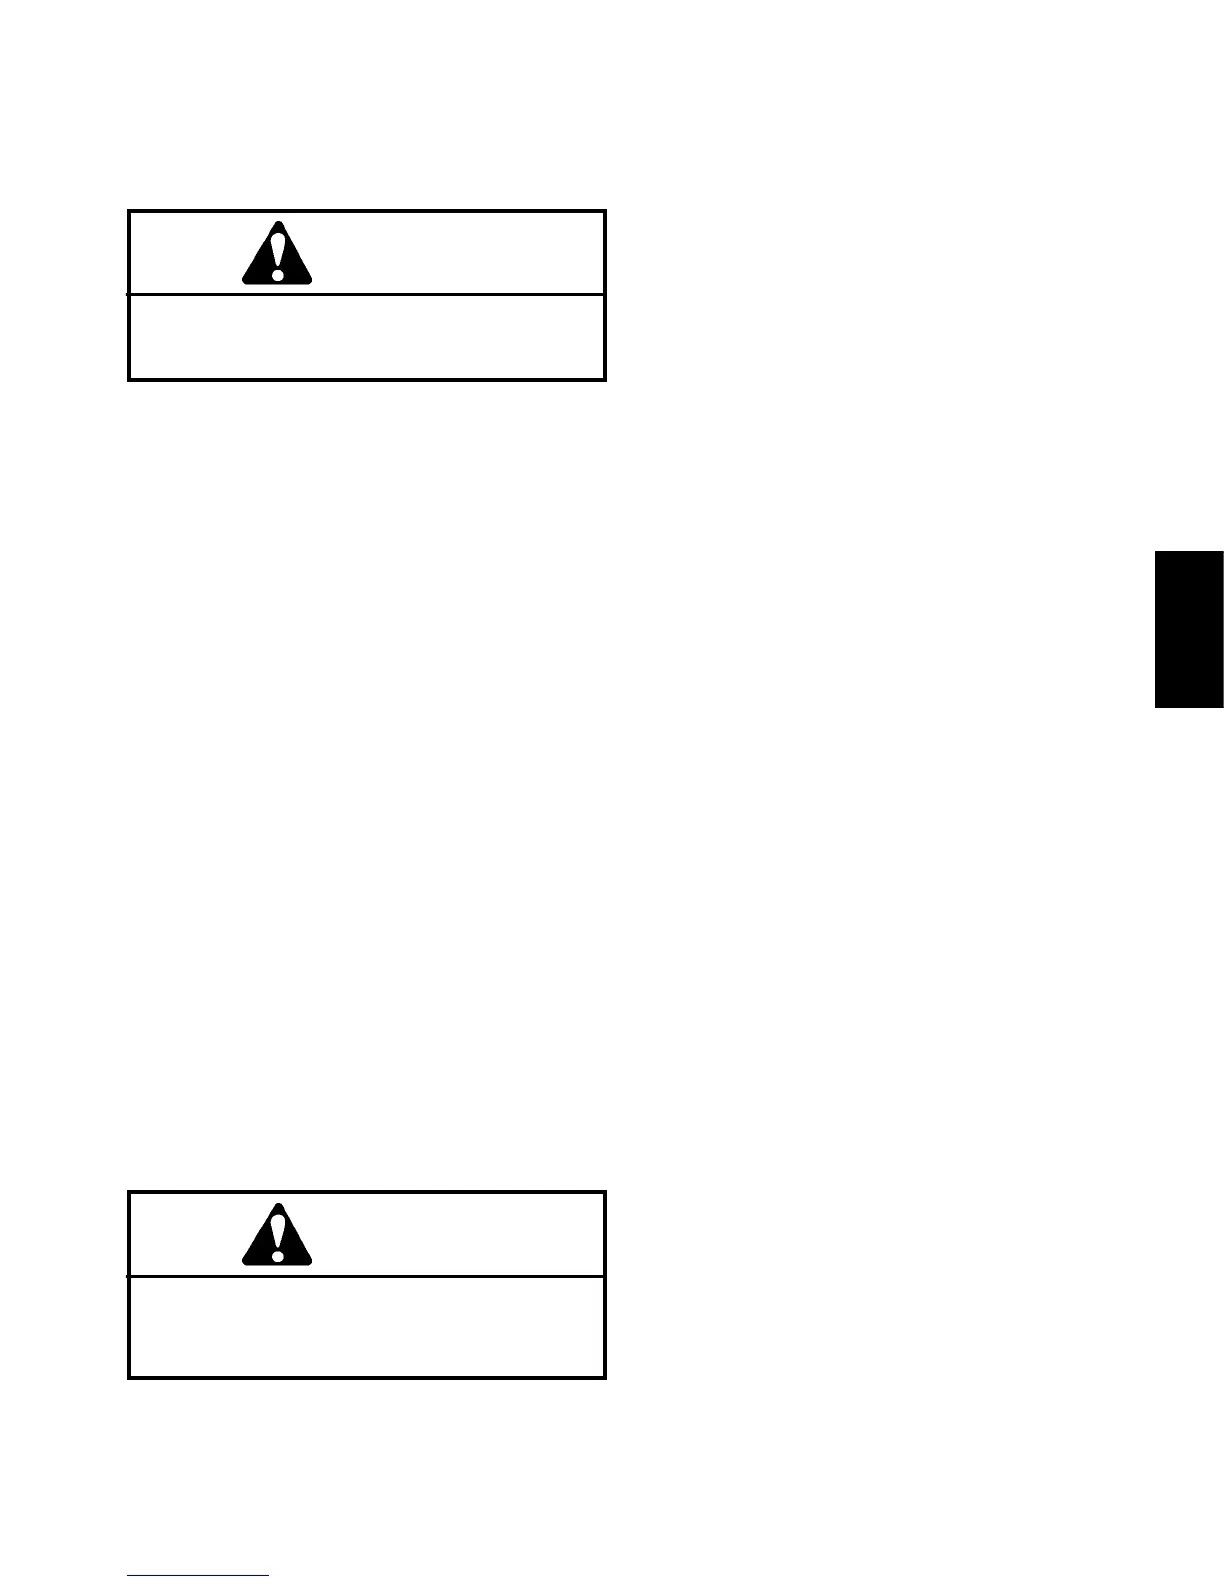
CAUTION
Support rear wheel to prevent dropping and
causing personal injury while removing lock nut
(item 16) and bolt (item 5). Use two (2) people to
remove rear wheel from castor fork.
9. Iftherearballjointneedstoberemoved,accomplish
the following:
A. Block front wheels. Jack up rear wheel off the
groundbytheframe.Supporttheframewith therear
wheel off the ground.
B. Remove lock nut (item 16), bolt (item 5), rear
spindle spacers (item 29) and rear wheel assembly
from the castor fork.
C. Remove jam nuts and steering cylinder ball joint
from the castor fork.
Installation (Fig. 68)
1. If the rear ball joint was removed, install ball joint to
castor fork:
A. Secure ball joint to the castor f ork with jam nuts.
Torque nuts from 65 to 85 ft--lb (88 to 115 N--m).
B. Installwheeltothecastorforkbyinsertingthebolt
(item5) throughthe castorfork,rearspindlespacers
(item 29) and wheel assembly. Secure bolt with lock
nut (item 16).
C. Lower rear wheel to ground
2. If fittings were removed from steering cylinder, lubri-
cate and place new O--rings onto fittings. Install fittings
into cylinder openings making sure that fitting orienta-
tionisasnoted during removal.Tighten fittings (seeHy-
draulic Fitting Installation in the General Information
section of this chapter).
3. Iffrontballjoint wasremovedfromthe steeringcylin-
der, press ball joint into cylinder and secure with retain-
ing ring.
4. Press steering cylinder onto the installed rear ball
joint and secure with retaining ring.
5. Pivot steering cylinder into the frame. Rotate steer-
ingcylinderandinstallfrontballjointtothe frame brack-
et. Secure ball joint to the bracket withjam n uts. Torque
nuts from 65 to 85 ft--lb (88 to 115 N--m).
6. Lowerfueltankbasetotheframe.Securebasetothe
frame with the three (3) cap screws and flat washers.
7. Connect hydraulic hosesandnewO--ringstothehy-
draulic fittings (see Hydraulic Hose and Tube Installa-
tion in the General Information section of this chapter).
Hydraulic
System

 Loading...