9
Chapter 1 Get Started
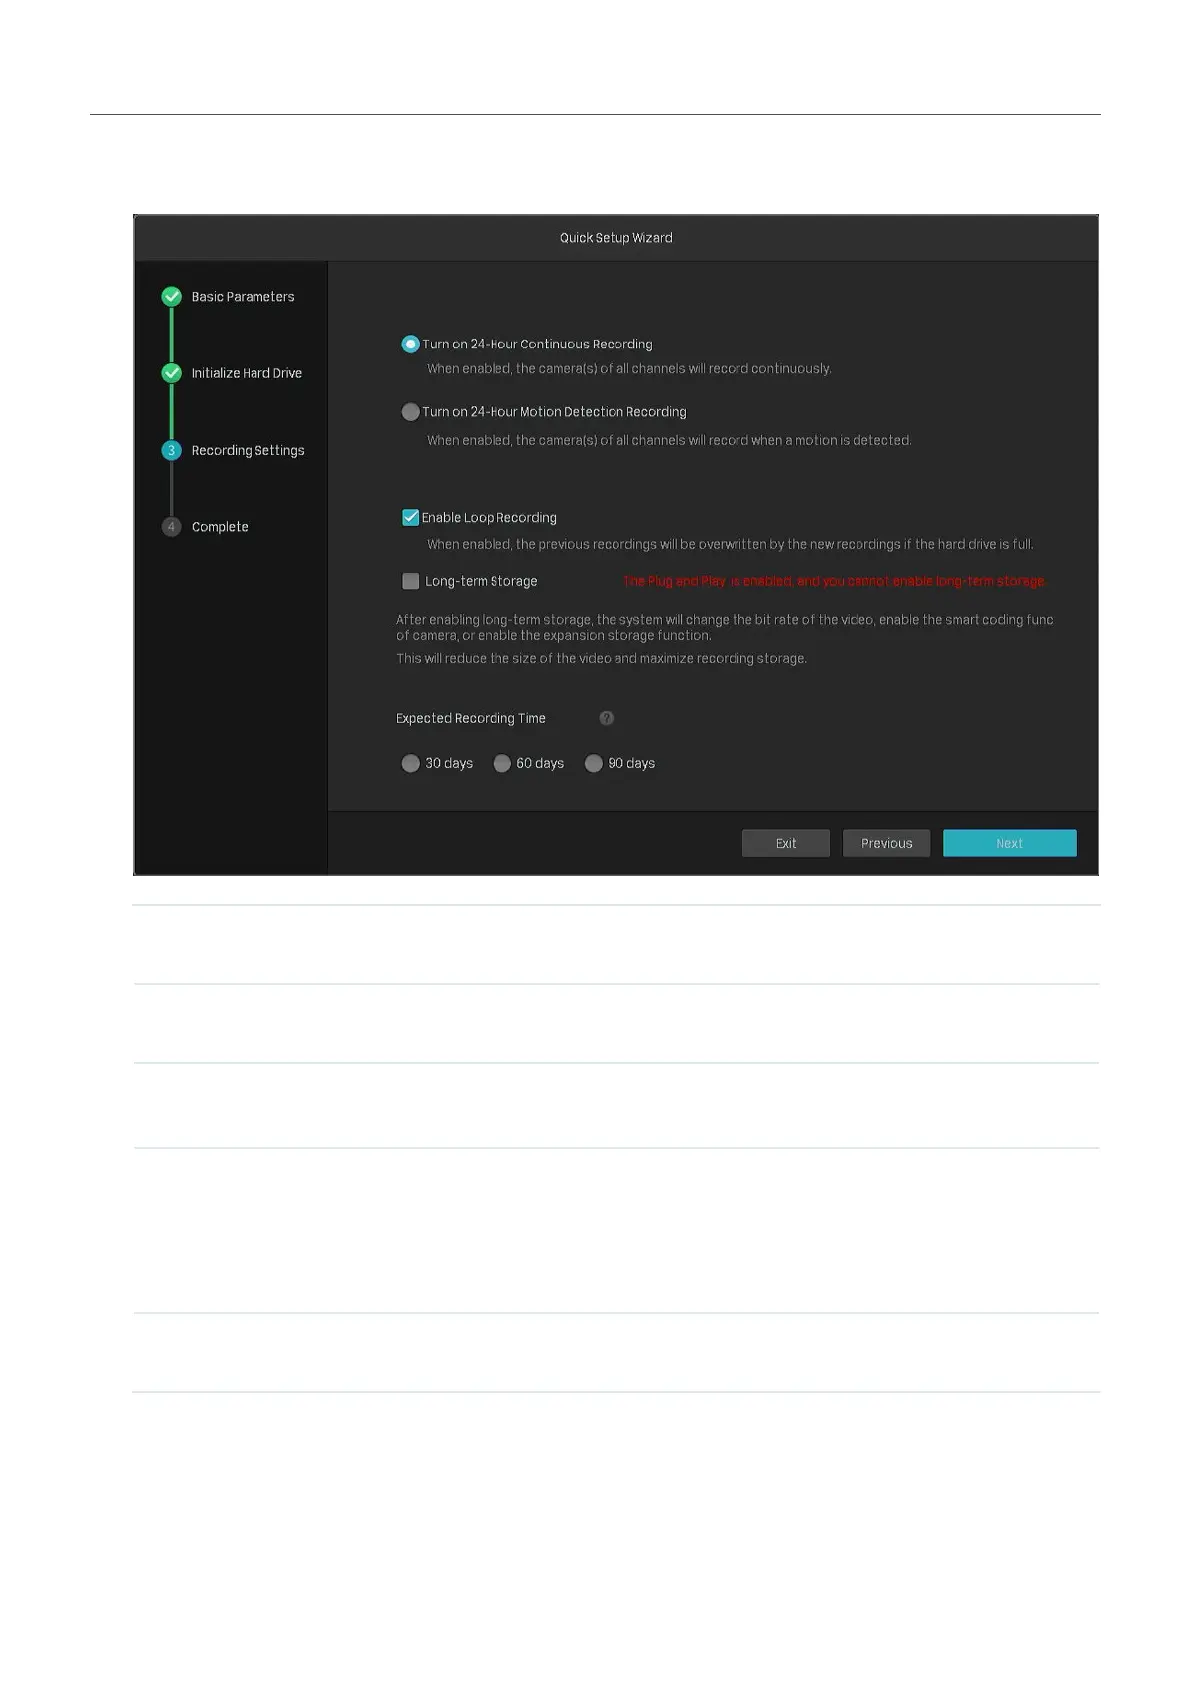
4. Set the recording schedule according to your needs. By default, the settings are applied to all
cameras managed by the NVR. Click Next.
Turn on 24-Hour Continuous
Recording
All of the cameras will be set to record continuously (24/7).
Turn on 24-Hour Motion
Detection Recording
The camera starts to record when a motion is detected.
Enable Loop Recording
Click the check box to overwrite the oldest recording files
with the latest one when the hard drive is full.
Long-term Storage (Only for
VIGI NVR1016H)
Click the check box to reduce the size of the video and
maximize recording storage.
Note: If you have enabled Plug and Play, this function cannot
be enabled.
Expected Recording Time
(Only for VIGI NVR1016H)
Select the recording time you expect.
 Loading...