62
Chapter 4 Recording and Storage
How can I do that:
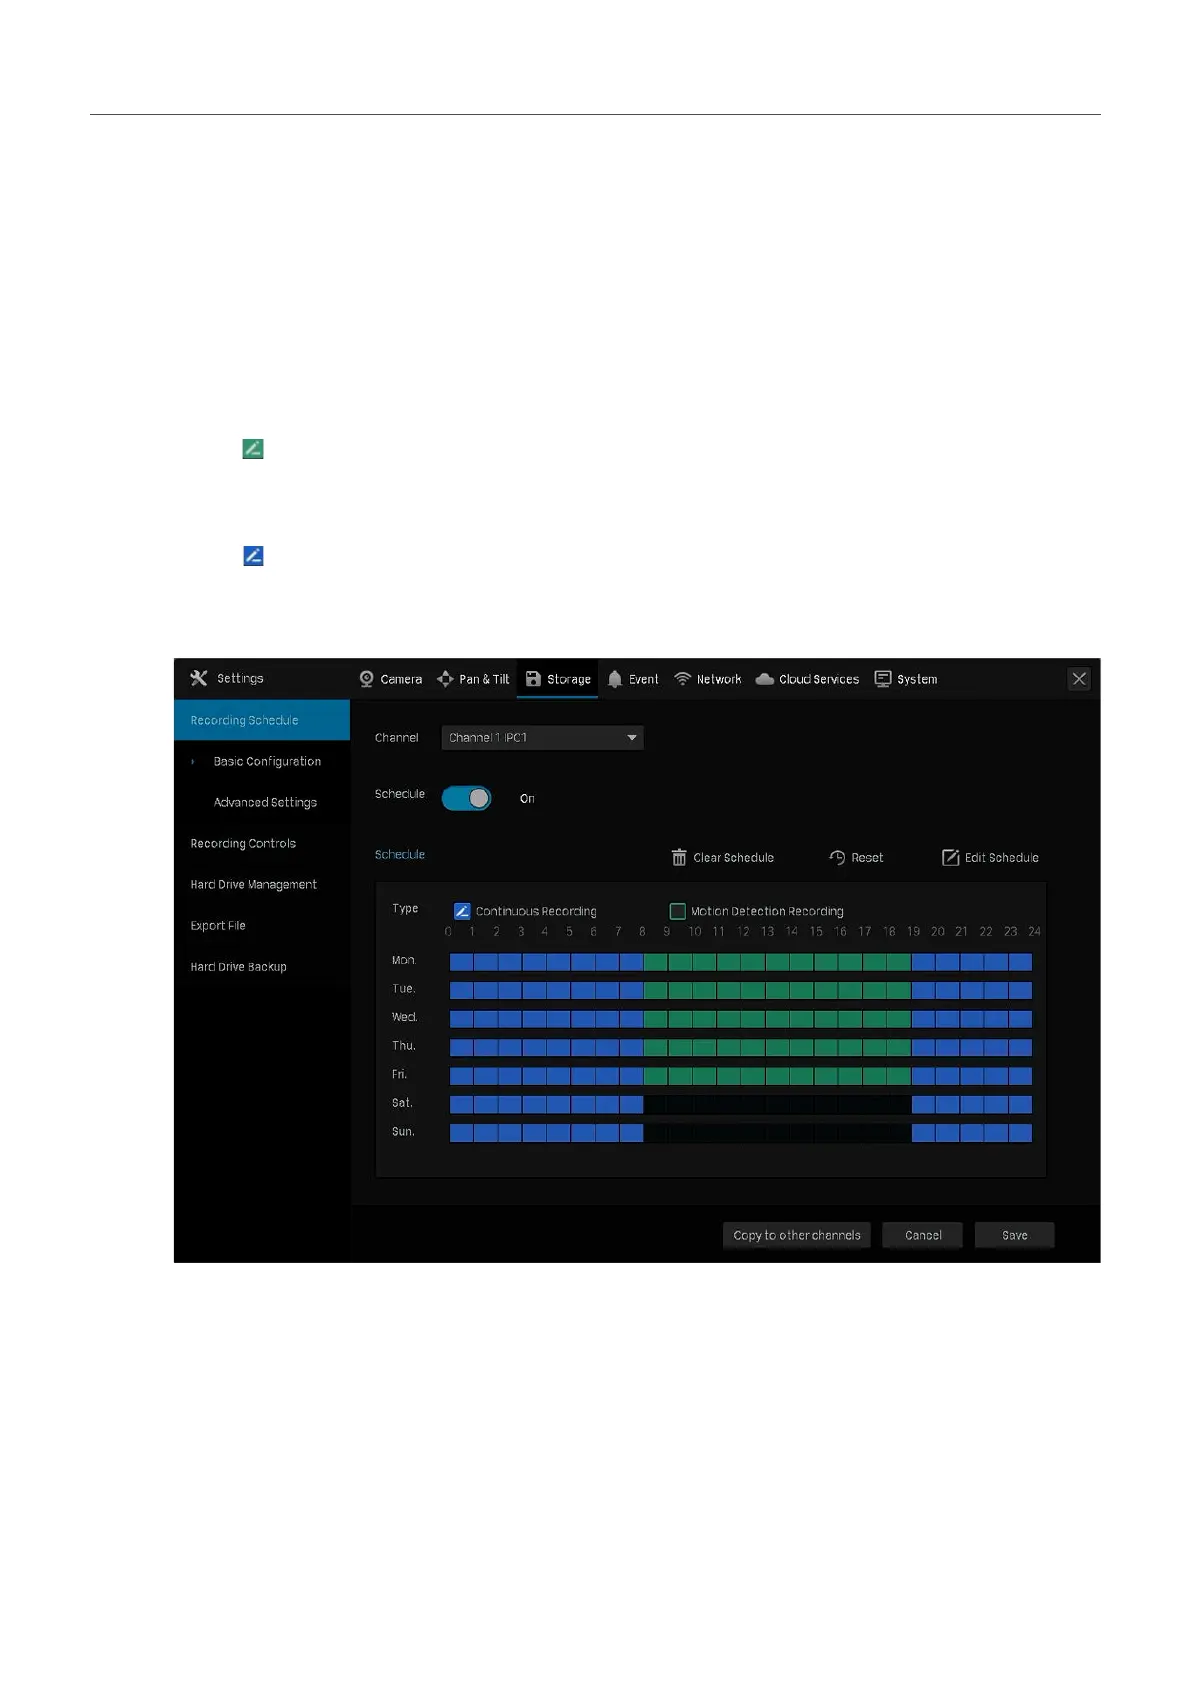
1. Right click on the Live View screen and click Settings in the pop-up main menu, then go to Storage
> Recording Schedule > Basic Configuration.
2. Select the channel from the drop-down list.
3. Enable Schedule. By default, it is enabled.
4. Customize the recording schedule with one of the following methods.
■ Method 1: Via Time Bar
1 ) Select
Motion Detection Recording and drag the cursor on time bar to set 8:00 to 19:00 for
motion detection recording from Monday to Friday. The color of these rectangles will change
from blue to green.
2 ) Select
Continuous Recording and drag the cursor to set 8:00 to 19:00 for no recording on
Saturday and Sunday. The color of these rectangles will be erased.
3 ) Click Save in Basic Configuration to save the settings.

 Loading...