13
4. After the oil has been drained, use a pry bar without
sharp edges to carefully lift up on the transaxle
enough to align drain plug with access hole. Install
the drain plug and tighten to 16 ft-lb (21.8 N-m).
NOTE: Failure to align drain plug with access hole
during removal and installation may cause cross
threading of the plug.
5. Add Synthetic Transaxle Fluid with EP into the fill
plug hole. The lubricant level should be approxi-
mately at the bottom of the plug hole threads.
NOTE: The manufacturer recommends the use of
manufacturer-approved lubricants.
6. Install the fill plug and tighten to 16 ft-lb (21.7 N-m).
7. Re-install lower right A-arm. Tighten to 42 ft-lb
(56.9 N-m).
8. Re-install wheel if removed. Using a crisscross pat-
tern, tighten the lug nuts in 20 ft-lb (27.2 N-m) incre-
ments to a final torque of 40 ft-lb (54.4 N-m) (steel
wheel), 60 ft-lb (81.6 N-m) (aluminum wheel
w/black nuts), or 80 ft-lb (108.8 N-m) (aluminum
wheel w/chrome nuts).
Shift Lever/Shift Cable
CHECKING
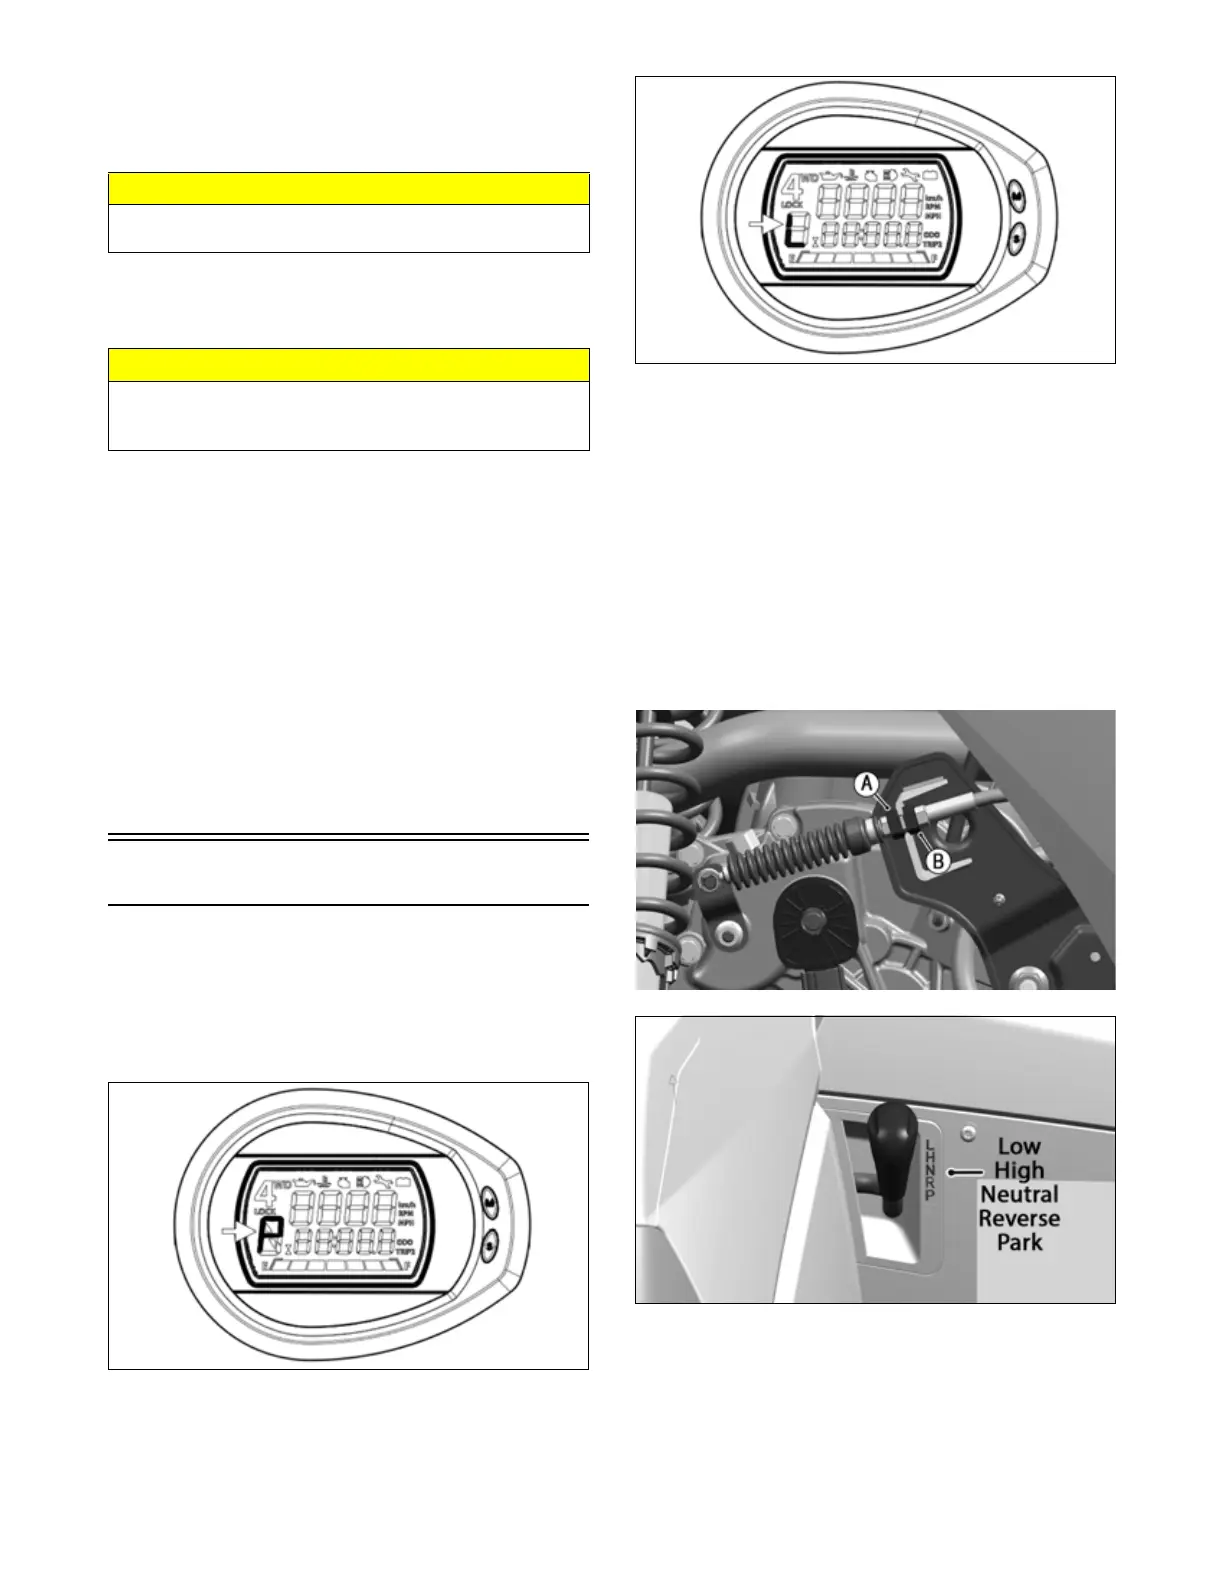
Turn the ignition switch on; then shift the transmission
into Park. The letter P should illuminate on the LCD
gauge and the Park icon (P) should illuminate.
NOTE: The vehicle should not be able to move.
OHA041
Move the shift lever all the way forward. The letter L
should illuminate on the LCD gauge.
OHA041A
If either Park or Low position cannot be reached, the shift
cable must be adjusted.
ADJUSTING SHIFT CABLE
1. Place the transmission in park.
2. Access the threaded cable end under rear right-hand
fender; then loosen and adjust nuts (A) and (B) to
adjust the cable housing so shift lever operates at the
Park and Low positions in the shift lever pocket
range.
NOTE: If the Low position cannot be engaged, the
cable must be shortened by moving the cable adjust-
ment to the right.
OHA089
OHA004
3. Tighten the nuts (A) and (B) to 20 ft-lb (27.1 N-m).
4. Check each gear shift position for proper gear selec-
tion and ensure the proper icon illuminates on the
LCD gauge.
NOTE: If the LCD gauge displays the correct gear,
verify the transmission fully engages into that gear.
CAUTION
Using a pry bar with sharp edges may result in transaxle
case damage.
CAUTION
Inspect the oil for any signs of metal filings or water. If
found, take the vehicle to an authorized dealer for servic-
ing.