112
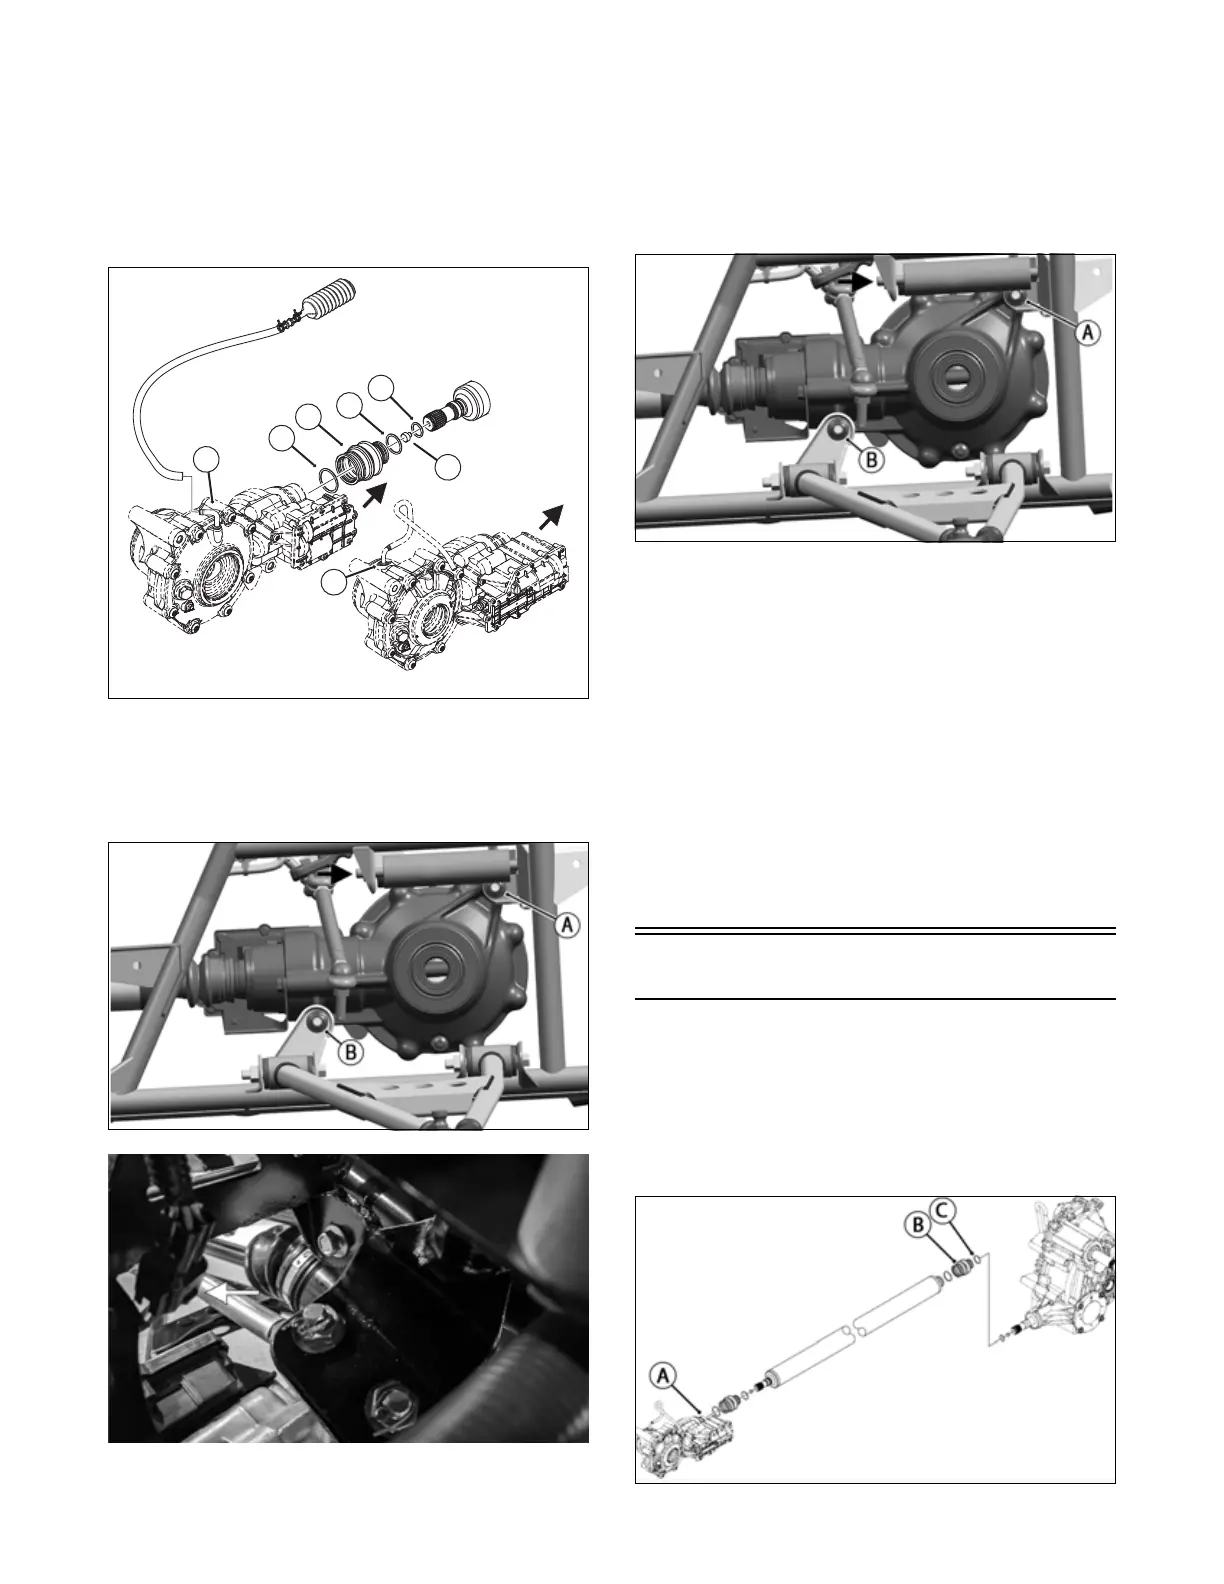
INSTALLING DIFFERENTIAL
1. With the rubber boot (A), O-ring (B), and driveshaft
bumper (C) set in place, place the differential assem-
bly into position in the frame; then grease the splines
for the front driveshaft and engage the front drivesh-
aft to the differential; then gently slide the front dif-
ferential toward the rear of the vehicle; then install
the front differential vent hose.
OHA115A
2. Install the lower differential mounting cap screws
(B). Do not tighten at this time. Reconnect the front
drive actuator connector above the front drive actua-
tor (A) to the main harness and secure with nylon
ties.
OHA075
OHA114
3. Install the upper differential mounting cap screw (A)
with a new lock nut. Tighten to 45 ft-lb (61.2 N-m);
then tighten the lower differential mounting cap
screws to 16 ft-lb (21.8 N-m).
NOTE: Reattach upper A-arm if previously moved
to access upper differential mounting cap screw.
Secure pivot tube to frame with bolt and nut.
OHA075
4. Remove the fill plug and pour the recommended
amount of lubricant into the differential; then install
the fill plug. Tighten to 16 ft-lb (21.8 N-m).
5. Verify the location of the O-rings for the axles; then
install the front axles. See Drive Axles section.
6. Apply a light coat of multi-purpose grease to the hub
splines; then install the hubs (see Hub Assembly in
this section).
7. Install the wheels and tighten the wheel nuts using a
crisscross pattern in 20 ft-lb increments to a final
torque of 40 ft-lb (steel wheel), 60 ft-lb (aluminum
wheel w/black nuts), or 80 ft-lb (aluminum wheel
w/chrome nuts).
8. Remove the vehicle from the support stand.
Driveshaft
REMOVING
1. Remove the front differential (A) as described in the
Front Differential section.
2. Uncouple the driveshaft boot (B) from the transaxle
front output. Account for the O-rings (C) for the
driveshaft-to-transaxle coupler.
MODC077