133
Front A-Arms
REMOVING
1. Secure the ATV on a support stand to elevate the
front wheels; then remove the wheels.
2. Remove the cotter pin from the hub nut. Discard the
cotter pin.
XR099
3. Remove the nut securing the hub.
4. Remove the brake caliper (A). Account for two cap
screws. Remove the clips securing the brake line
hose to the upper A-arms.
NOTE: Do not allow the brake caliper to hang from
the cable/hose.
5. Remove the hub assembly (B).
OHA086
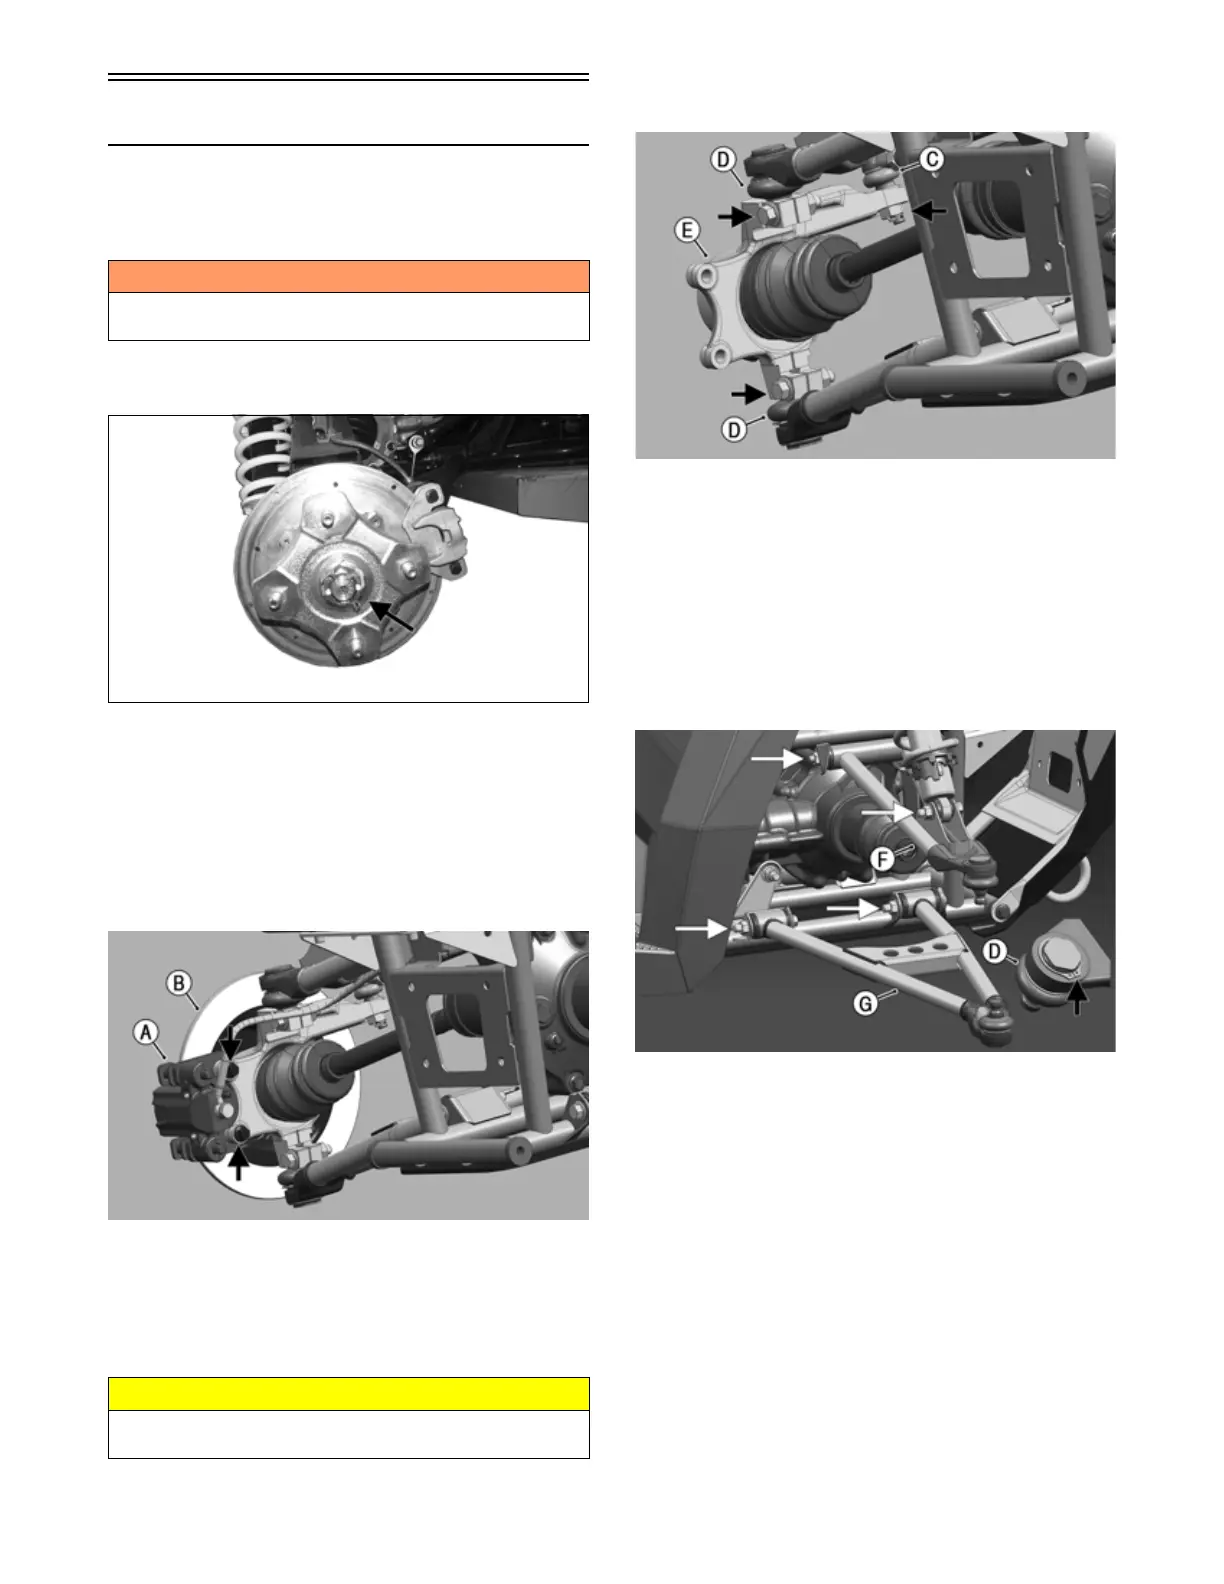
6. Remove the cotter pin and nut securing the tie rod
end (C) to the knuckle (E); then remove the tie rod
end from the knuckle.
7. Remove the cap screws securing the ball joints (D) to
the knuckle (E).
8. Tap the ball joints out of the knuckle; then remove
the knuckle.
OHA087
9. Remove the lower shock absorber eyelet from the
upper A-arm (F).
10. Remove the cap screw securing the upper A-arm (F)
and two cap screws securing lower A-arm (G) to the
frame.
11. Remove the snap ring from the ball joint (D); then
remove the ball joint from the upper and lower
A-arm.
NOTE: Tap ball joint to loosen Loctite.
OHA088
12. If being serviced, remove the inserts and sleeve from
the A-arm. Reinstall serviced or new inserts and
sleeve.
! WARNING
Make sure the ATV is solidly supported on the support
stand to avoid injury.
CAUTION
Support the knuckle when removing the cap screws or
damage to the threads will occur.