27
Shift Cable
REMOVING
1. Remove the seat, right-hand side panel, front fender
panel and storage compartment box. Note routing of
shift cable and cable tie locations.
2. Remove the cap screw and lock nut securing the shift
cable to the shift lever. Loosen the jam nut securing
the shift cable to the shift bracket. Remove the shift
cable.
OHA090
3. Remove the E-clip securing the shift cable to the
transaxle.
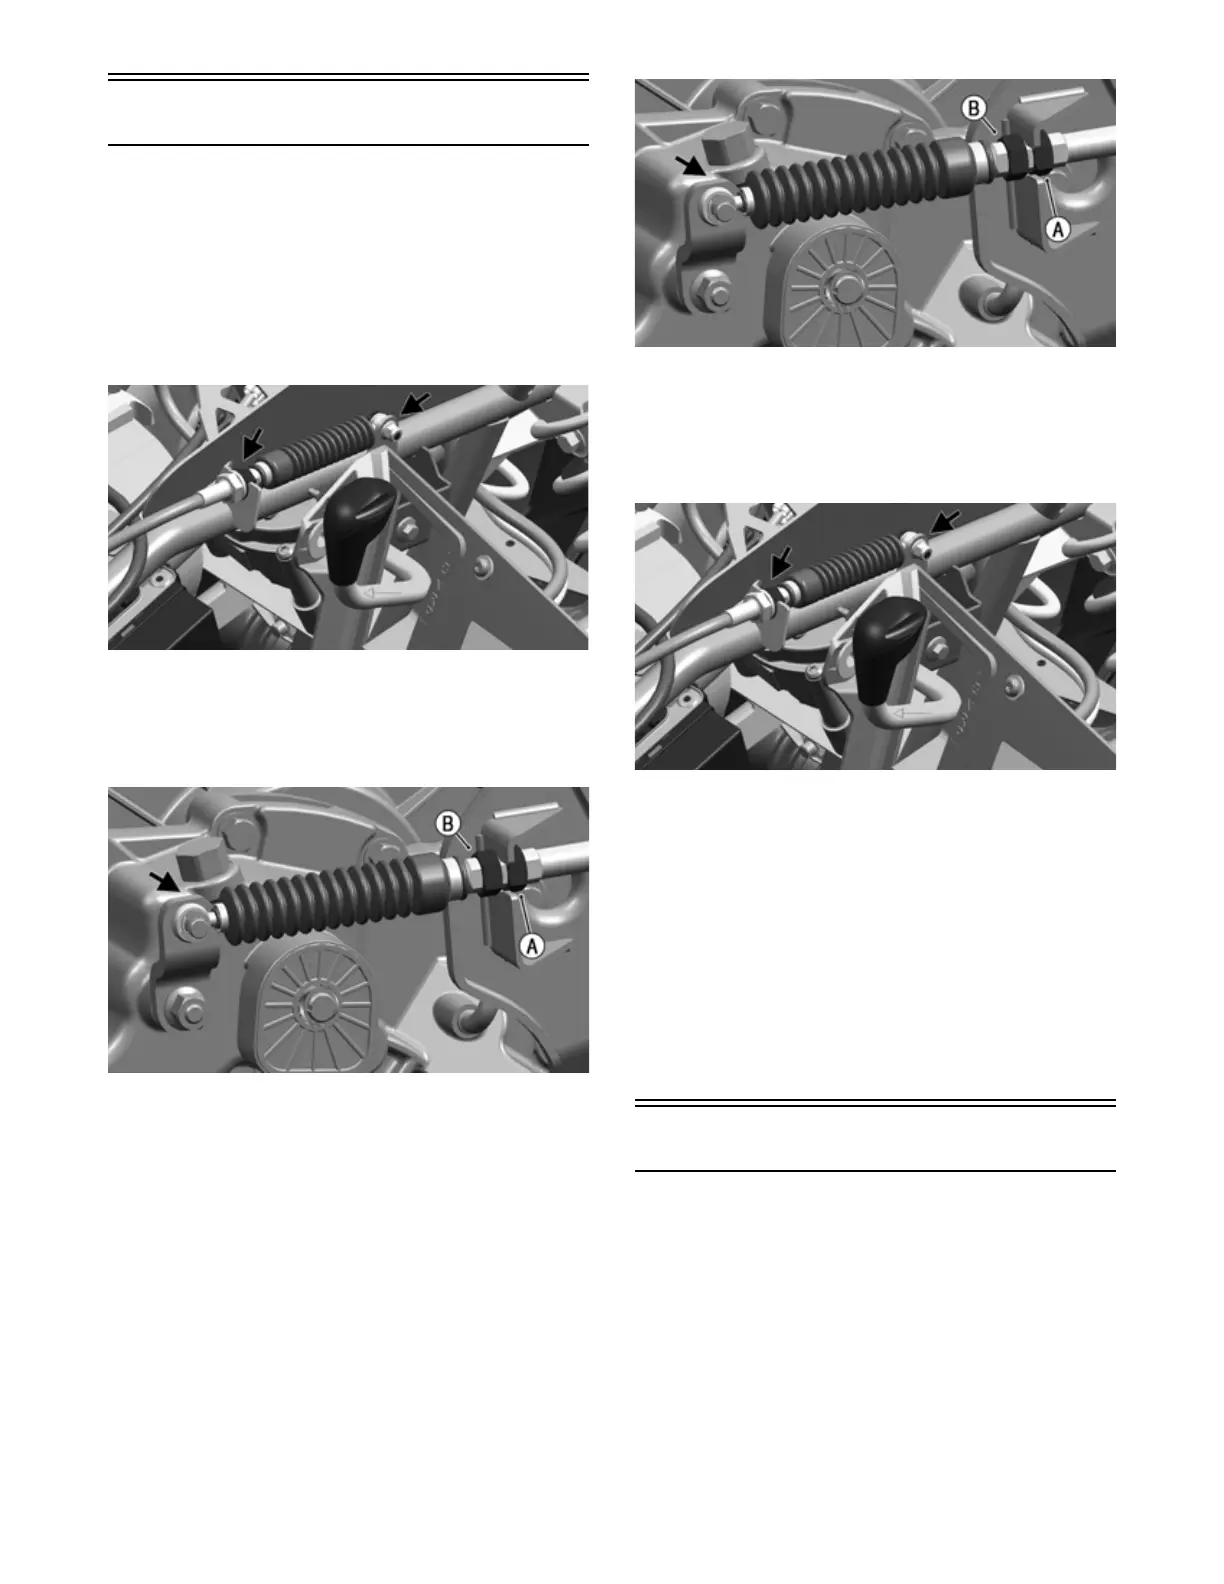
4. While holding the nut (B), loosen the jam nut (A)
and remove the shift cable from the transaxle.
OHA071
INSTALLING
1. Install the new shift cable in place using the routing
noted in the above steps for Removing. Guide the
shift cable nut and jam nut into the shift cable
bracket. Install the cable end to the shift arm stud and
secure with a new E-clip. Finger-tighten the jam nut
(A) at this point.
OHA071
2. Guide the shift cable into the frame bracket. Secure
with jam nut. Finger-tighten at this point. Install the
shift cable end to the shift lever ear and secure with
the cap screw and new lock nut. Tighten to 8 ft-lb
(10.8 N-m). Tighten jam nut to 20 ft-lb (27.1 N-m).
OHA090
3. Fasten the shift cable to the chassis with the previ-
ously noted cable tie locations.
4. Shift the transmission through all positions. Make
sure each gear position illuminates on the LCD
gauge when the appropriate gears are selected and
that the Park indicator illuminates only when the
transmission is fully in Park. Adjust as necessary.
5. Adjust the shift cable (see the Periodic Mainte-
nance/Tune-up section). After the cable is properly
adjusted, tighten the jam nuts to 20 ft-lb (27.1 N-m).
6. Install the storage compartment box, front fender
panel, right-hand side panel, and seat.
Front Bumper — Inner
REMOVING
NOTE: If equipped, remove front brush guard by
removing bottom skid plate screws holding brush
guard, then remove top bolts and nuts from clips
holding brush guard to rack. Replace skid plate
screws. Remove winch.