16
Checking/Replacing V-Belt
REMOVING
1. Remove seat, gas cap, and left side panel and foot-
well (see Steering/Body/Controls).
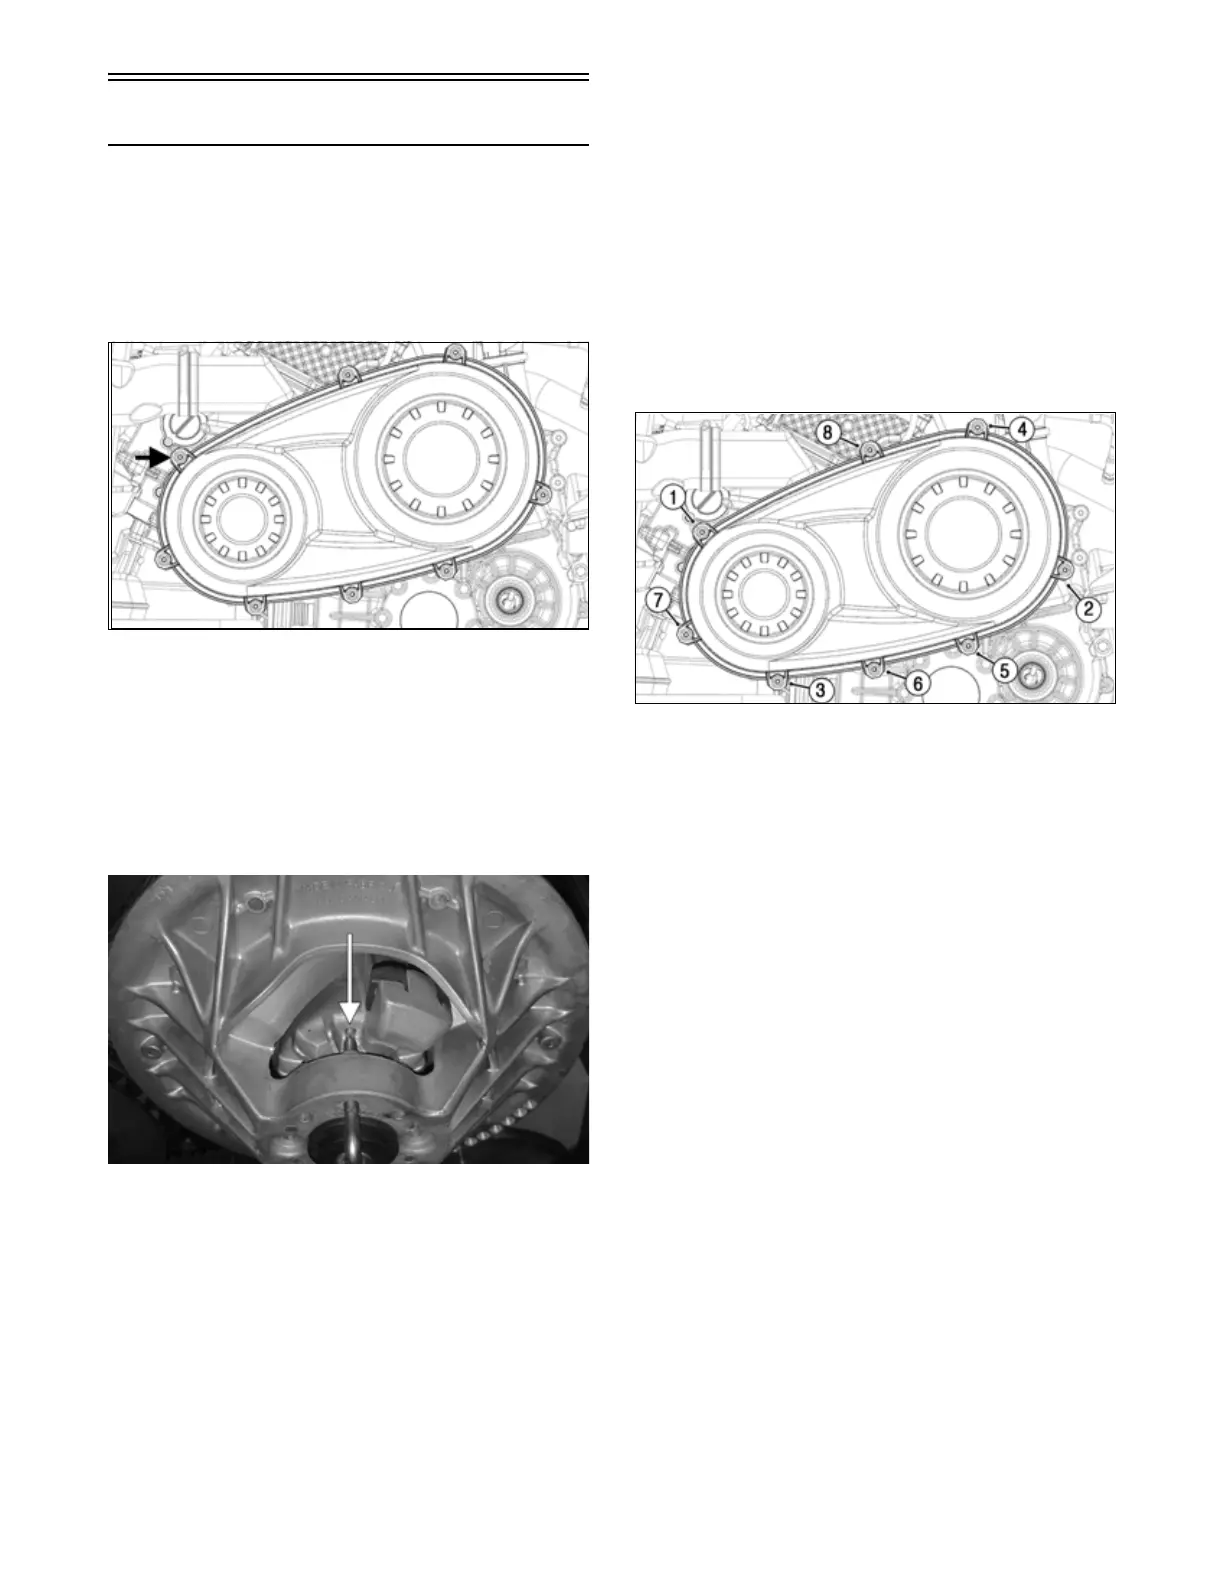
2. Remove the eight screws securing the CVT cover;
then using a rubber mallet, gently tap on the cover
tabs to loosen the cover. Remove the cover.
OHA047
3. Thread the Belt Removal/Installation Tool (not
included) clockwise into the driven clutch until the
movable sheave opens far enough to remove the
drive belt.
NOTE: When inserting the tool, make sure the tool
is seated on the flat portion of the movable sheave and
not on the rib or the cam shoe boss. The movable
sheave may need to be rotated in order to correctly
align the tool with the flat portion of the sheave.
ZR-401
4. When the sheaves are apart, pull up on drive belt and
roll belt over stationary sheave until it is free of the
driven clutch.
5. When the belt is free of driven clutch, remove the
belt from the drive clutch.
CHECKING
Use the Drive Belt Gauge to identify any abnormal wear.
Measure across the top of the V-belt (in multiple loca-
tions) using a Vernier caliper. Do not squeeze the belt as
doing so may produce an inaccurate measurement. The
V-belt must be at least 30.8 mm at any point.
INSTALLING
1. Place the belt (so the arrow is pointing toward the
front of the vehicle) between the sheaves of the drive
clutch.
2. With the driven clutch sheaves fully apart, roll the
belt over the stationary sheave.
3. With the drive belt properly positioned in the drive
clutch and driven clutch, turn the belt tool counter-
clockwise and roll the belt back and forth to allow
the driven clutch sheaves to fully close.
4. Install the CVT cover and secure with the cap
screws. Tighten the cap screws in sequence shown to
24 in-lb (2.7 N-m).
OHA047A
5. Install the left-hand footwell and side panel (see
Steering/Body/Controls).
6. Install seat.