59
Installing Engine
1. Carefully place engine down into position using
blocks to aid in locating proper height. Replace any
shims used to properly locate engine in chassis in
previously marked locations.
2. Install the right-side mounting plate and secure to
engine with two bolts. Tighten to 45 ft-lb (61 N-m).
Then install two new front engine mounting bracket
lock nuts on engine mounting studs. Tighten to 35
ft-lb (47.5 N-m).
OHA142
3. Install the left-side mounting bracket and secure to
engine with cap screws. Tighten to 45 ft-lb (61 N-m).
Then install two bolts through left-side mounting
bracket and transaxle, and secure with two new lock
nuts on right-side plate. Tighten to 75 ft-lb (101.7
N-m). Remove blocks.
NOTE: If additional alignment is needed to insert
bolts, gently use a suitable tool to pry up under the
engine or transaxle, using extreme care not to damage
either.
OHA141
OHA142B
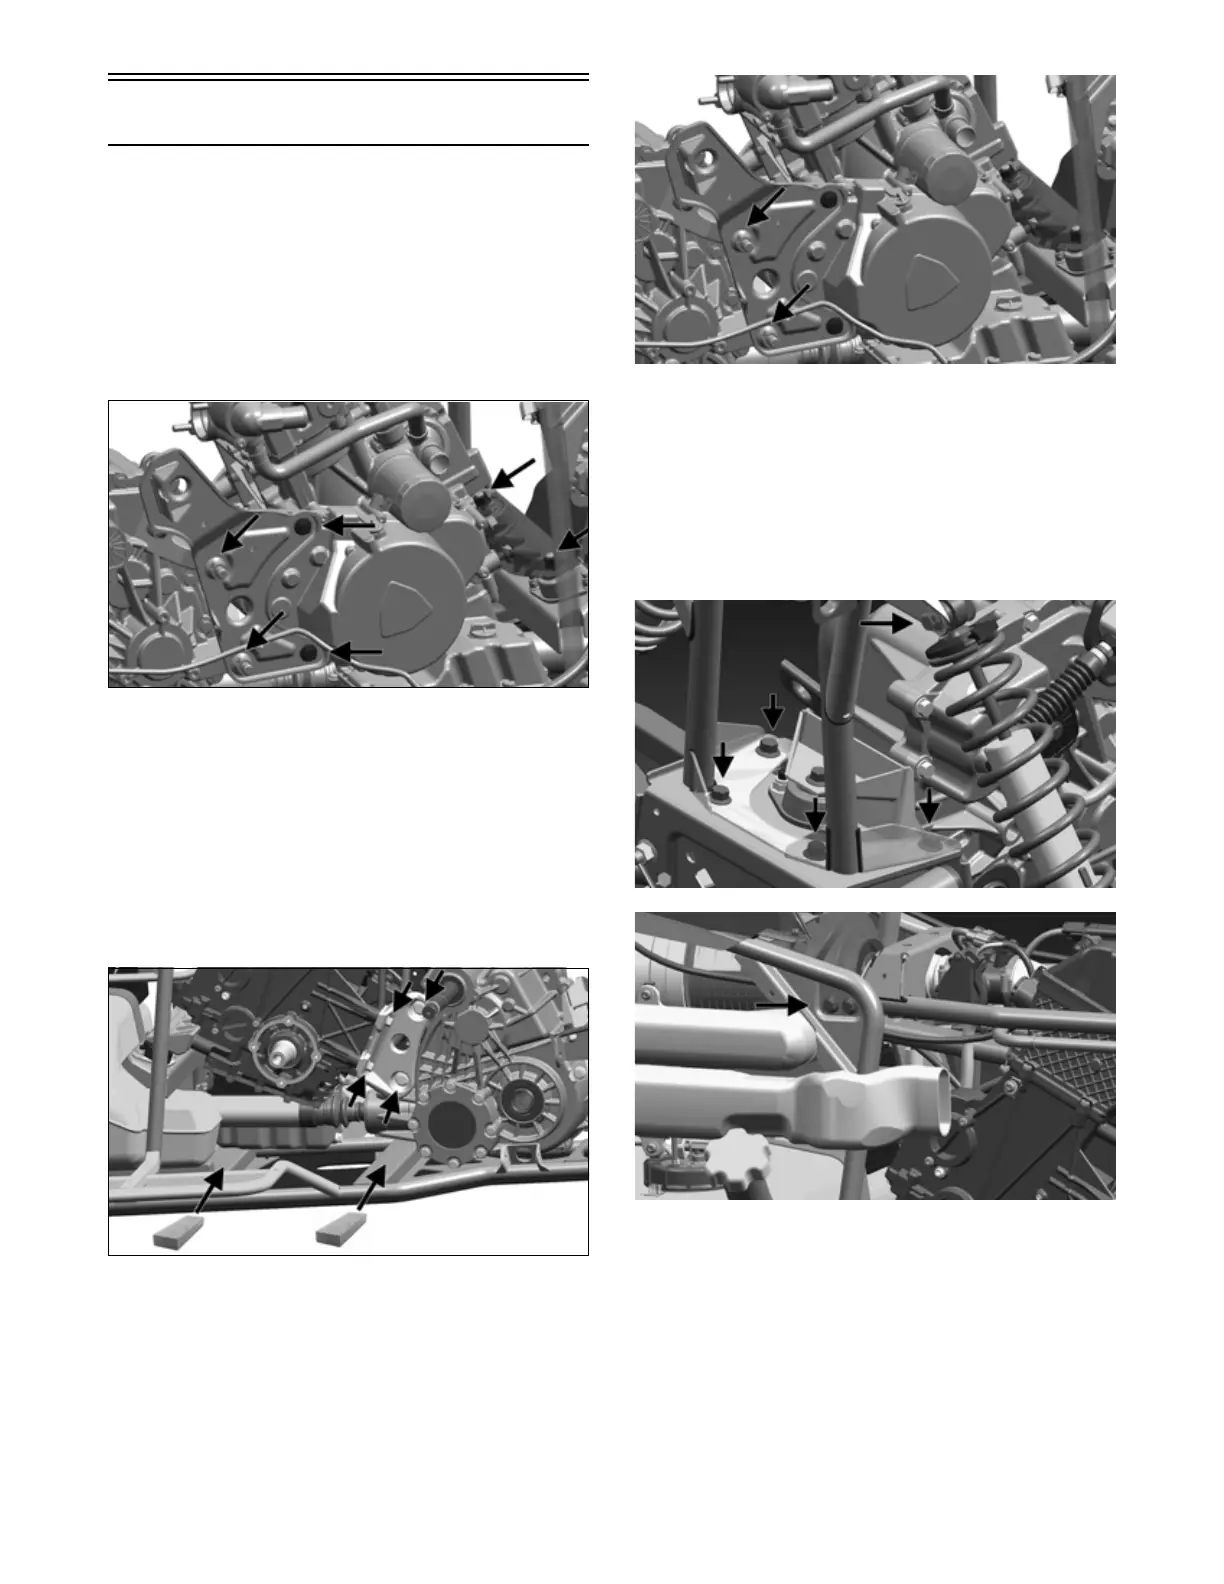
4. Place upper frame into position and secure front with
cap screws. Tighten to 35 ft-lb (47.5 N-m). Secure
rear upper frame to lower frame with four cap screws
and new nuts. Tighten to 42 ft-lb (56.9 N-m). Secure
upper rear shocks to frame with bolts and new lock
nuts. Tighten to 42 ft-lb (56.9 N-m).
NOTE: If muffler was removed, reattach to upper
frame.
OHA116
OHA117
5. Assemble exhaust pipe to engine, account for seal,
and secure with new lock nuts. Do not tighten at this
time. Then with gasket and exhaust pipe square to
muffler, secure with springs. Tighten engine-side
lock nuts to 20 ft-lb (27.1 N-m).
NOTE: It is important that the exhaust pipe and
gasket attachment to the muffler is square to prevent
exhaust leaks.