29
INSTALLING
1. Install muffler shield if needed. Account for spring
and flat washers and tighten screws to 10 ft-lb (13.6
N-m). Position the muffler in place with top brackets
placed in frame grommets.
2. Position right and left lower attachment point brack-
ets on lower muffler attachment pins and secure to
frame with four screws.
3. Install the exhaust gasket, attach exhaust pipe and
secure with springs.
4. Re-tighten nuts securing exhaust pipe to engine to 20
ft-lb (27.1 N-m).
Headlights — Taillight
HEADLIGHTS
NOTE: The bulb portion of the headlight is fragile.
HANDLE WITH CARE. When replacing the head-
light bulb, do not touch the glass portion of the bulb.
If the glass is touched, it must be cleaned with a dry
cloth before installing. Skin oil residue on the bulb
will shorten the life of the bulb.
To replace the headlight bulb, use the following proce-
dure:
1. Disconnect the wiring harness; then remove the rub-
ber boot from the headlight assembly.
MOD046
MOD096
2. Remove the old H4 bulb by unlocking the spring;
then insert the new bulb into headlight assembly and
lock the spring to secure the bulb.
MOD097A
3. Install the rubber boot, making sure it is sealed
around the bulb. Connect the wire harness.
MOD098A
4. Adjust the headlight (see Checking/Adjusting Head-
light Aim in this sub-section).
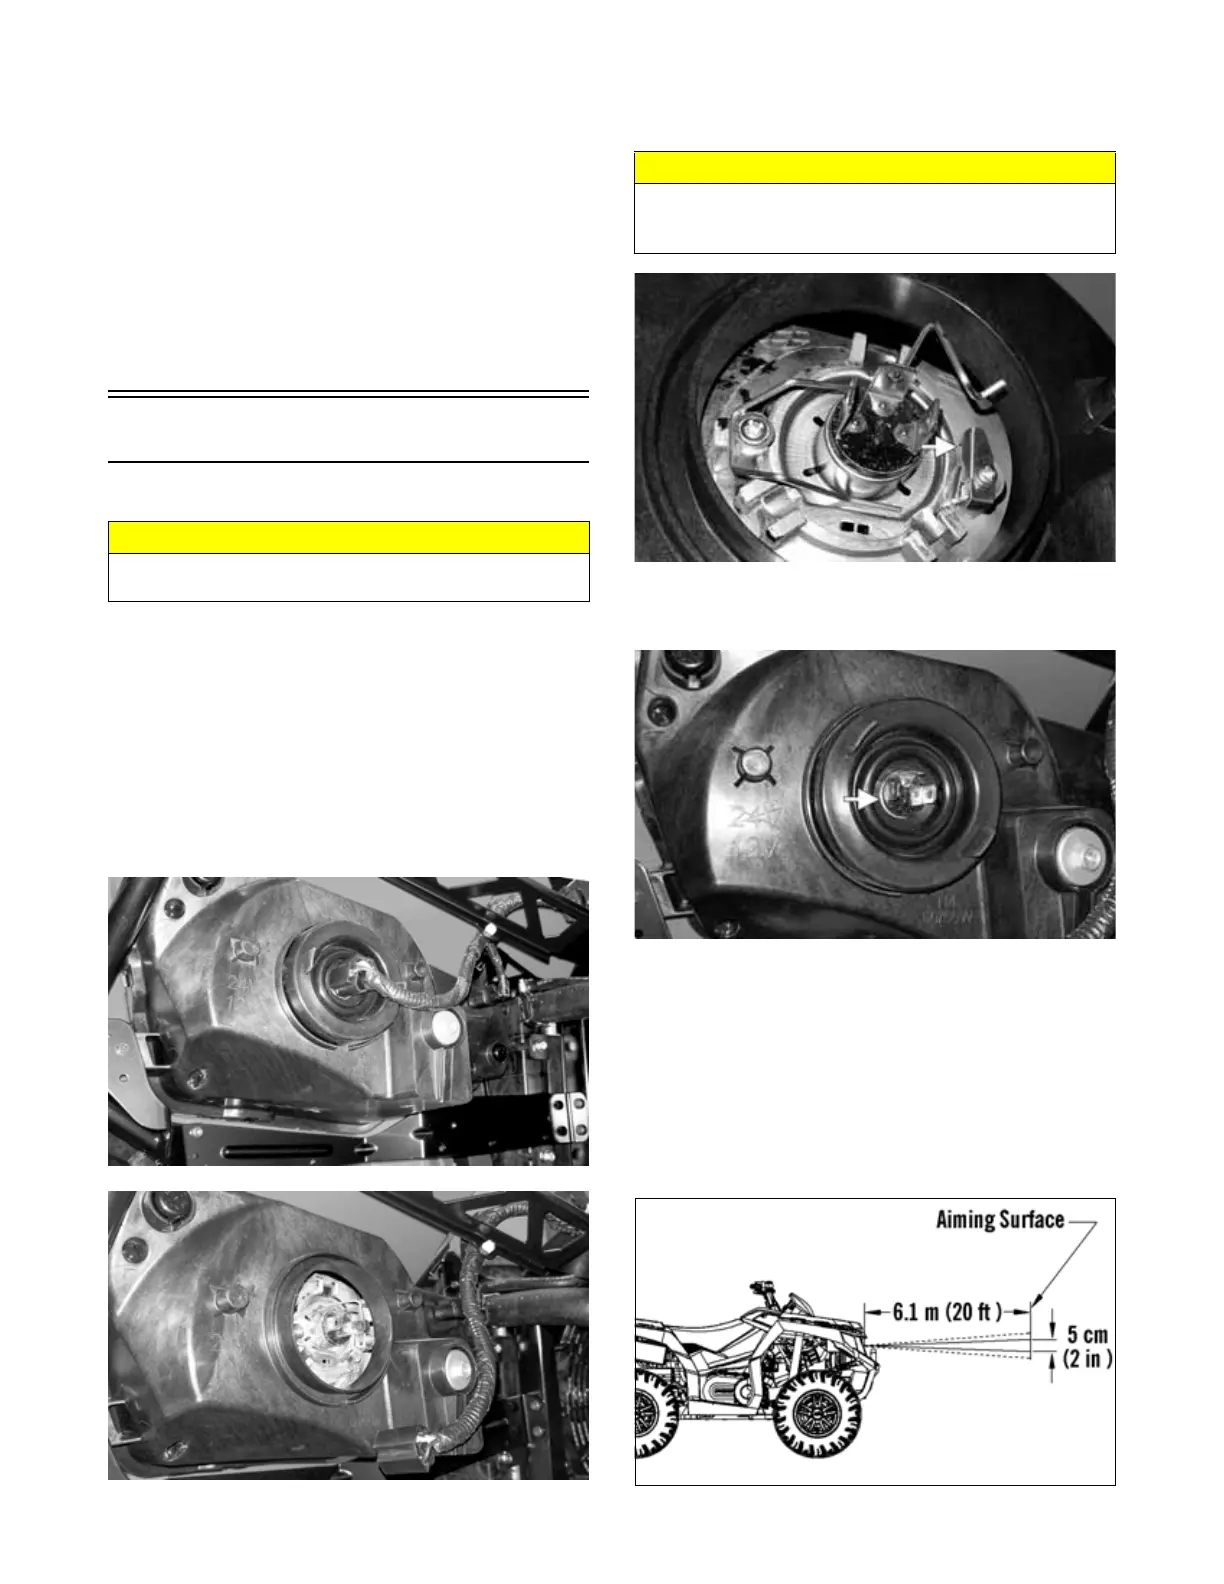
Checking/Adjusting Headlight Aim
The headlights can be adjusted vertically and horizon-
tally. The geometric center of the HIGH beam light zone
is to be used for vertical and horizontal aiming.
1. Position the ATV on a level floor so the headlights
are approximately 20 ft. (6.1 m) from an aiming sur-
face (wall or similar aiming surface).
0748-548
CAUTION
Use only specified bulbs indicated in the Specifications
chart as replacement bulbs.
CAUTION
When replacing the headlight bulb, be careful not to
touch the glass portion of the bulb. Grasp the new bulb
with a clean rubber glove.