64
Removing Drive and Driven
Clutch
NOTE: If only removing drive and driven clutch,
remove seat, left-hand side panel and left-hand foot-
well (see Steering/Body/Controls section).
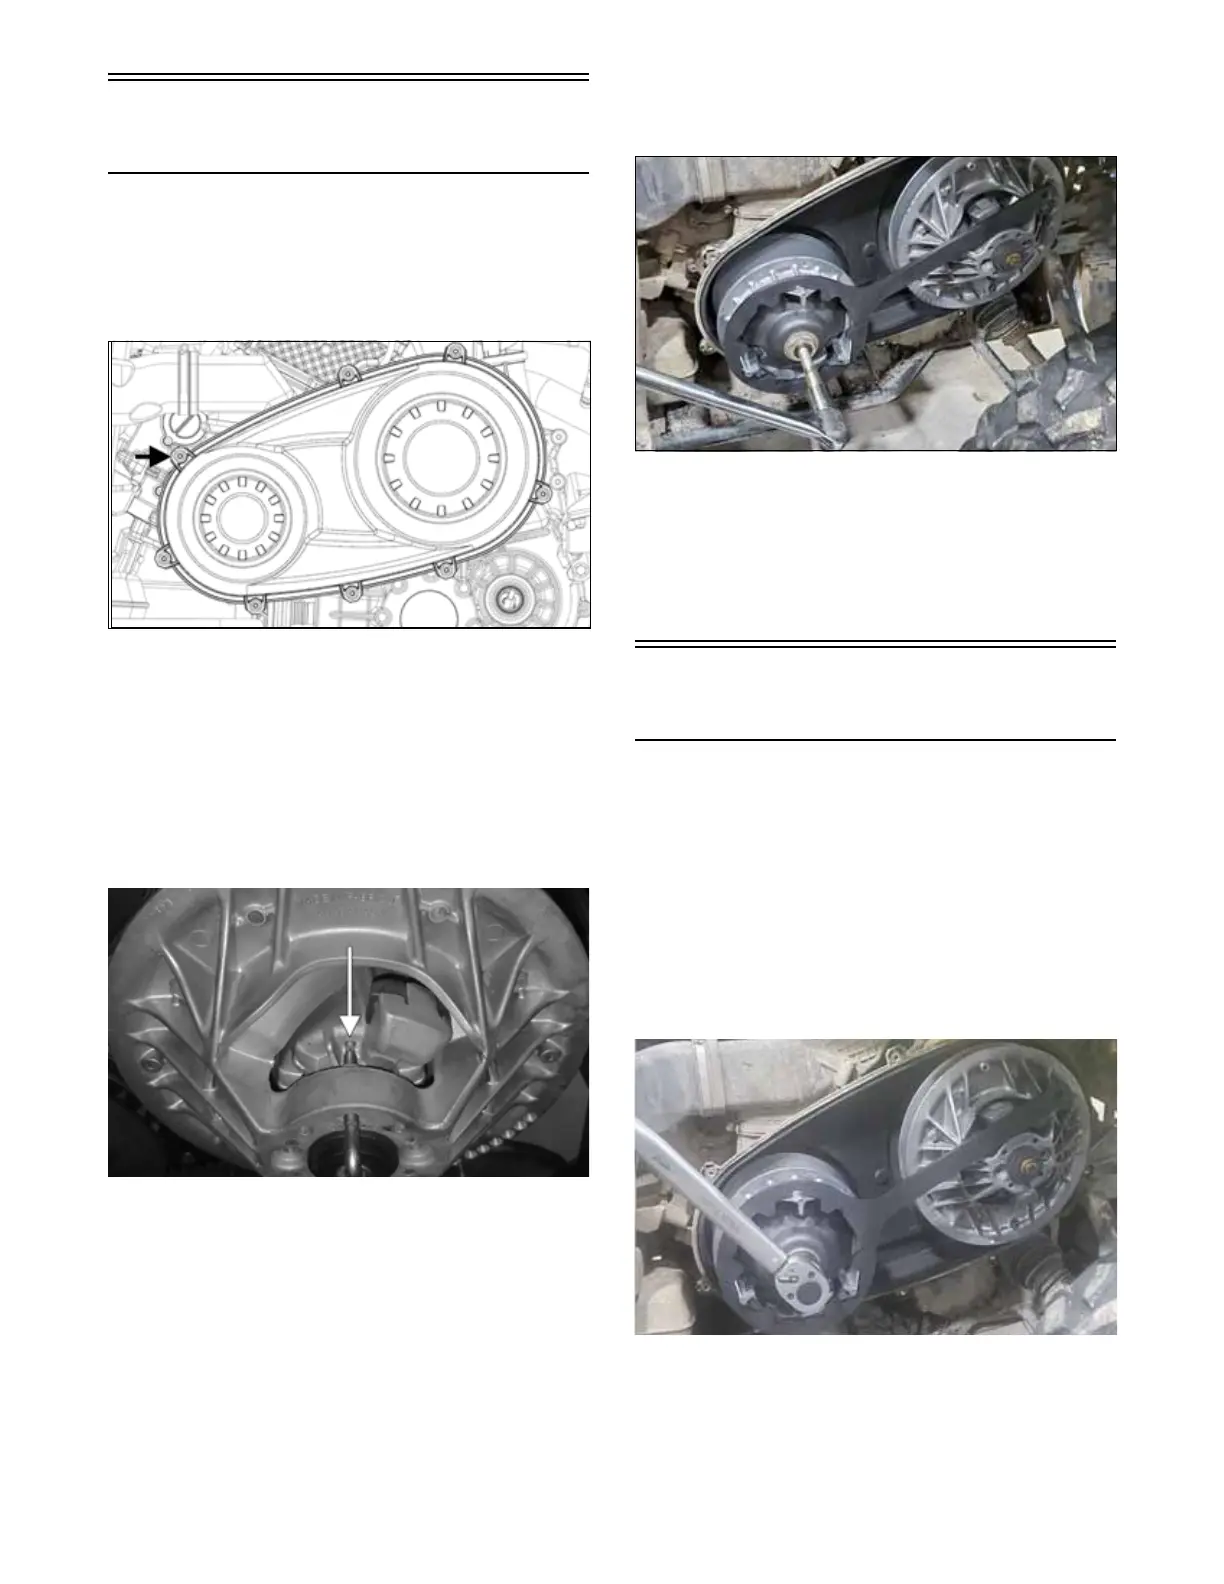
1. Remove the eight screws securing the CVT cover.
Remove the cover.
OHA047
2. Thread the Belt Removal/Installation Tool (not
included) clockwise into the driven clutch until the
movable sheave opens far enough to remove the
drive belt.
NOTE: When inserting the tool, make sure the tool
is seated on the flat portion of the movable sheave and
not on the rib or the cam shoe boss. The movable
sheave may need to be rotated in order to correctly
align the tool with the flat portion of the sheave.
ZR-401
3. When the sheaves are apart, pull up on drive belt and
roll belt over stationary sheave until it is free of the
driven clutch, then remove belt.
4. Using the Drive Clutch Retention Tool, remove the
bolt and washer securing the drive clutch to the
crankshaft.
5. Using the Drive Clutch Puller and the Drive Clutch
Retention Tool, tighten the puller. If the drive clutch
will not release, sharply strike the head of the puller.
Repeat this step until the clutch releases.
NOTE: Before installing the clutch puller, apply oil
to the threads of the puller and a small amount of
grease to the tip of the puller.
VTA086
6. Remove the drive clutch from the engine compart-
ment.
7. Remove the cap screw and washer securing the
driven clutch to the driven shaft. Slide the driven
clutch off the shaft. Account for shims on the driven
shaft.
Installing Drive and Driven
Clutch
1. Install the driven clutch onto the driven shaft. Secure
using the cap screw and washer. Tighten to 60 ft-lb
(81.3 N-m).
NOTE: Before installing the drive clutch, be sure to
wipe clean both the crankshaft taper and clutch
mounting taper using a clean towel.
2. Place the drive clutch into position on the crankshaft.
3. Using the Drive Clutch Retention Tool (resting on
the driven clutch) to hold the drive clutch, tighten
the nut to 147 ft-lb (200 N-m)..
VTA081