8
OHA027
6. After the lid is removed, check the interior portion of
the lid for mud and debris to assess the state of the air
filter. The center portion should be clean. Next,
remove the filter through the same path as the lid and
pull it out of the wheel well.
OHA028
NOTE: Once the filter has been removed, lightly
tap the filter to remove any dust particles or contami-
nants from the filter. If the filter is excessively covered
in dust particles and contaminants, it must be
replaced.
7. Plug the engine intake tube with a clean shop towel.
Then clean the inside of the air filter housing.
OHA029
NOTE: Verify the shop towel has been removed
from the intake tube before continuing.
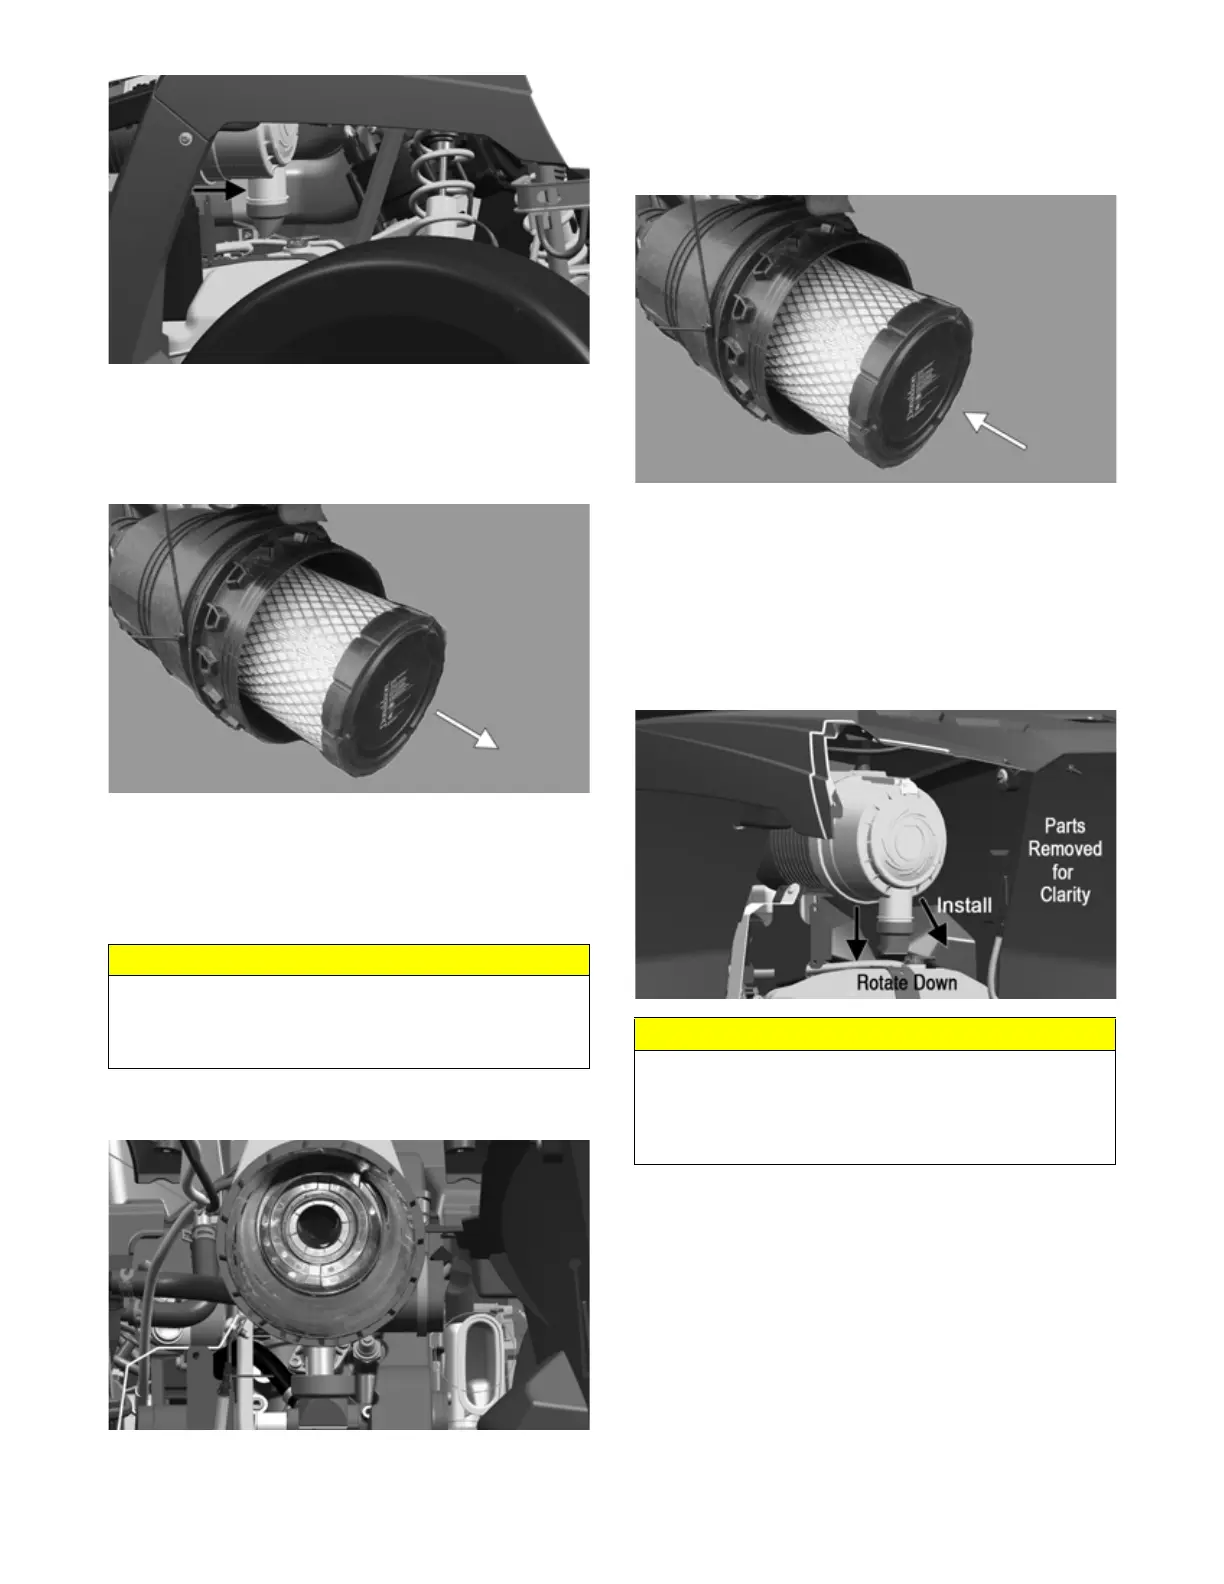
8. Remove the shop towel from the intake tube. Insert
the filter the same way as removed making sure to
push the filter all the way in toward the engine intake
tube with the open end of the filter not visible at the
front of the air box.
OHA030
9. While pushing the coolant lines out of the way,
replace the air box lid by pushing the duckbill first
and rotating the lid until it is completely around the
filter. Work the lid on with the duckbill positioned 15
degrees off vertical (see illustration OHA031). Twist
the lid 15 degrees clockwise until able to push the
yellow latch in and lock the lid in place. When
installed the lid should have the duckbill facing
downward and vertical to the vehicle.
OHA031
10. Replace the winch solenoid or emergency shutoff
switch (if applicable).
11. Re-tighten the two Torx T40 bolts in the forward
storage compartment. Replace the right-side panel
and seat.
CAUTION
Do not use compressed air to clean the paper element.
This may cause tears in the element and allow particles
to enter the combustion chamber, leading to acceler-
ated engine wear.
CAUTION
A torn air filter can cause damage to the engine. Dirt
and dust may get inside the engine if the element is
torn. Carefully examine the element for tears before
and after cleaning it. Replace a torn element with a new
one.