3 Setup
Note – Use a circuit-breaker (not supplied) between the external power supply and the power
supply network to protect your equipment against voltage fluctuations.
Note – Once the instrument is turned on, on the touch screen either the Battery icon appears if
there is fully charged battery installed, or the Power Supply icon appears indicating that the
external power supply is being used.
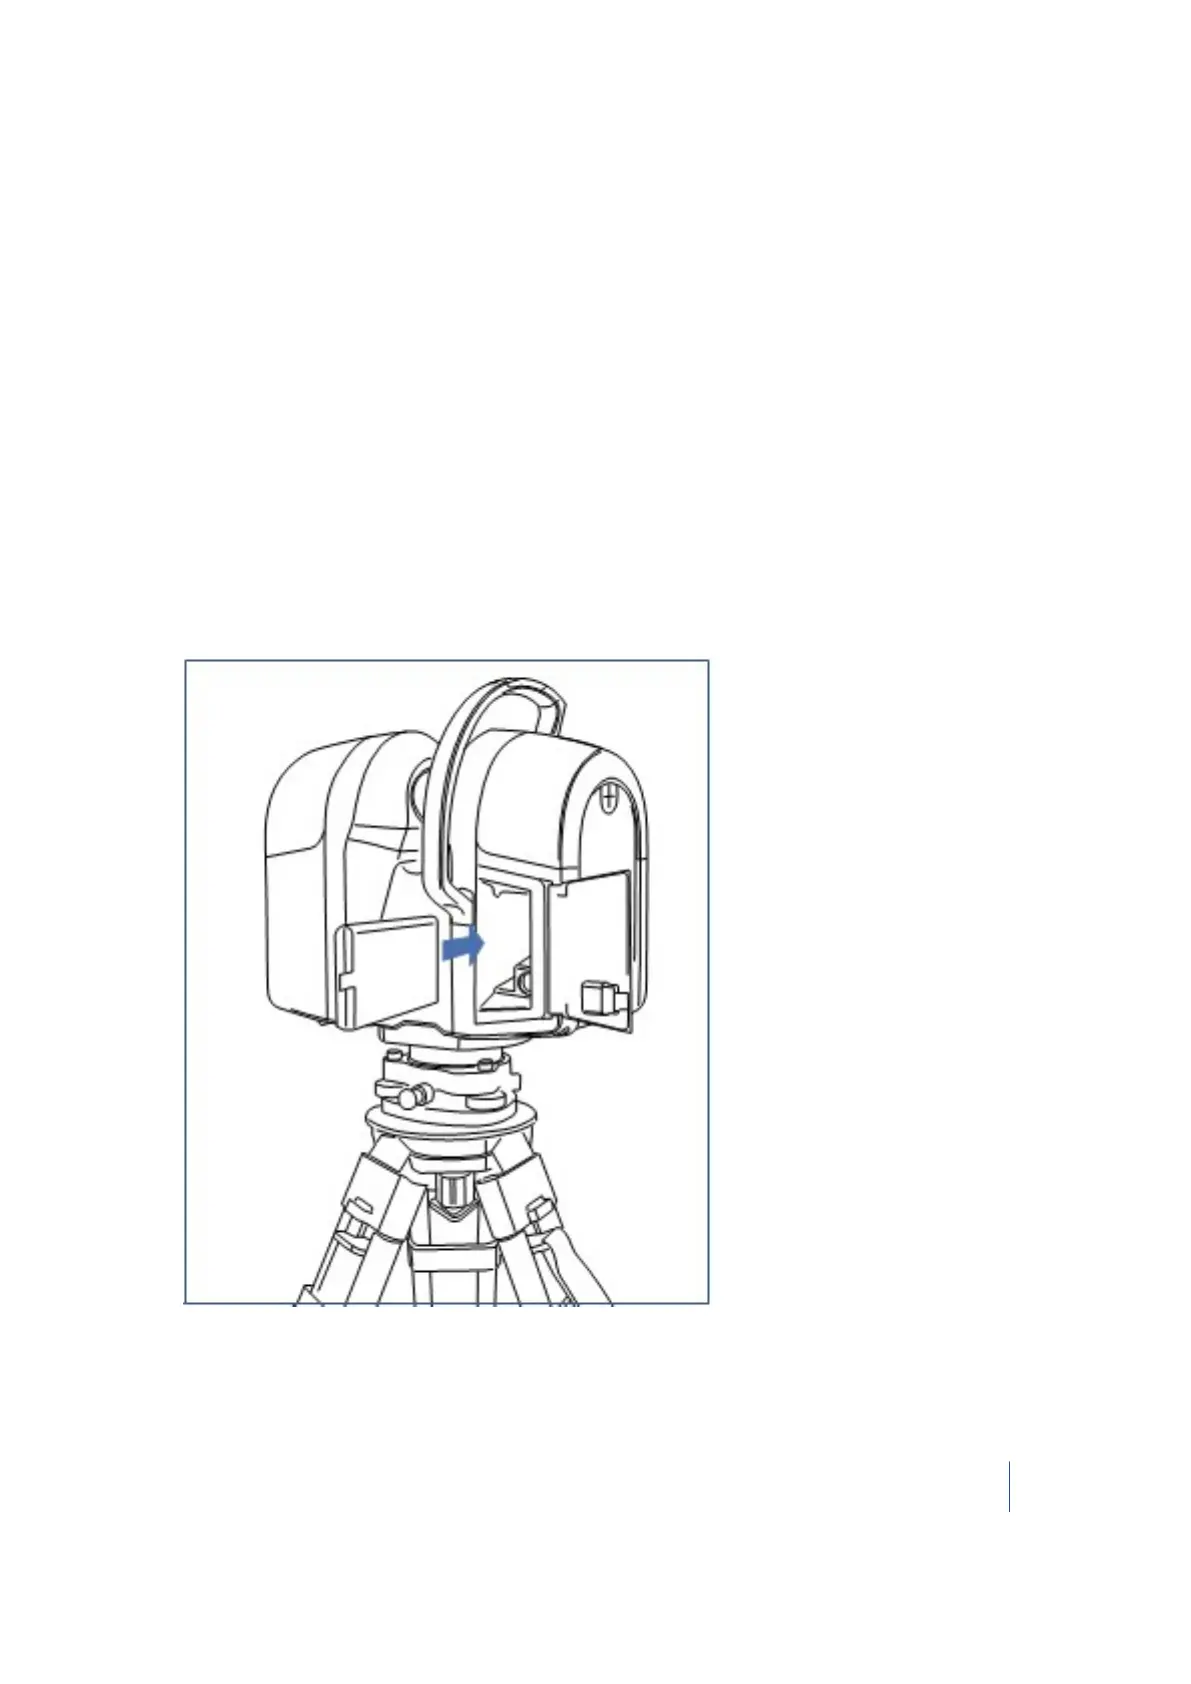
Inserting a battery
The smart battery fits into the battery compartment on the back of the instrument. It can be easily
removed and replaced.
1. Ensure that the instrument is turned off.
2. Release the latch of the battery compartment door.
3. Open the battery compartment door.
4.
Insert the battery into the battery compartment with the battery connectors positioned
towards the bottom of the instrument:
5. Close the battery compartment door.
Note – Once the instrument is switched on, the power supply icon on the touch screen indicates
that the instrument is powered by battery.
Trimble TX8 3D Laser Scanner User Guide 45