DocNo.FM0410issueM‐1Page20
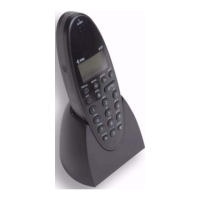
BASE FIXED TO WALL
LOCATE TOP TWO CLIPS FIRST
NOTE
ENSURE THE PULLCORD
IS LOCATED IN THESE
SLOTS
SWING
DOWNWARD
AND CLIP
TOGETHER
INSERT THE TRIANGLE PEGS
INTO THE BASE CLIPS.
APPLY MORE FORCE TO
ONE PEG, WHILE GENTLY
LIFTING THAT SIDE OF THE LID.
THEN APPLY FORCE TO THE
OTHER CLIP, SIMULTANEOUSLY
LIFTING THE LID.
LIFT LID
OUTWARDS
FROM
LOWER EDGE
13.FITTING&REMOVINGTHEINTERCOMFRONT
Beforefittingtheintercomfront;settheAddressandOptionsDILswitchesandchecklinksLK1‐3arefittedinthecorrect
positions.Ensureallcablesareproperlyterminatedandsecuresparewiresintheclipsprovided.
FITTING THE INTERCOM FRONT
Locatethe2topcornersoftheintercomfrontoverthe2topcornersoftheintercomback,swingdownwards andclip
togetherensuringthepullcordislocatedinitsslots.
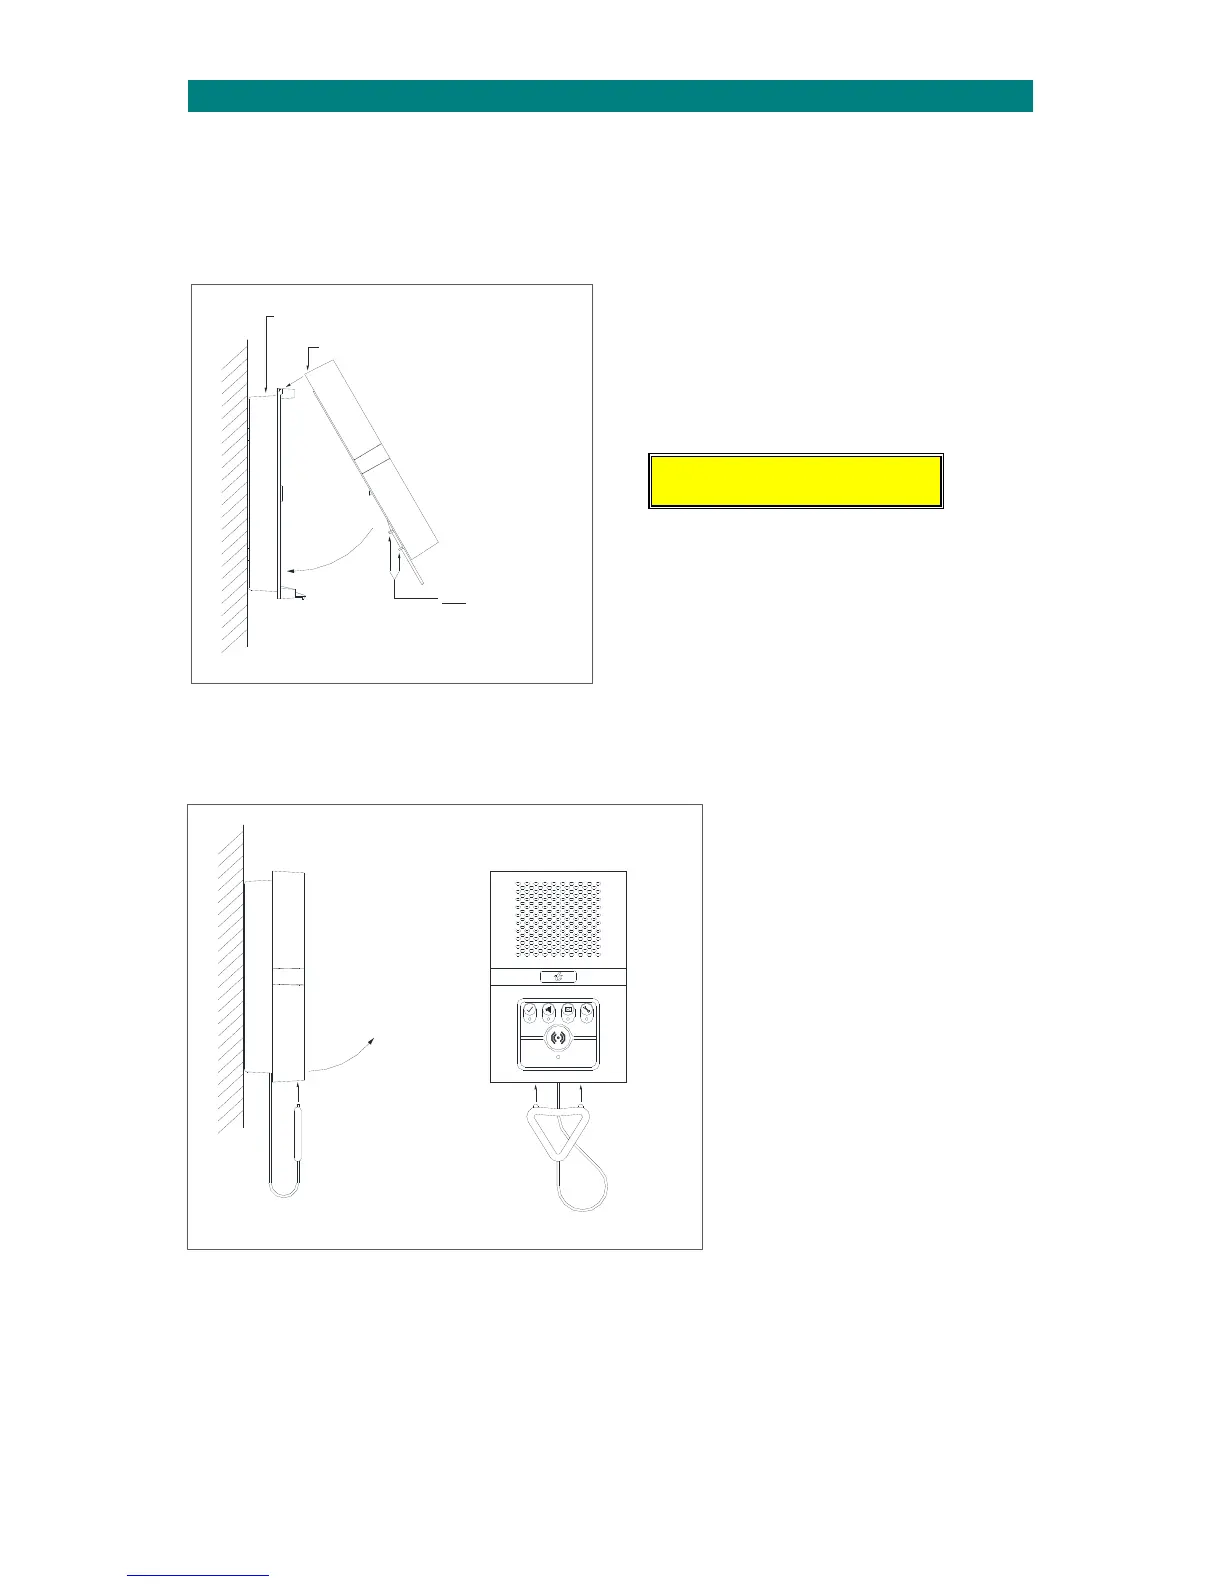
REMOVING THE INTERCOM FRONT
Usethepegsontheorangetriangletopushtheclipsoneatatimeonthelowerfacewhilstpullingthefrontoutwardsfrom
thebottomedge.
ALWAYSCHECKTHEPULLCORDOPERATES
AFTERTHEFRONTISFITTED