45
OK Button
The OK button saves all changes made to the printer driver settings and closes the printer driver settings
interface window and takes you back to the previous window.
Cancel Button
The Cancel button closes the printer driver settings interface window and takes you back to the previous
window without saving changes made to the settings.
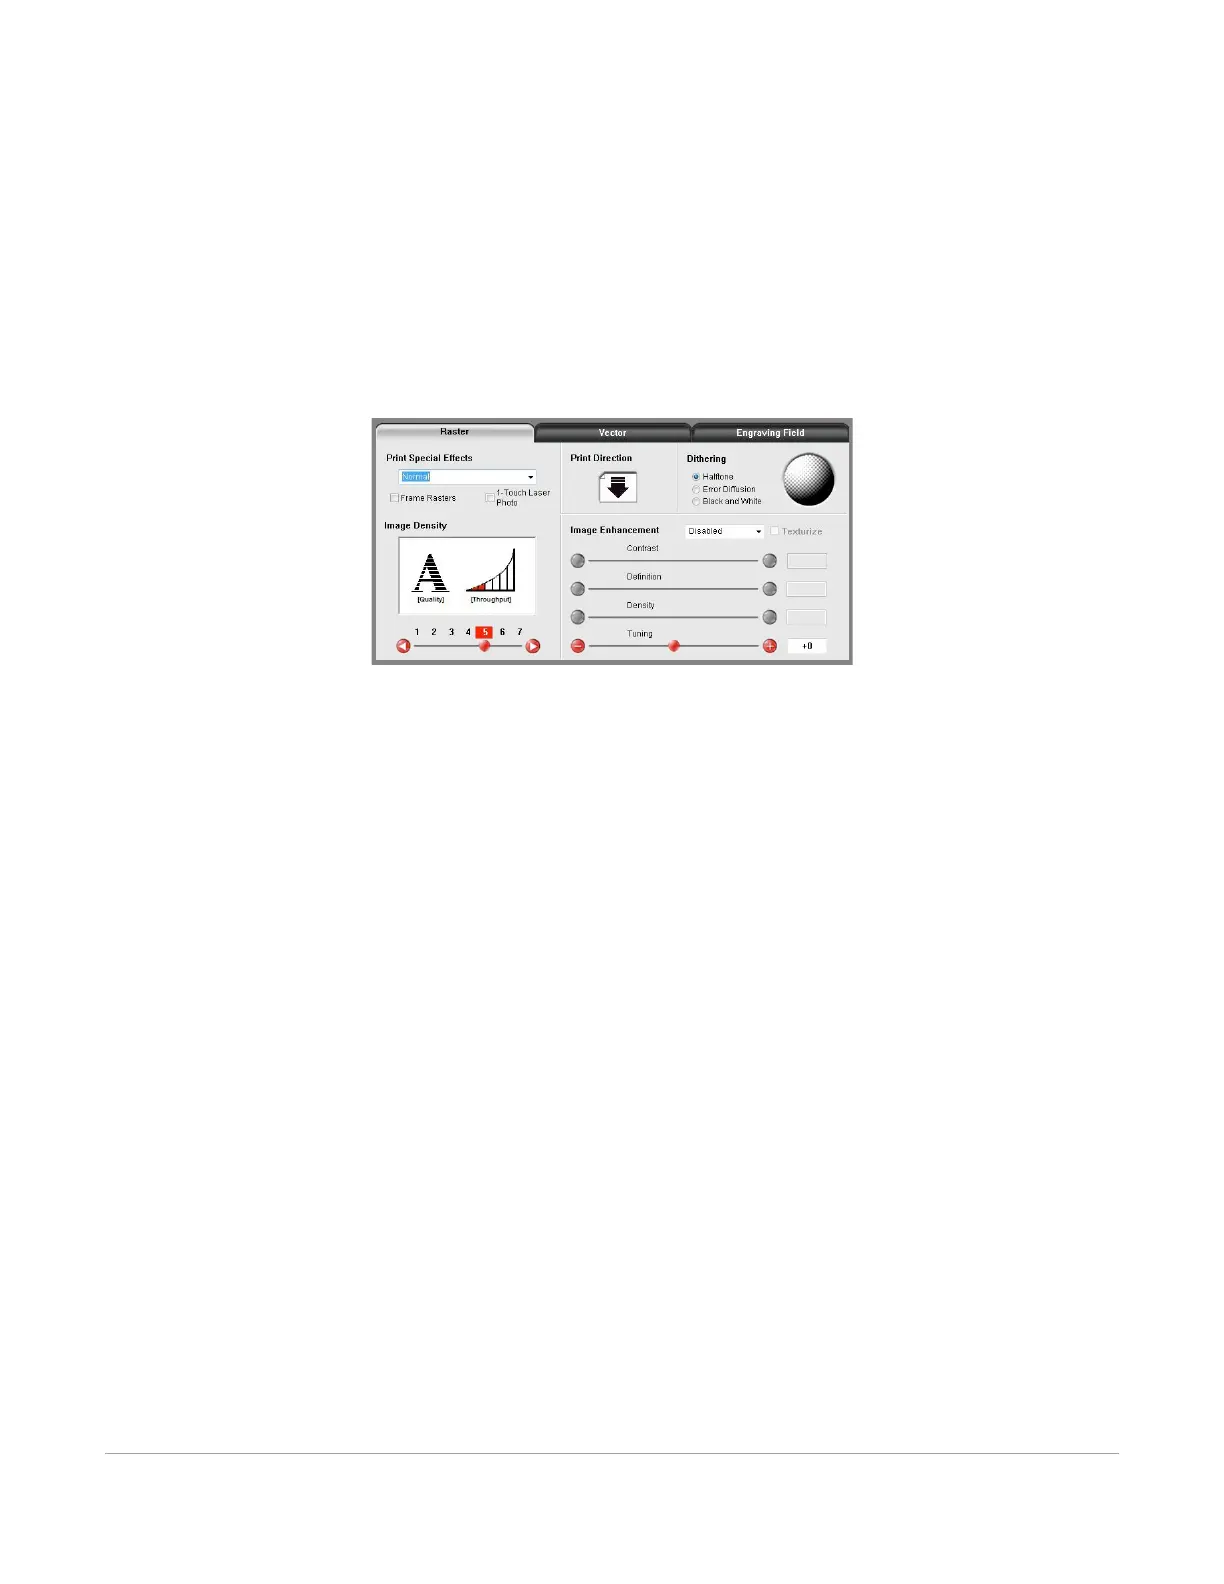
Raster Sub-Tab
The raster sub-tab on the manual control tab of the printer driver setting interface displays a group of
settings that affect how raster objects are processed by the laser system.
The controls in the sub-tab are described below:
Print Special Effects
The dropdown list allows you to choose from several special print modes, normal for most materials and
applications or one of the other modes for special applications. The modes work as follows:
Normal Mode
In this mode, all single color raster data is mapped to the closest color in the color table and
processed using the job settings attached to that color. All grayscale or multicolor bitmaps are
converted to grayscale and then a dither pattern is applied to them and the black color job settings
are used. This is the default recommended mode of operation.
3D Mode
This mode affects raster elements of your image. In this mode, all raster objects regardless of color
will be converted to 256 color grayscale and then during processing the laser power level is varied
on the fly in accordance with the grayscale levels in the image. Lighter parts of the image will receive
less laser power and darker parts more laser power resulting in a contoured depth and a three-
dimensional look. Special 3D software is required to produce the type of grayscale images that are
compatible with this mode. Please contact our Applications Department for the latest 3D software
recommendations. If you select 3D mode, you can adjust the grayscale to laser power level mapping
table using the 3D Setup button. See the description of the 3D Setup button for more details. Keep
in mind that it may require several passes to create enough relief in the engraving to get the desired
results. By default, all other colors are forced to raster mode and are not used since colored raster
data is converted to grayscale. The red pen is left in rast/vect mode and it is recommended that all
vector cut lines in the graphic being printed be colored red so that they will be interpreted as
vectors. Any black vector lines will be converted to raster objects.