65
General Software Guidelines
Use the following GENERAL guidelines when configuring Windows software applications to print to the ULS
Windows Printer Driver.
Page Setup
To properly position graphics in the laser system processing field, most graphics software will permit the
customization of the page size and orientation. As a rule of thumb try to set the page orientation in your
software of choice to Landscape and the page size to match the engraving area of your laser system. This
should result in the upper left corner of the page aligning with the upper left corner or zero-zero of the laser
system processing field.
If you are using the manual printer driver tab, the page size in your graphic software may also be reduced to
match the size of your material but remember to adjust the page size in the printer driver to correspond to
the graphics software’s page size. If the page size in the software and the page size in the ULS printer driver
match the alignment between the upper left corner of the page and upper left corner of the processing field
should be preserved.
Some graphics software will provide on-screen rulers. If this is the case, it is often possible to configure the
rulers so that they match those in the laser system. This can also help with positioning of graphics in the
processing field of the laser system.
Power Control Through Color Selection
As mentioned earlier your laser system uses colors to assign laser settings to different elements of the
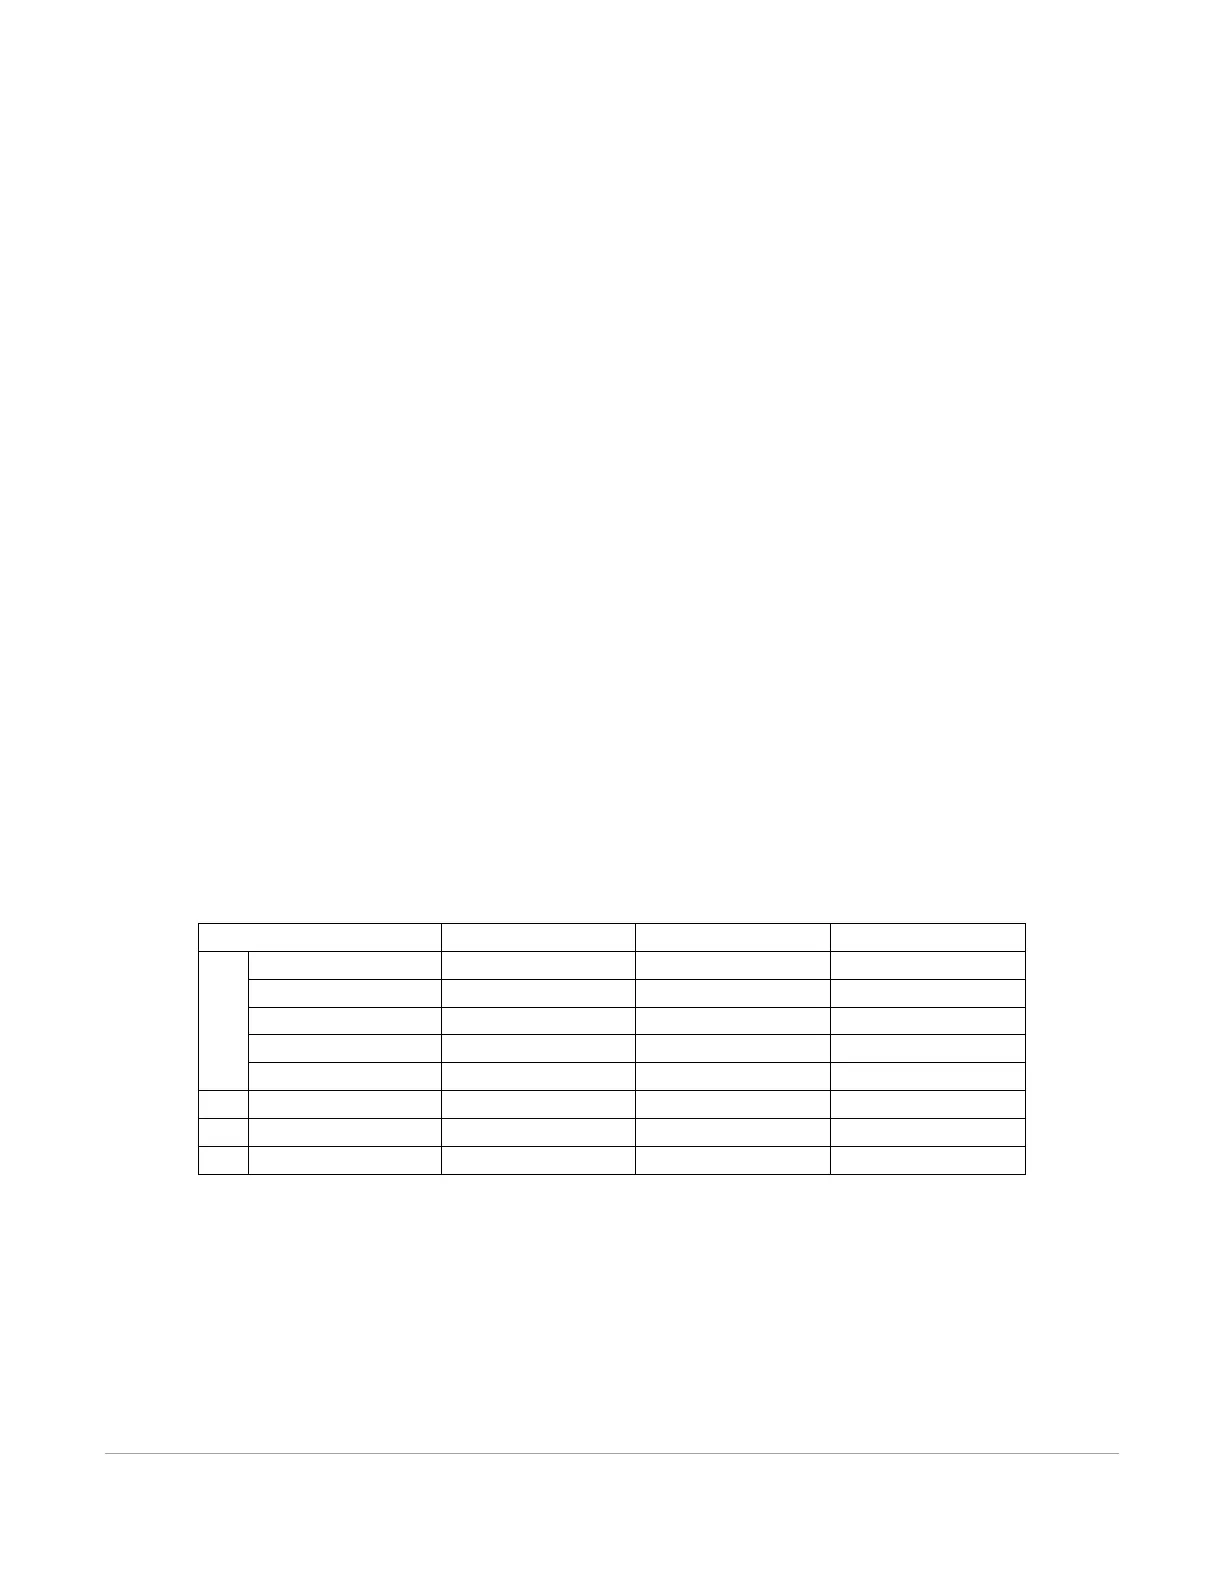
graphics you are printing. The materials database driver tab uses three colors: BLACK (raster objects), RED
(vector cut objects) and BLUE (vector mark objects). The manual driver tab uses a color table of eight colors:
BLACK, BLUE, RED, GREEN, CYAN, MAGENTA and ORANGE. These colors are defined in the RGB (Red-green-
blue) color system using the following RGB values. To ensure that the colors you are using in your graphics
will map appropriately to the printer driver colors, you should learn how your graphic software defines
colors and if possible use or set up an RGB pallet with the RGB values listed below.
LO
RS
Vector Output for Vector Cutting and Marking
The printer driver distinguishes between raster objects (raster engraving) and vector objects (vector cutting
and marking) by the types of elements contained in the graphic being printed. All graphics, other than
outlines of very thin line widths will be interpreted as raster objects and the raster mode will be used for
laser processing. Not all software is capable of printing vector output. If you want to create jobs for vector
cutting, make sure your graphic software of choice allows creation of vector lines and that the line width can
be 0.001” (0.0254 mm) or less. The printer driver will interpret these objects as vectors.