83
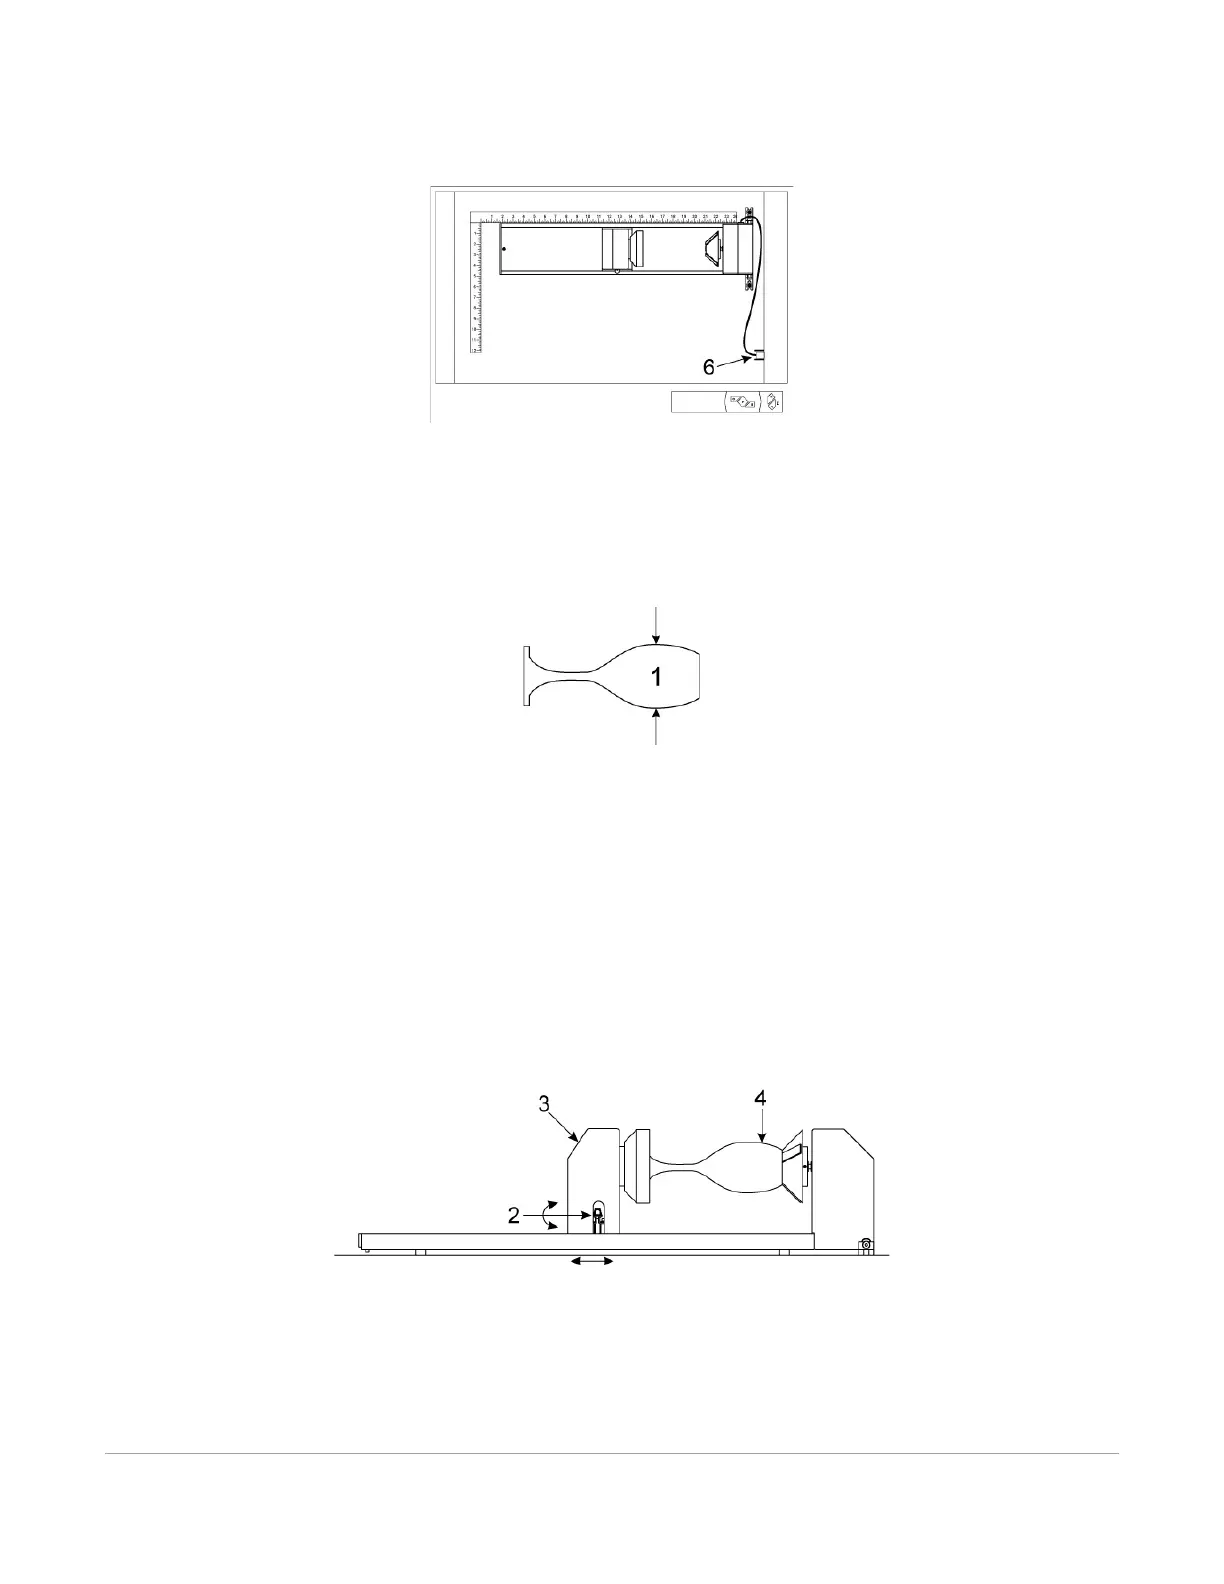
5. With the power to the system still OFF, connect the rotary fixture control cable to the receptacle on
the laser system (6).
Loading Material
Before loading material into the fixture, measure the diameter (1) of the material in the area where the
engraving or marking is to be located, by using a caliper or similar measuring device. A wine glass is used for
illustrative purposes here.
6. Place the open end of the material (4) on the fixed end of the rotary fixture. Lift the lever (2) on the
adjustable end of the fixture and slide it up against the base of the material so the material rests
firmly centered inside of the inverted cone. Push the adjustable end of the fixture (3) to the right
firmly against the bottom of the material. Lower the lever on the end of the fixture to lock the
material in place. The rubber pads should keep the material from slipping.
Note: If the material does not have an open end you can purchase an additional internal cone
fixture to hold the material. If the material has two open ends you can purchase an additional
external cone fixture to hold the material. To change out fixtures, loosen the setscrew that holds the
fixture to the rotary shaft, remove the un-needed fixture and replace with the new fixture.
Note: If engraving a tapered object (1), the Rotary Fixture can be tilted to maintain proper focus on
the tapered surface. To do this, lift the left end of the fixture and place a spacer (2) underneath.
Slide the spacer left and right until the tapered surface of the object is parallel (3) to the material
support table. Make sure all parts of the rotary fixture clear the motion system.