72
screws keep the Coaxial Gas Assist Attachment base aligned with the laser beam. If the Coaxial Gas Assist
Attachment becomes misaligned with the beam, portions of the laser beam will be clipped causing a loss of laser
power to the material. If this occurs, follow instructions below to realign the Coaxial Gas Assist Attachment.
CAUTION: Do not install the Coaxial Gas Assist Attachment unless you plan on using Gas Assist and never use the
Coaxial Gas Assist Attachment without proper airflow. Leaving the Coaxial Gas Assist Attachment attached to the
Coaxial Gas Assist Attachment base and running the laser system without airflow will cause smoke from laser
processing to be drawn up into the Coaxial Gas Assist Attachment and rapidly damage the focus lens. Also
remember to make sure the Lateral Gas Assist Attachment mounting screw is installed in the gas feed hole for
the Lateral Gas Assist Attachment when using the Coaxial Gas Assist Attachment so air does not escape out the
Lateral Gas Assist Attachment gas feed port.
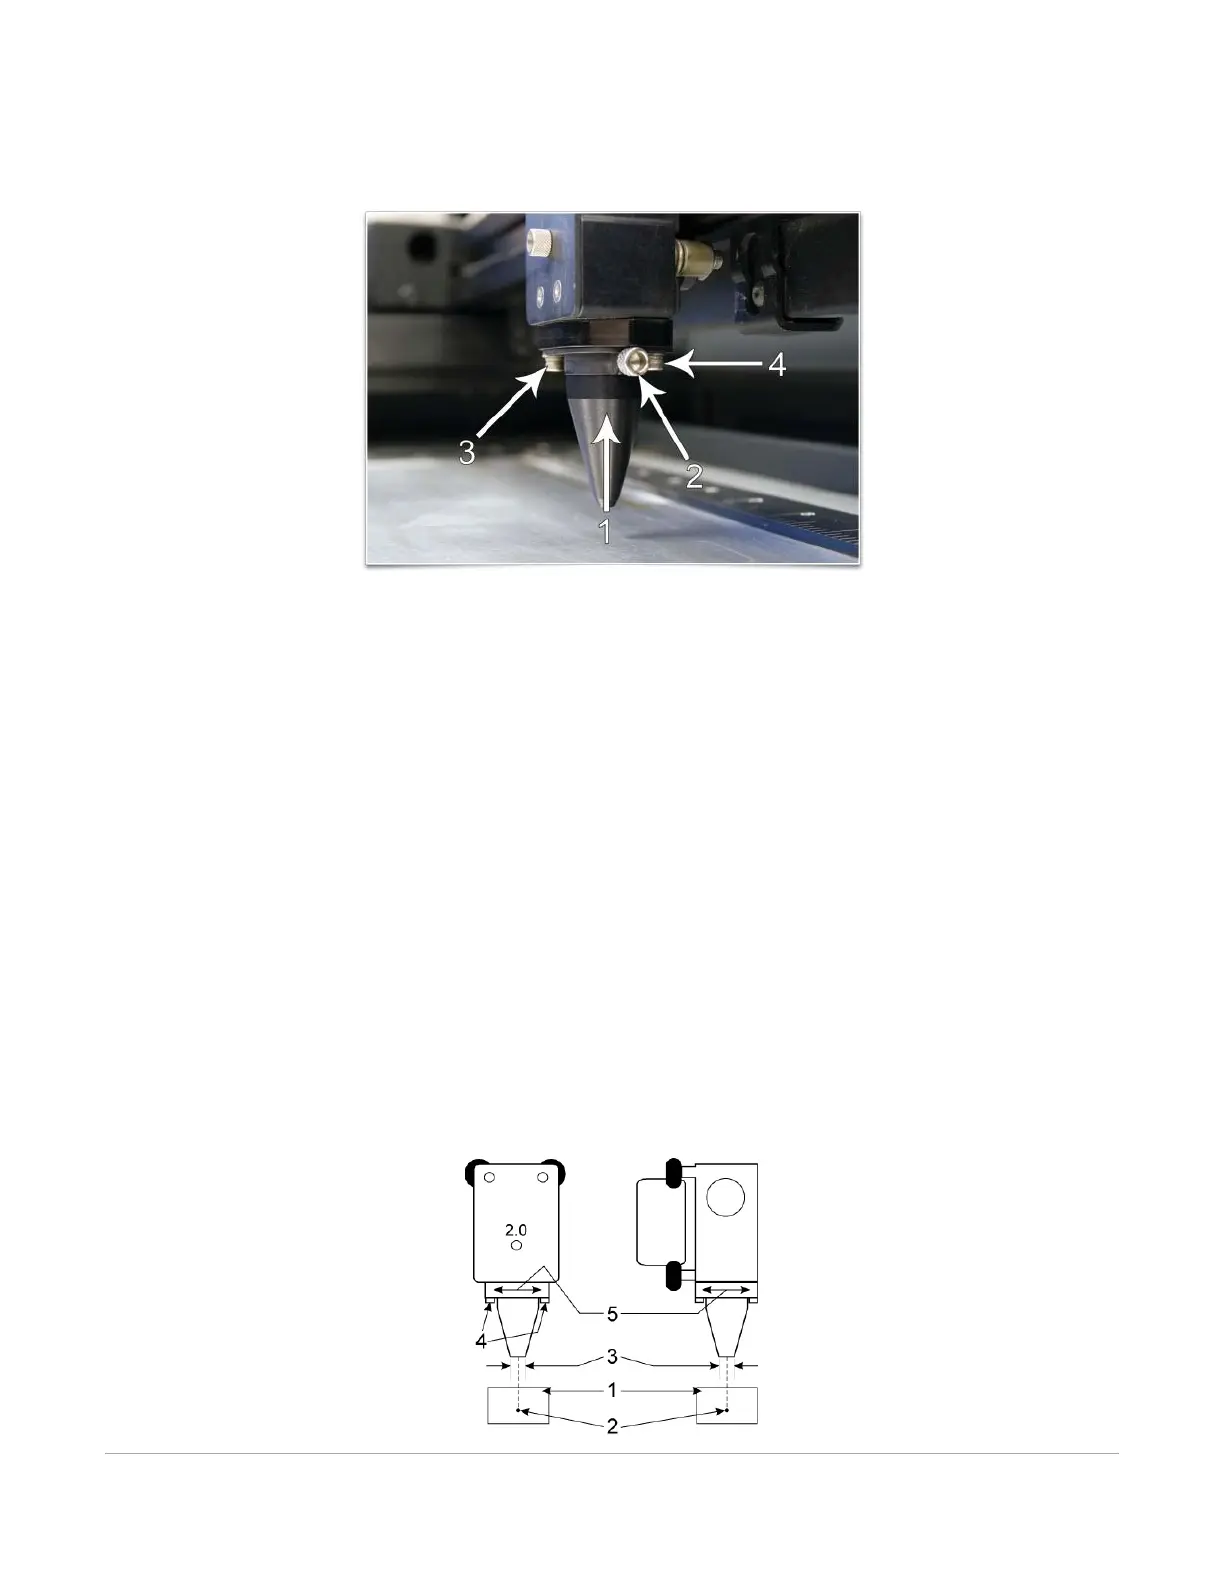
Coaxial Gas Assist Attachment Alignment Check and Adjust
1. Power the laser system ON and start the UCP.
2. Open the top door.
3. Position the focus carriage in the middle of the field.
4. Place a piece of paper (1) underneath the Coaxial Gas Assist Attachment and observe the position of
the red beam (2) in relation to the center of the bottom of the Coaxial Gas Assist Attachment (3).
5. If the red beam is not centered, first make sure the Coaxial Gas Assist Attachment is seated
correctly, then if necessary, slightly (1/4 turn) loosen the mounting screws for the Coaxial Gas Assist
Attachment base and adjust the base (5) until the red diode laser comes out of the center of the
Coaxial Gas Assist Attachment opening.
6. Tighten the base mounting screws (4) gently and re-check the Coaxial Gas Assist Attachment’s
alignment.