86
4. Finally rotate the material by hand until the position you want to be the center of your graphic is
facing directly up. Keep in mind that the rotary fixture does not have a home location in the
rotational axis, so the topmost part of the material (the part facing straight up) is always the center
of the graphic when printing using the materials driver tab or the center of the page when printing
using the manual driver tab.
Printer Driver Settings (Manual Driver Tab)
1. Start the graphic software you plan to print the job from and open or create the artwork you plan to
print to the laser system then open the print setup dialog in your graphic software, make sure your
ULS laser system printer driver is selected and open printer properties dialog.
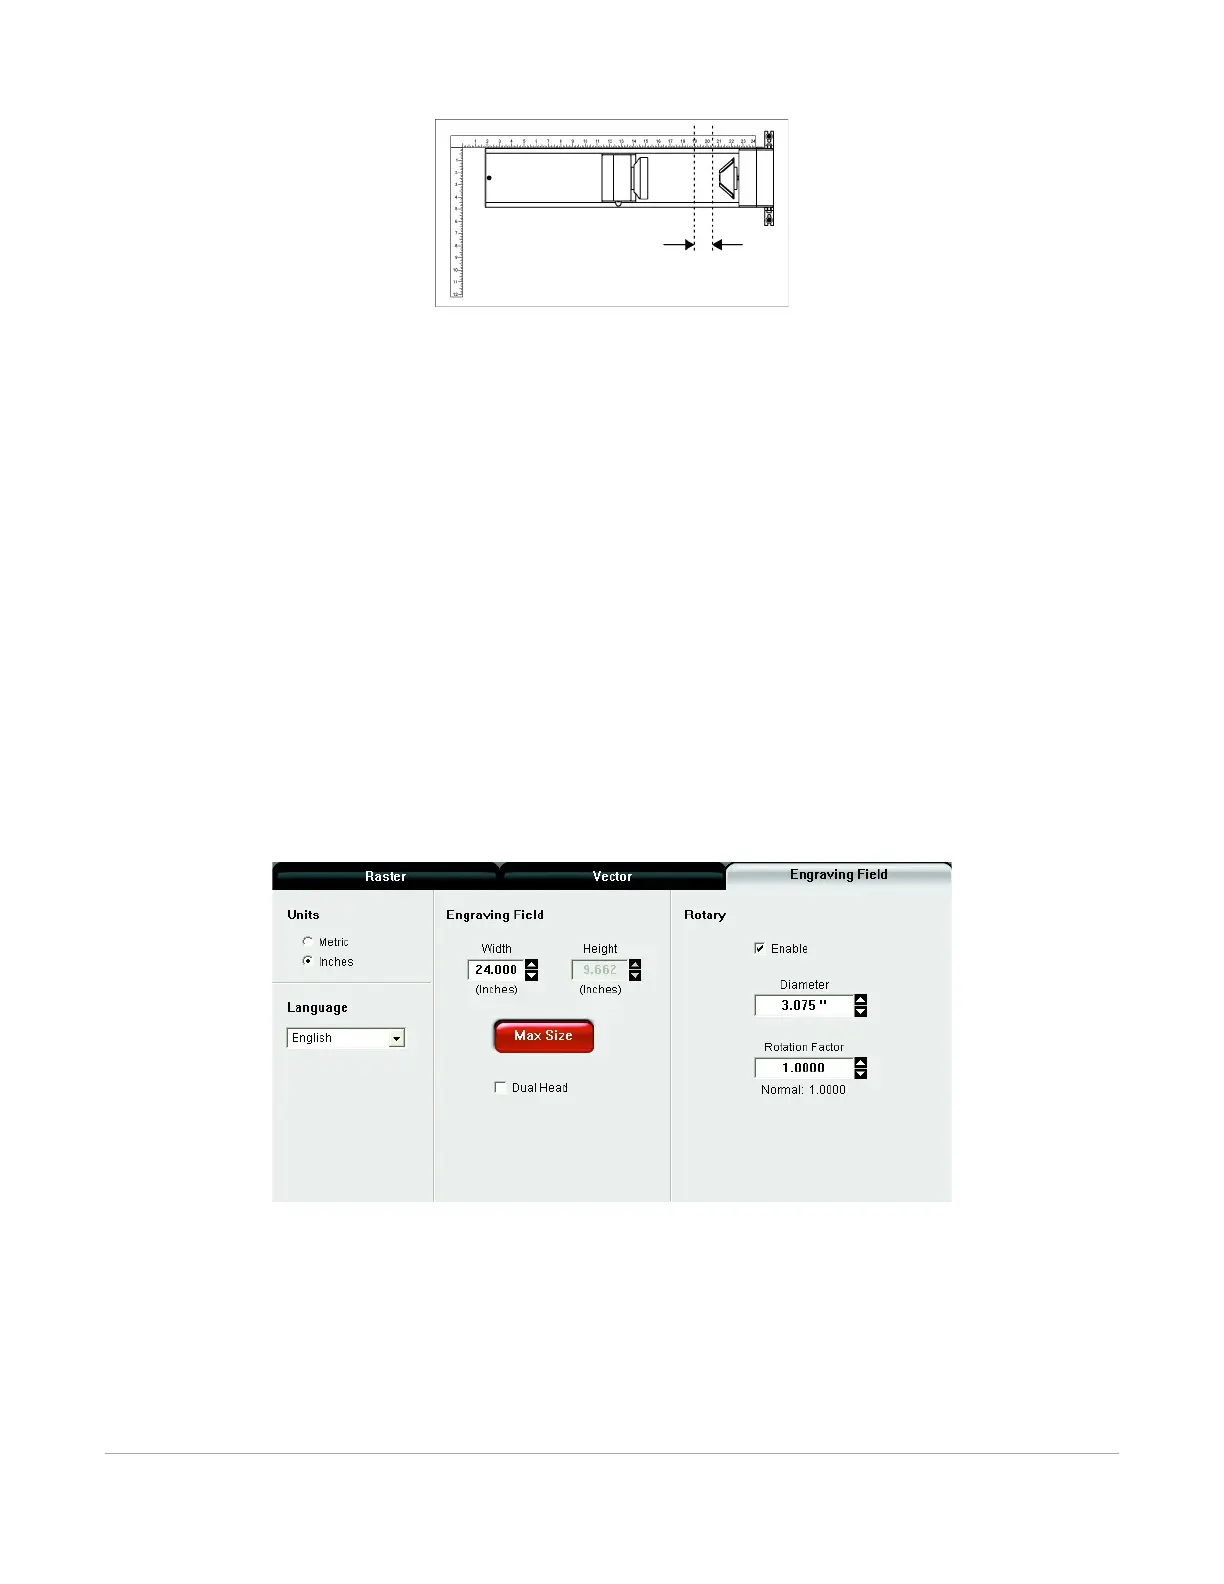
2. In the ULS printer driver properties dialog, press the Engraving Field sub-tab within the Manual
Control Tab.
3. Press the “Max Size” button to make sure the field is maximized before continuing.
4. Then select the “Enable” selection box in the Rotary section to enable rotary mode.
5. Type in the diameter of the material measured earlier.
6. Notice that while typing in the diameter, the height dimension of the engraving field changes
automatically. The new height value is equal to the circumference of the material. Make a note of
this new engraving field size.
7. Once you have the new engraving field size, exit the printer driver properties dialog.
8. In your graphics software change the page size to equal the new engraving field size from the printer
driver dialog.
9. This new vertical dimension of the page is now the circumference of the material to be engraved.