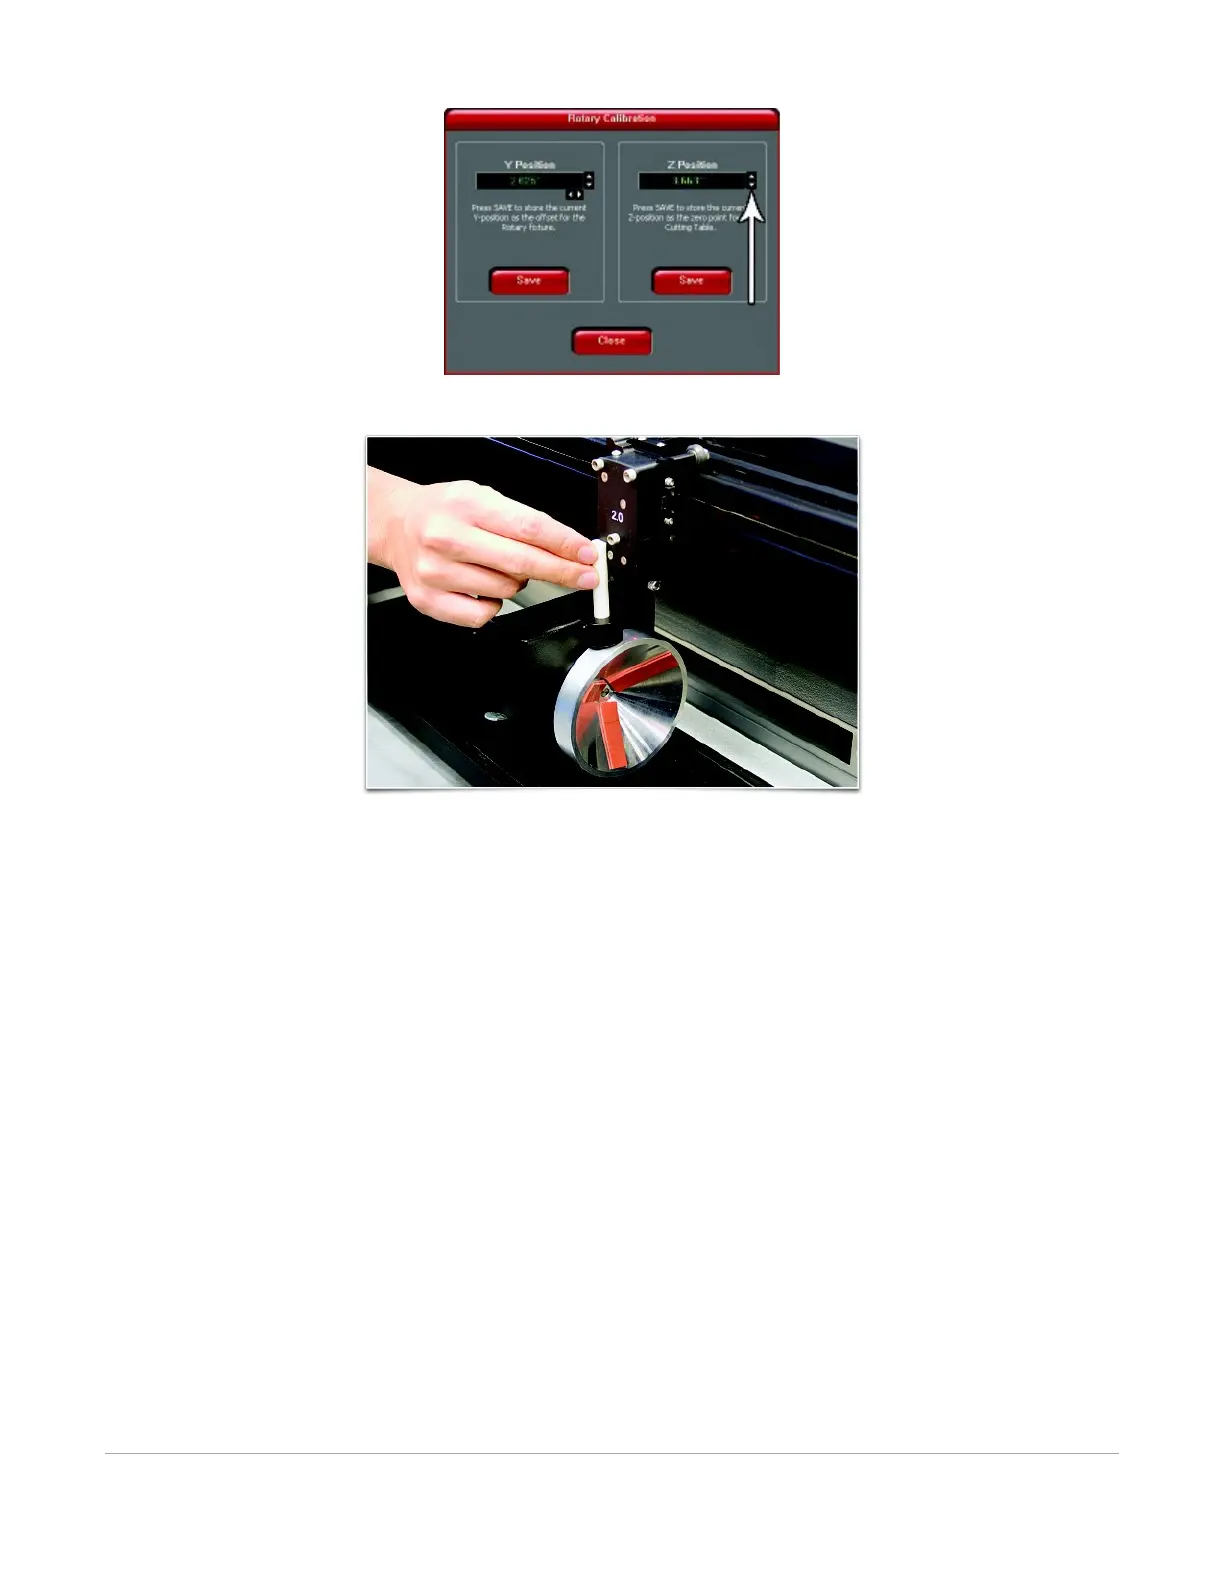
85
5. After focusing, press both SAVE buttons on the Rotary Calibration dialog. If asked to overwrite an
existing position, accept the new value by pressing YES.
6. Once complete, press the CLOSE button and the focus carriage will re-home.
7. Calibration is now complete.
Determining Graphic Placement
The next step is to align the graphics to be printed with the material inserted in the rotary fixture. Again, a
wine glass is used for illustration. You can use the X-axis ruler or, to be more precise, use the Red alignment
Laser and the X-Y coordinate display in the UCP to position the graphics in the X axis.
1. Using the Navigation buttons on the UPC, position the Focus Carriage above the material.
2. Move the carriage left or right until the center of the carriage or the red alignment laser is located
where you would like the top of the graphic to start on the material as indicated by the rightmost
line in the picture below. Make note of the X coordinate on the ruler or in the UCP.
3. Now, position the center of the carriage or the red alignment laser where you would like the graphic
to end on the material as indicated by the leftmost line in the picture below. Make note of the X
coordinate on the ruler or in the UCP.