Vertiv | SmartCabinet | User Manual 28
System Installation
• The two metal press strips on the top of the outdoor unit can be used as horizontal cable organizers at
the rear end of the cabinet.
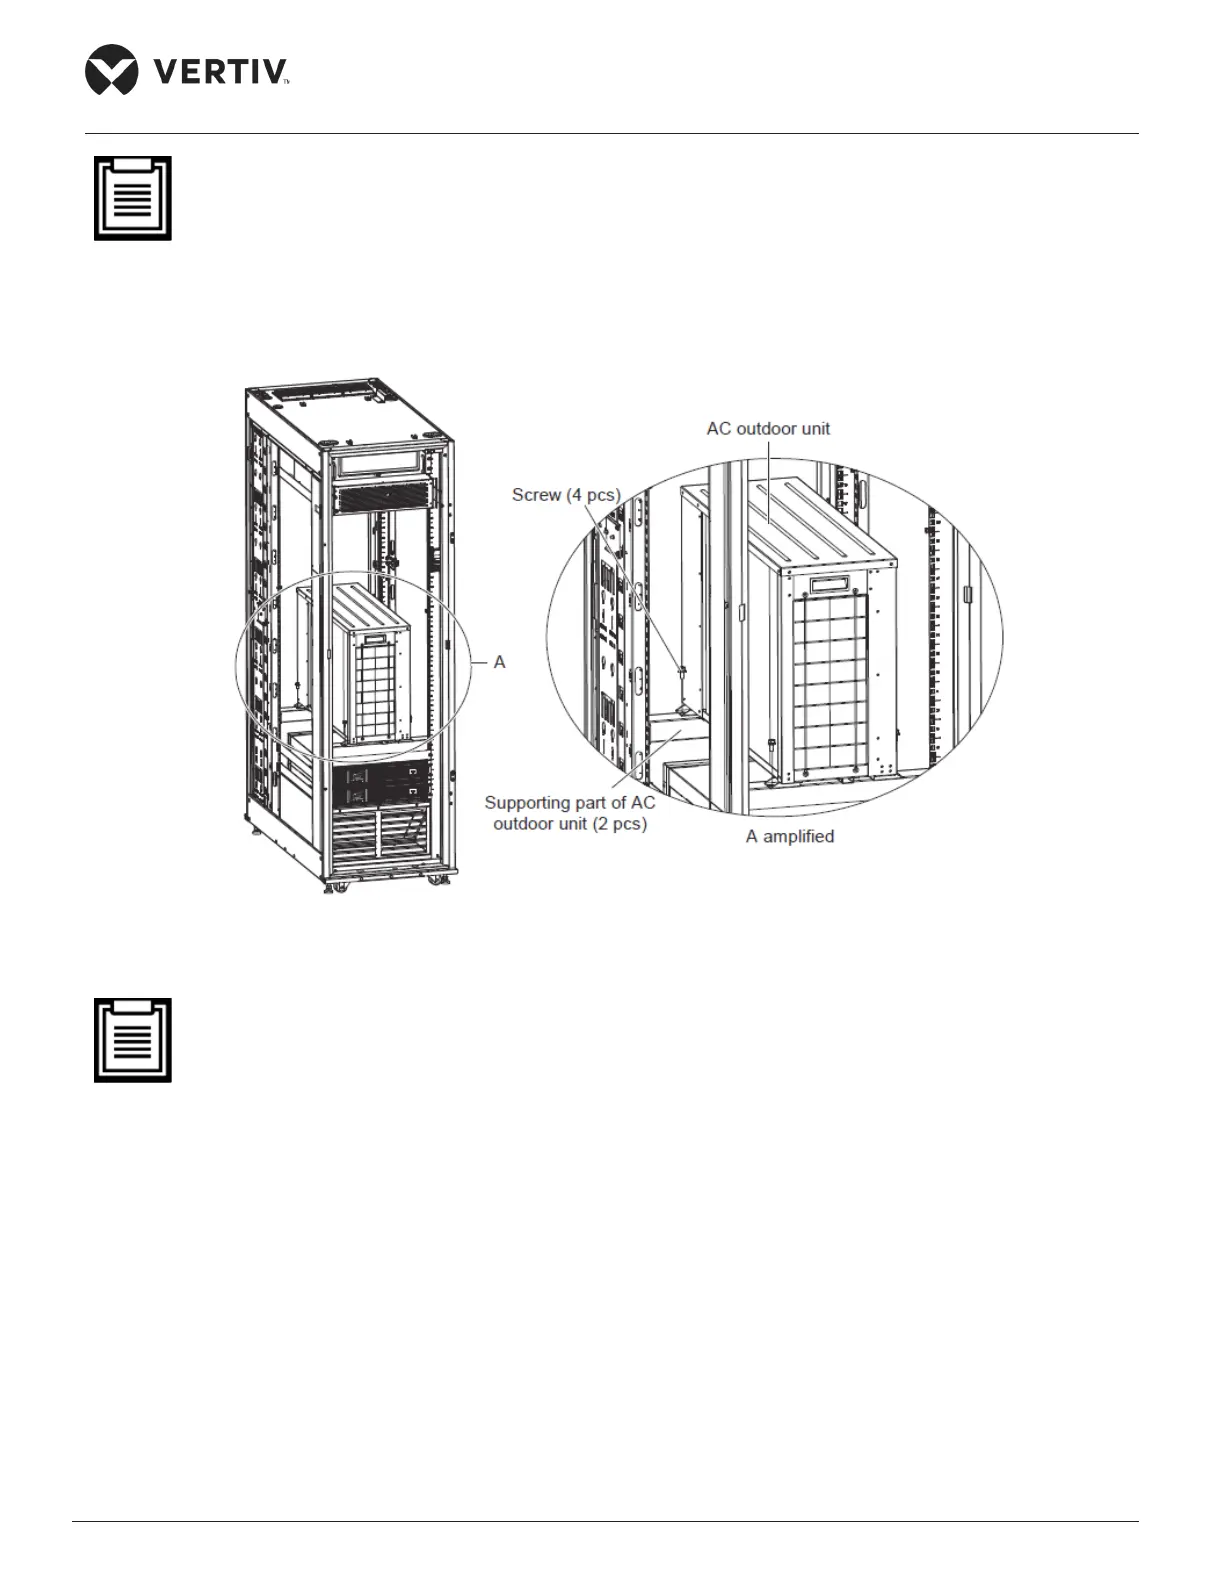
2. Remove 4 screws from the four corners of the outdoor unit following which the AC outdoor unit can be
taken out. Figure 2-19 depicts the location of the 4 screws on the four corners of the outdoor unit.
Figure 2-19 Removing the xing screws of outdoor unit
• Both top as well as the bottom piping methods are compatible with the SmartCabinet (for bottom pip-
ing, loosen the connectors that connect the pre-installed pipes in the cabinet and the indoor unit).
• The connectors of the unit are located on the AC indoor unit and outdoor unit as well as on top of the
cabinet. Utmost care must be taken while connecting the quick thread connector.
Installing the AC outdoor unit
The AC outdoor unit must be installed vertically. The outdoor unit can either be installed at a level higher or
lower than the indoor unit.
Figure 2-20 shows the scenario where the outdoor unit is installed higher than the indoor unit: