F
IG
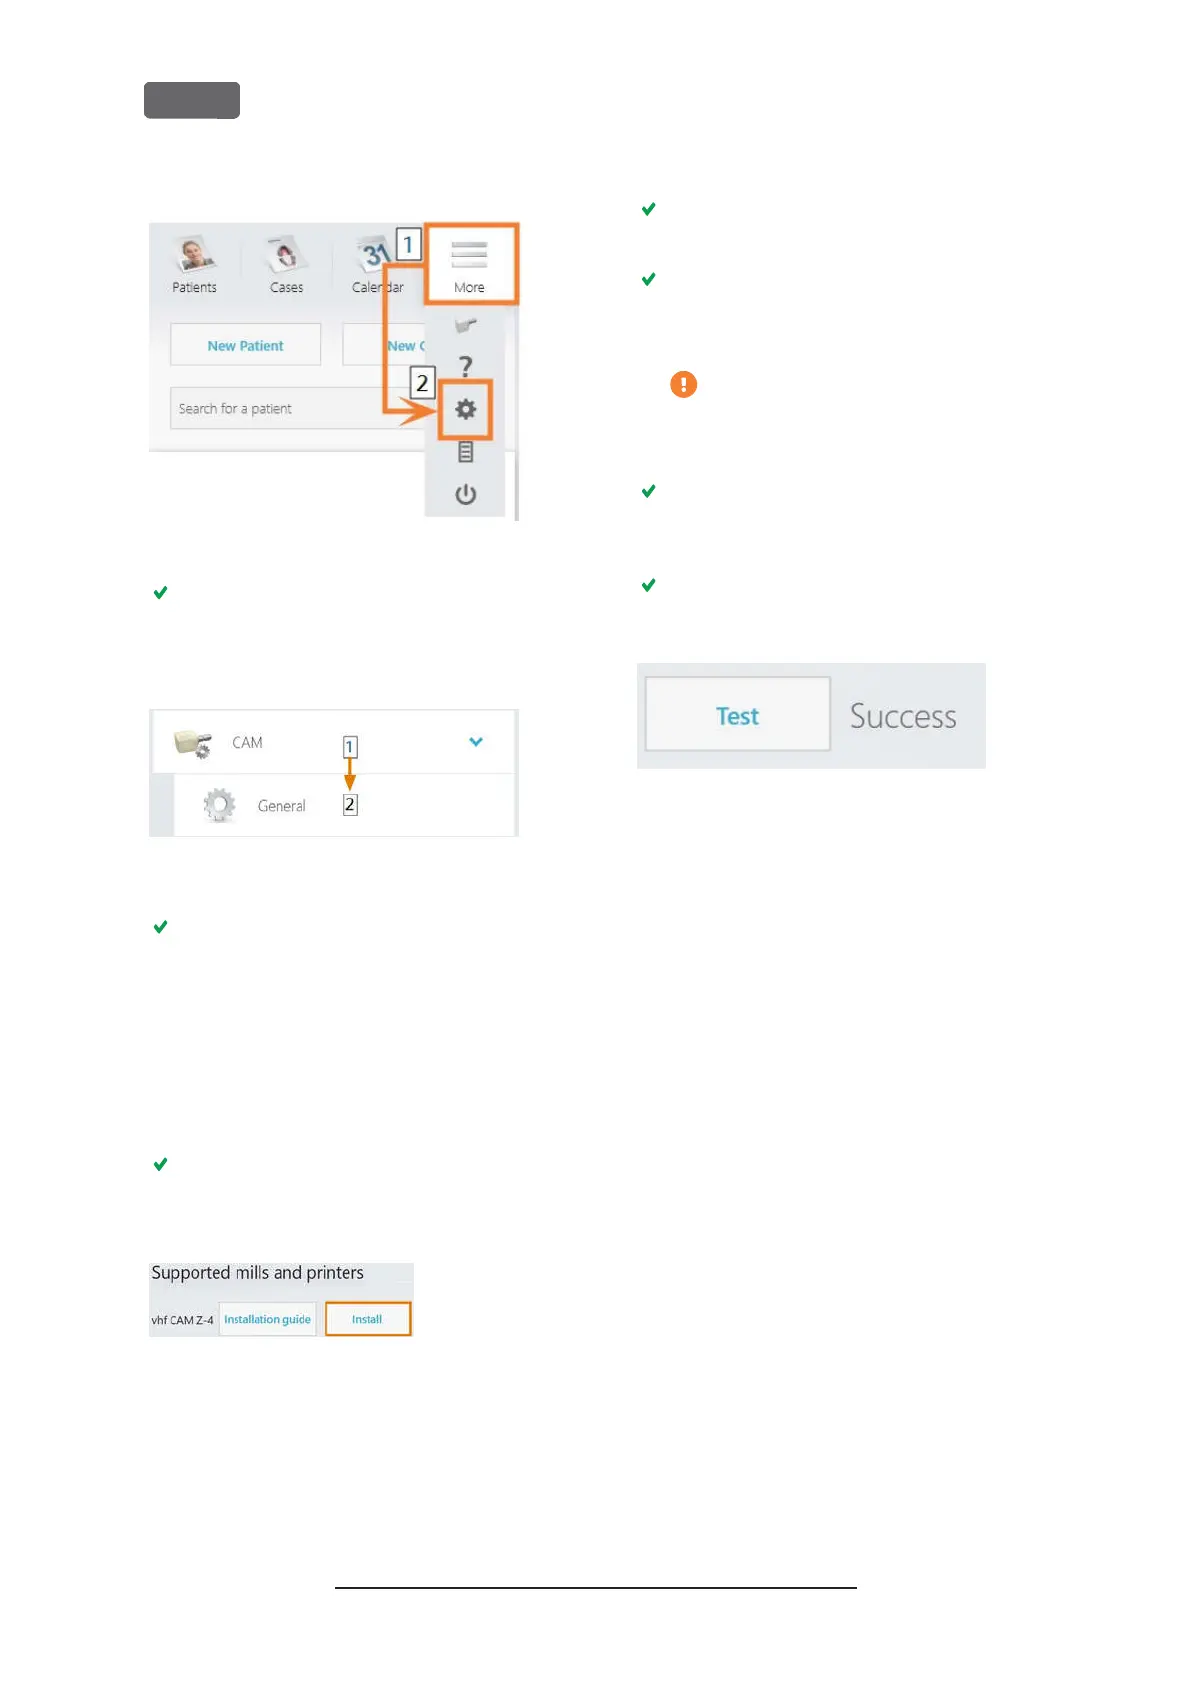
. 18 – O
PENING THE SETTINGS IN
TRIOS D
ESIGN
S
TUDIO
The settings menu displays.
10.
In the settings menu, open the
CAM
sub-menu.
11.
In the sub-menu, select
General
.
F
IG
. 19 – O
PENING THE
CAM
SETTINGS IN
TRIOS D
ESIGN
S
TUDIO
The general CAM settings display on the right
side.
12.
Locate the
Installed machines
section.
a.
Check if the Z4 is already listed in this sec-
tion.
b.
If the Z4 is already listed, select
[Remove]
.
Confirm your choice.
13.
Locate the
Supported mills and printers
section.
The Z4 must be listed in this section. If it isnt,
you may need to obtain a license from 3shape for
the Z4.
F
IG
. 20 – T
HE
S
UPPORTED MILLS AND PRINTERS SECTION IN
TRIOS
D
ESIGN
S
TUDIO
14.
In the line for the Z4, select
[Install]
. Confirm
your choice.
The
Connecting to your vhf Z4
window opens.
15.
Select
[Select CAM folder]
.
A file browser opens.
16.
In the file browser, select the network drive to
which you mapped the installation folder.
Do not select the
CNCTransfer
folder
within the installation folder.
17.
Select
[Select folder]
.
The file browser closes. The Z4 is now listed in
the
Installed machines
section.
18.
In the line for the Z4, select
[Test]
.
If the CAM folder is set correctly,
Success
displays
to the right of the
[Test]
button.
F
IG
. 21 – T
HE
Z4
HAS BEEN SUCCESSFULLY ADDED TO
TRIOS
D
ESIGN
S
TUDIO
19.
Save your changes in TRIOS Design Studio.
Restart the application.
Original Operating Instructions:Z4
Version: 12/5/2018
Z4 – Installing the machine
EN 26