F
IG
. 47 – R
EMOVING THE PROTECTIVE CAP
(
LEFT
)
AND USING THE
SCREW
2.
Remove the tool magazine from the working
chamber.
3.
To reset the screw, do the following:
a.
Using the provided allen key, turn the
screw to the left into its original position.
b.
Cover the screw opening with the pro-
tective cap.
The screw is reset and the tool magazine is
ready to be mounted again.
F
IG
. 48 – R
ESETTING THE SCREW
(
LEFT
)
AND PLACING THE
PROTECTIVE CAP
You can use the touchscreen to choose the right tool
magazine for the next job:
1.
To open the
Jobs
section, select the
depicted icon.
The
Jobs
section displays. The details of the next
queued job display.
2.
If necessary, switch to the desired job by using
the left and right arrow in the left bottom corner
of the touchscreen.
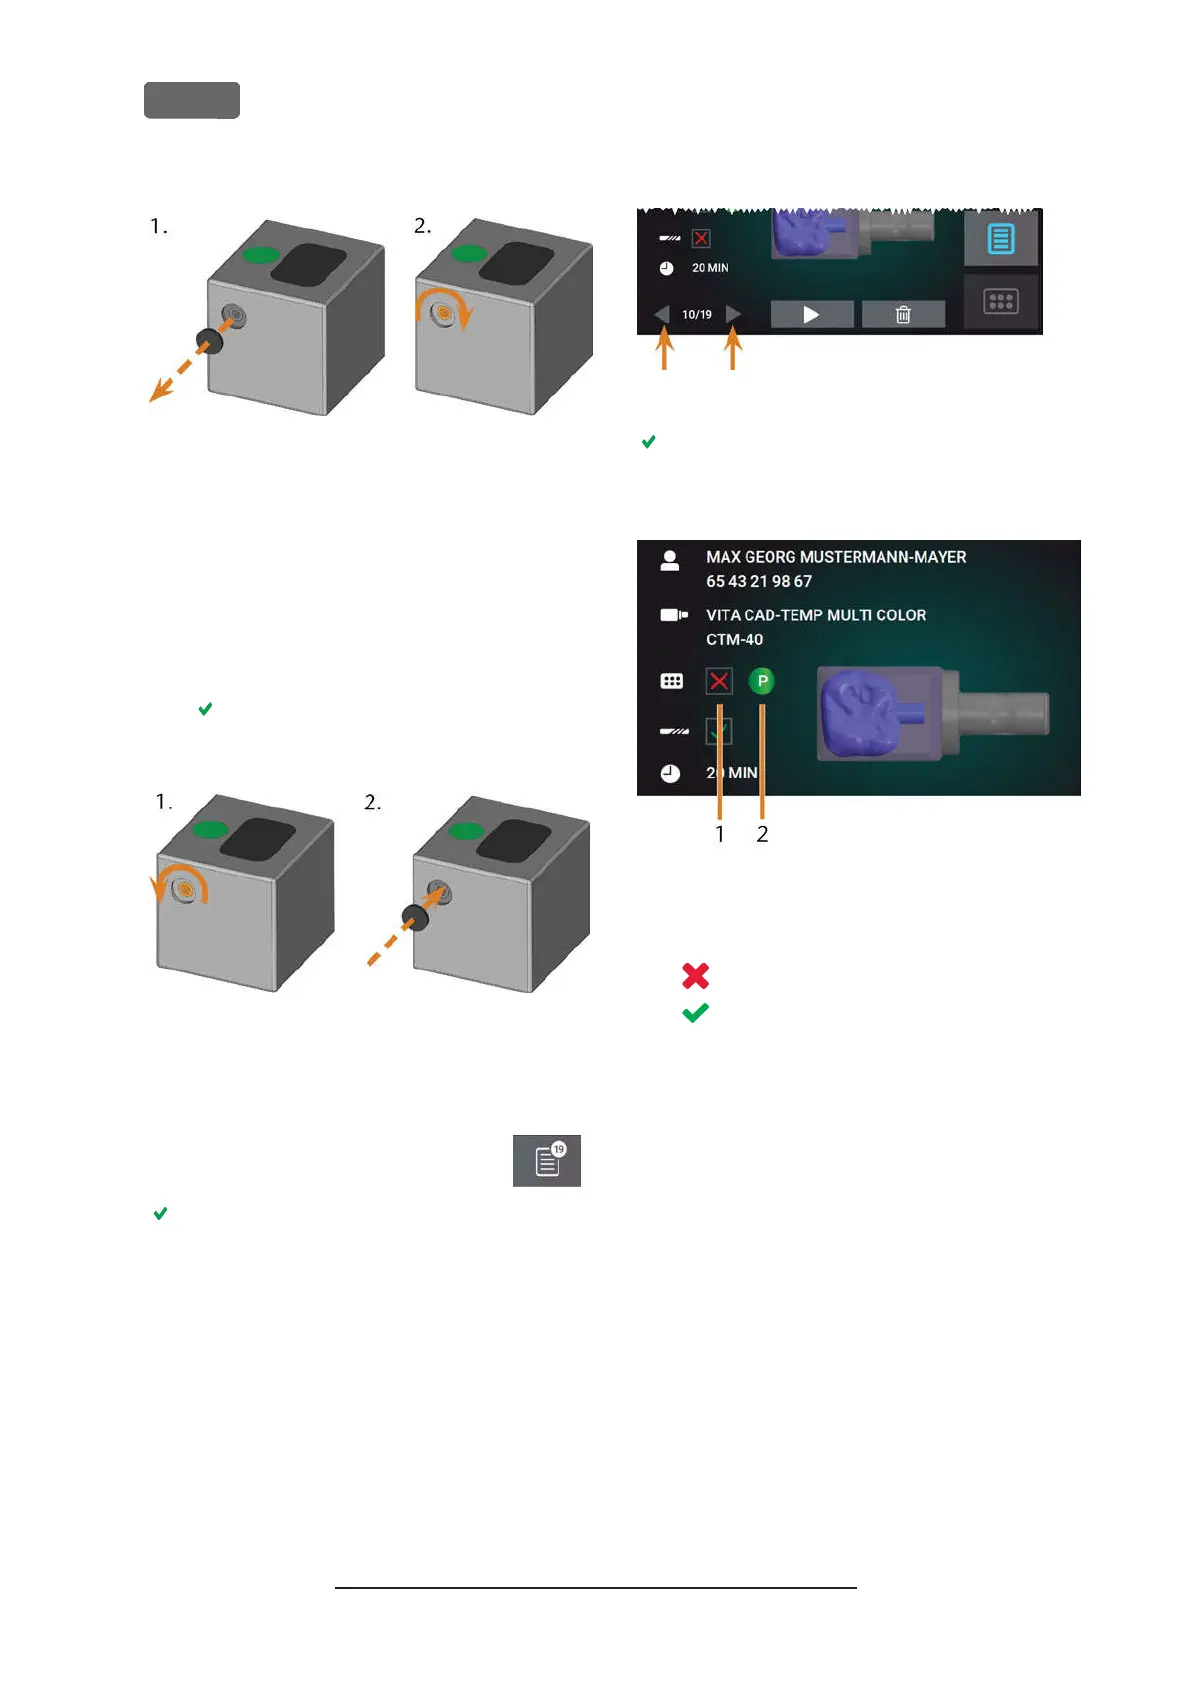
F
IG
. 49 – T
HE ARROWS TO SWITCH BETWEEN JOBS
The touchscreen displays the required tool
magazine and if it is mounted into the working
chamber.
F
IG
. 50 – T
HE TOOL MAGAZINE DETAIL S IN THE
J
OBS SECTION
1.
Check box to indicate if the required tool
magazine is mounted:
means
not mounted
means
mounted
2.
The color code and letter of the required tool
magazine (
Ž
Color codes of the tool magazines
–
on page41
)
3.
If an incorrect tool magazine is mounted, remove
this magazine by pulling it off the tool magazine
holder (
Ž
Fig. 46 –
on the previous page
, blue
arrow).
4.
To mount the required tool magazine, identify it
by comparing the color code:
Original Operating Instructions:Z4
Version: 12/5/2018
Z4 – Operation: Preparing jobs
EN 44