Visionix EyeRefract User Guide
17
Equipment and Installation
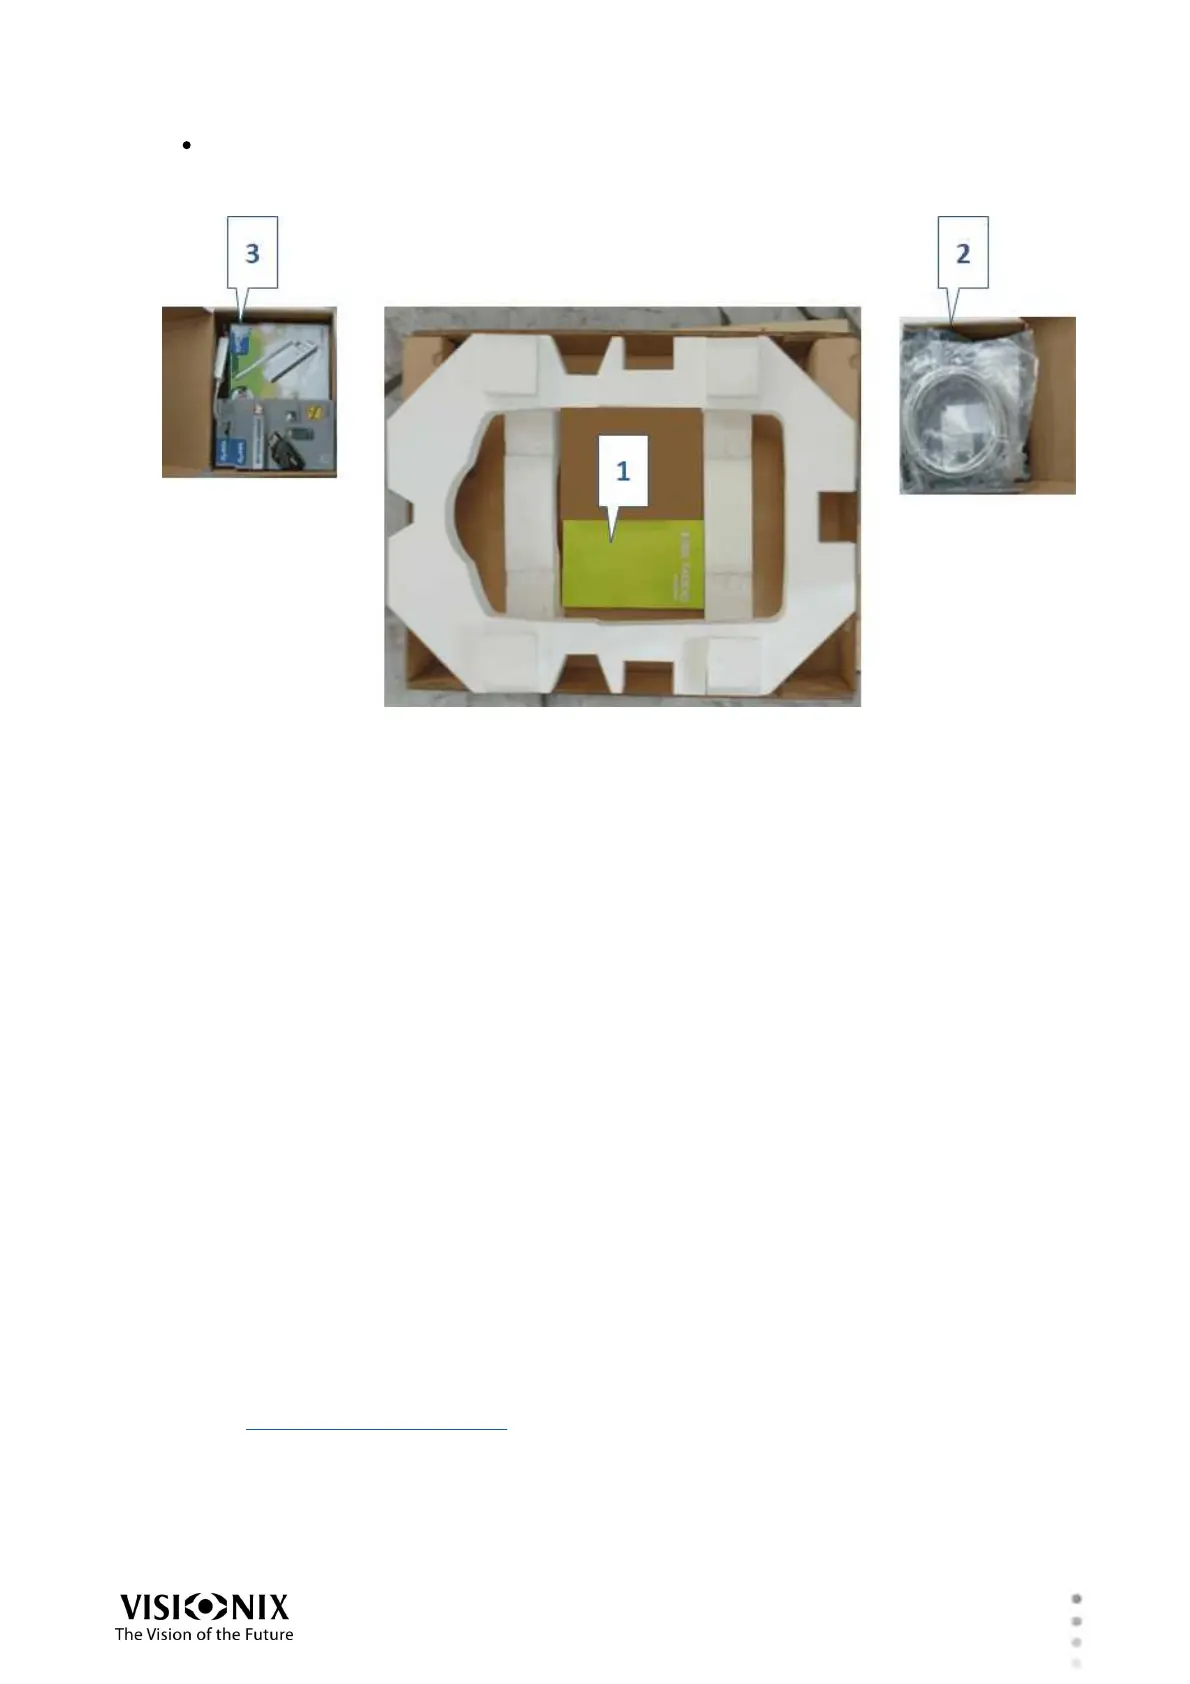
The tablet #1 below), (#2 and #3) are in four cartons at the bottom of (#1), beneath the
polystyrene foam padding that was under the EyeRefract unit. Remove the foam padding
to access these items.
Cartons of accessories under polystyrene foam padding
Setting Up the System
Once the components of the system have been unpacked, they should be placed in their
intended locations and connected to electrical power sources and to the system's dedicated
local network, as explained in this section.
Electrical Connections
The EyeRefract unit, and the router should be plugged into standard wall outlets. The tablet
should be charged as explained below.
Note: To ensure good connectivity between the tablet and the other components of the
system, avoid using the tablet when its batteries are less than 35% charged.
To connect the EyeRefract, and the router units to electric outlets:
1. Check that the power supply voltage corresponds to that required by the device (see the
identification label on the back of the unit).
2. Connect one end of the power cable that came with the unit to the power connector on
that unit.
Note: The power connector of the EyeRefract is located on the bottom of the unit (#6 in
the illustration of the rear panel).
3. Connect the other end of the power cable to a standard wall outlet.