36
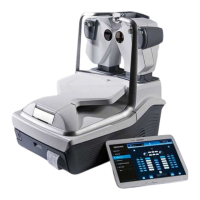
Visionix EyeRefract User Guide
36
Overview of the Software
Large camera pane
Shows the camera view of the patient's eye
Cross hairs superimposed on the image show the center of the camera view.
Tap any spot in the image to move the unit's head such that that spot is aligned
with the cross hairs in the center of the image.
Left eye
The patient's left eye, as seen through the camera view
Tap the eye to move the unit's left head such that the eye is centered.
Small camera pane
Shows the Shack-Hartmann image of the patient's eye (when measurement
started)
Tap the pane to switch the display such that the Shack-Hartmann image is
enlarged and displayed in the large camera pane (#7), and the camera view is
reduced and displayed in this small camera pane. Tap this area again to switch
the images back to their default locations.
Down arrow
Lowers the head on this side so that it aligns better with the patient's eyes
Tap the arrow to move the head down one step, or press and hold to move the
head continuously until you release the button.
Start button
Begins the diagnostic test
Cancel
Cancels the measurement procedure and opens the Refraction screen
Right Eye
The patient's right eye, as seen through the camera view
Tap the eye to move the unit's right head such that the eye is centered.
Keratometery measurement
ON-K measurement will be tested for this measurement
Off-K measurement will not be tested for this measurement
During a Diagnostic
After you select to begin the measurement procedure, the Measure screen shows
information about the procedure's progress. When both eyes are being measured, the
diagnostic is performed simultaneously for both, although the processing of one eye may take
longer than that of the other eye. A progress bar below the image of each eye shows the
current stage of that eye.
During the first stage of the diagnostic, the system attempts to center the patient's eyes in the
camera views. When it detects one of the patient's eyes in the camera view, it superimposes a
circle on it, and then adjusts the height of the head so that the center of the eye is as close as
possible to the center of the camera view. When the middle of the patient's eye is aligned well
enough with the center of the camera view for the diagnostic to be performed, the circle
identifying the eye is green; when the eye is not centered well enough, the circle is red.
Throughout the measurement process, if the system is having trouble locating the centers of
the patient's eyes, you can help it in the Measure screen, by adjusting the unit's heads and
chin rest, and by tapping the patient's eyes in the camera views.
When the diagnostic is underway, you can skip stages of the test, or stop the test entirely, from
the Measure screen. You cannot, however, activate or deactivate one of the eyes during a
diagnostic.